How to (and Why You Should) Add Google Tag Manager to Your Magento 2 Website

Out of the box, Magento 2 provides you with analytics reports and dashboards that allow you to keep track of your sales and customers. But there are also third-party tools available that can help you better understand your store‘s performance and discover new ways to improve your bottom line.
One of those tools is Google Tag Manager.
With Google Tag Manager, you can gain more control over how you track website activity and ensure that your tracking data is accurate.
Keep on reading to learn exactly what Google Tag Manager is, why you should use it and how to add Google Tag Manager to your Magento 2 website.
What is Google Tag Manager?

Google Tag Manager (GTM) is a completely free solution for managing all your website’s tracking tags. If you don’t know what a tracking tag is, it’s a snippet of code that collects data on your website and sends it to third parties. Tags are an efficient and accurate way to measure website activity.
Most websites utilize a large number of tags that track and collect various types of data. Managing all these tags and the data they collect is complex, and can often be very time-consuming.
This is where Google Tag Manager can help.
GTM simplifies the process of implementing and managing various types of tags and code snippets on your Magento 2 website. Instead of having to insert a large number of different code snippets in order to implement multiple tags, you can just insert the Google Tag Manager snippet and then manage all your tags from GTM’s interface. You can use it to implement the Facebook Pixel tracking code, Google Ads conversion tracking and Google Analytics tracking, as well as a variety of other types of tags.
Apart from helping you implement tags without dabbling in code, Google Tag Manager also provides you with a way to organize all your tags in a single place. It allows you to change tags and the way they function right from the GTM interface — no need to change the tag’s code on your website.
Note: Google Tag Manager isn’t a replacement for Google Analytics. These two solutions are meant to work together to provide you with better data that you can use to make informed decisions about your marketing strategy.
Why Google Tag Manager is Helpful for Your Store
So, at this point you know that Google Tag Manager gives you the ability to add and change tags without touching the source code. But how, exactly, does that benefit your business?
For established ecommerce companies that have teams of marketers and developers, this allows marketers to start tracking the performance of campaigns themselves rather than relying on developers to set up the tags. In turn, this frees up time for developers to address all their other tasks and responsibilities, making your business more efficient overall.
And for smaller stores that are being run by a single non-developer merchant, hard coding tags isn’t even an option. The intuitive interface provided by Google Tag Manager allows such merchants to take advantage of the benefits of tracking tags. It enables them to gain much more insight into the performance of their store and use that understanding to make more informed business decisions.
How Does Google Tag Manager Work?

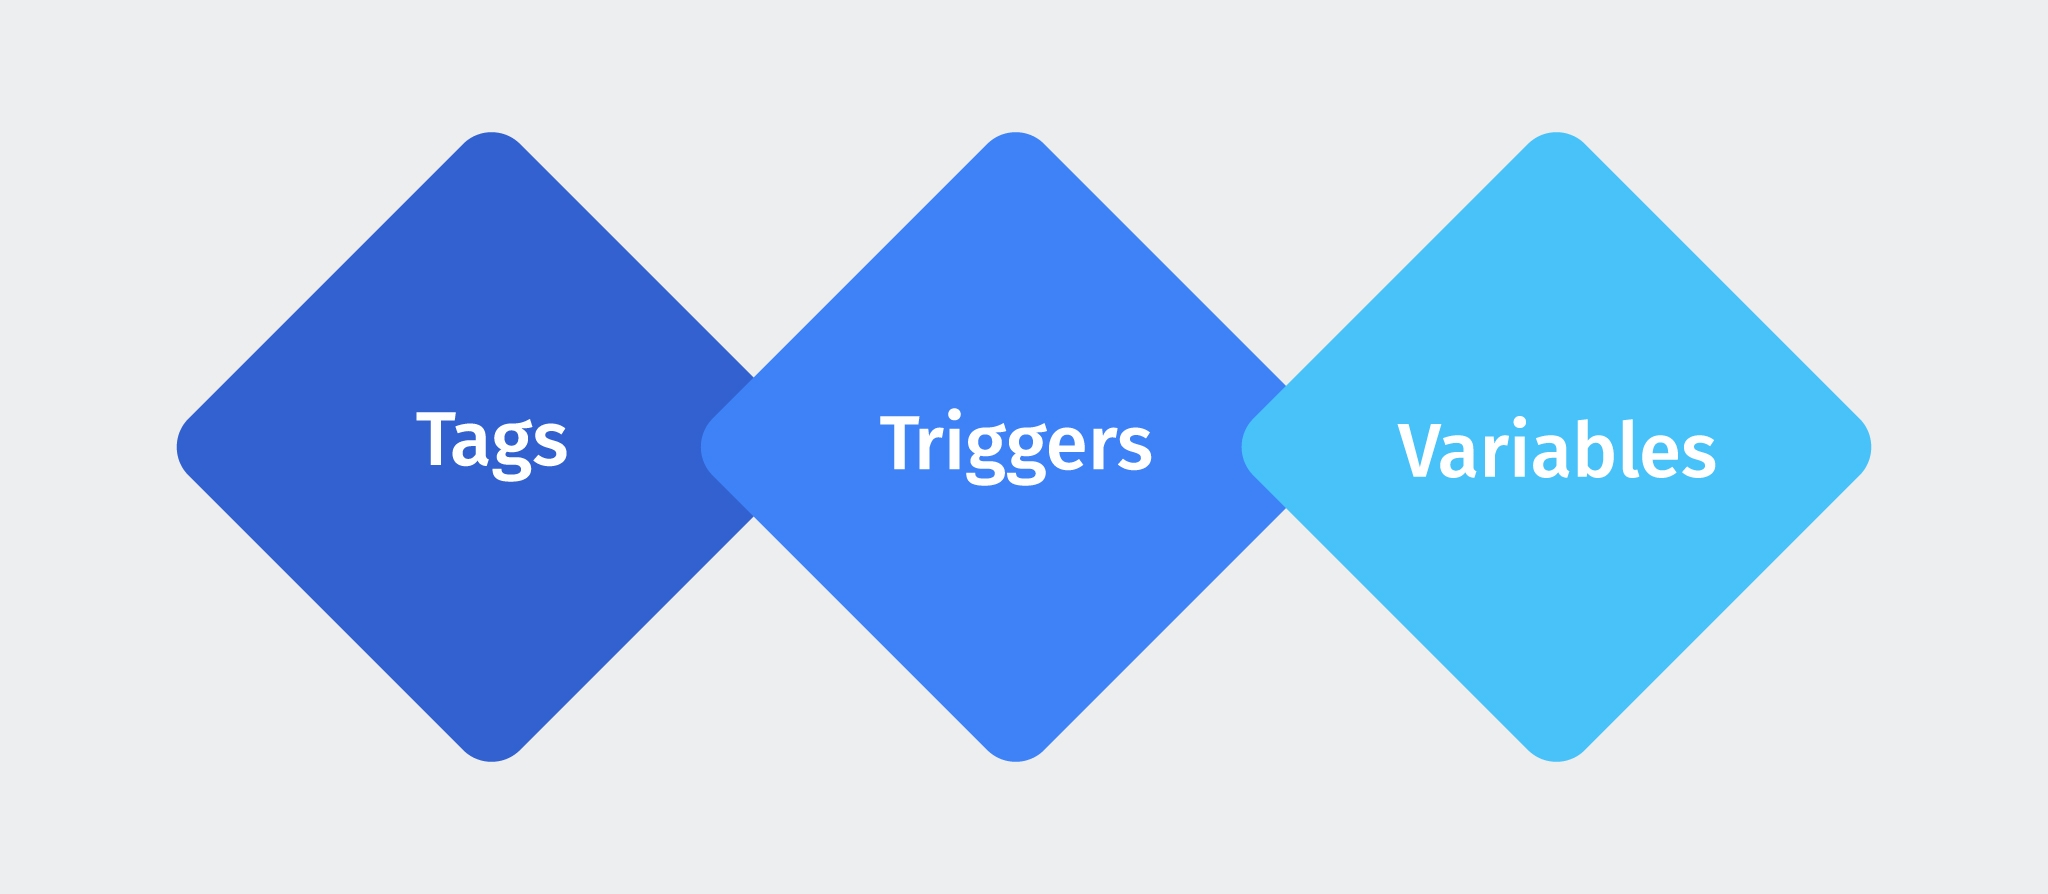
Google Tag Manager needs the following to work properly:
1. Tags
As mentioned above, these are snippets of code you need to implement on your website to track website activity. Examples include the Facebook Pixel and Google Universal Analytics tracking code.
2. Triggers
Triggers are events that need to take place for Google Tag Manager to fire a certain tag. Each trigger consists of variables, operators and values. Examples of triggers include pageviews and link clicks.
3. Variables
Variables are placeholders for values that can change, such as product names or prices. They store values that are used by tags and triggers, and include any additional information GTM might need to properly track data.
Variables can hold a single piece of data or a set of data points. They can also be reused between different tags. Examples of variables include page URL and referrer.
While GTM comes with built-in variables, you can also create your own.
4. Containers
A container holds all the tracking tags and triggers for your website. Each domain in your Google Tag Manager account has its own assigned container.
You’ll need to create a container the first time you use GTM. Once created, you’ll have to add the container code to your website so you can start using Google Tag Manager.
5. Data Layers
Data layers are JavaScript objects that separate the information tags’ need to function from the rest of your website’s code. They help to speed up the firing of tags by holding all the information a tag needs in a single location.
Apart from helping website performance, data layers also ensure your tags will keep working even if you alter your website’s code.
The Difference Between Google Tag Manager and Google Analytics

Google Tag Manager’s focus is on tracking data. The purpose of Google Analytics, on the other hand, is to allow you to review and analyze your data.
Unlike Google Analytics, Google Tag Manager doesn’t provide you with any reports. You can’t use it to analyze data.
If you’re currently using Google Analytics, implementing GTM won’t change your reporting or data analysis routine. You’ll still be setting up custom segments, running conversion reports and analyzing your sales from within Google Analytics.
However, if you’d like to use these two solutions together, you’ll need to make sure to remove the Google Analytics code from your website first. Having both the Google Analytics and GTM tracking codes on your website will result in double reporting and inaccurate data.
Why You Need to Use Google Tag Manager
There are plenty of benefits that come with using Google Tag Manager. It allows you to:
- Gain more control: GTM enables you to customize the data that’s sent to Google Analytics. You can use GTM to track basic events, but also to implement complex enhanced ecommerce tracking.
- Save time: You and your development team can focus on more important tasks instead of spending time manually adding tags to your website. Tags can be deployed a lot faster by adding them to GTM compared to implementing them manually.
- Organize better: Tracking tag data through the GTM interface allows you to organize all your tags in a single location.
- Reduce tracking errors: Mistakes can happen when you try to add tags manually. You might insert the tag in the wrong place, or include a typo that messes up the entire functioning of the tag. Using GTM prevents this from happening.
- Implement tags accurately: Google Tag Manager doesn’t allow you to publish tags that include syntax errors. Adding tags through GTM ensures that they’ll work as intended. GTM also allows you to debug your tags in its preview mode.
- Improve website performance: Thanks to GTM’s usage of data layers and asynchronous tag deployment, your site will perform better because there’ll be fewer delays related to firing tracking tags.
How to Set Up Google Tag Manager for Magento 2
Now that you understand what GTM is and why you need to use it, let’s look at how you can set up Google Tag Manager on your Magento 2 website.
Register a Google Tag Manager Account
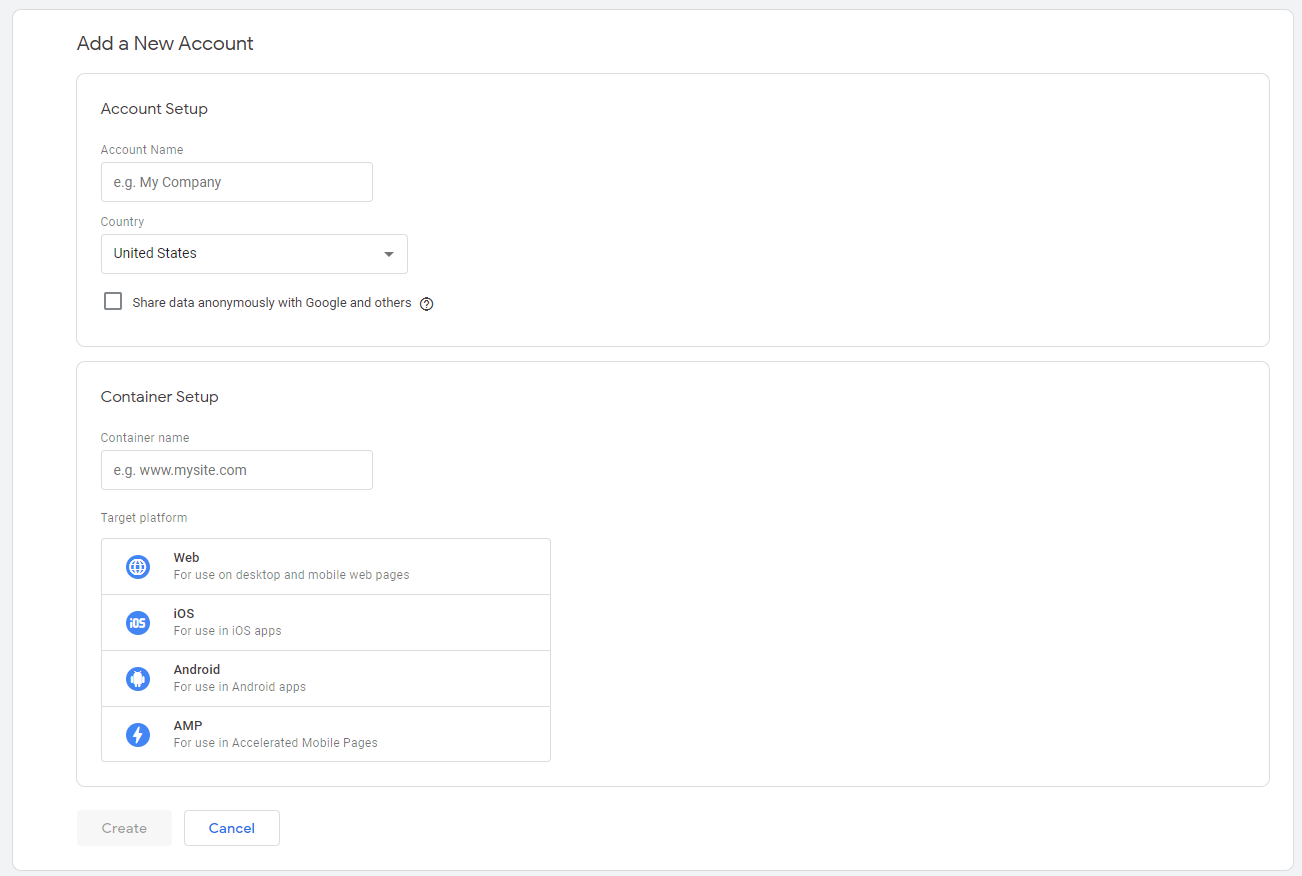
Go to the Google Tag Manager website and click on Start for free to register your free GTM account.
On the next page, add your account name and country, and set up your first container.

Add Your Google Tag Manager Container ID to Your Website
Magento 2 supports GTM integration out-of-the-box, so you won’t need to edit your website code to implement Google Tag Manager.
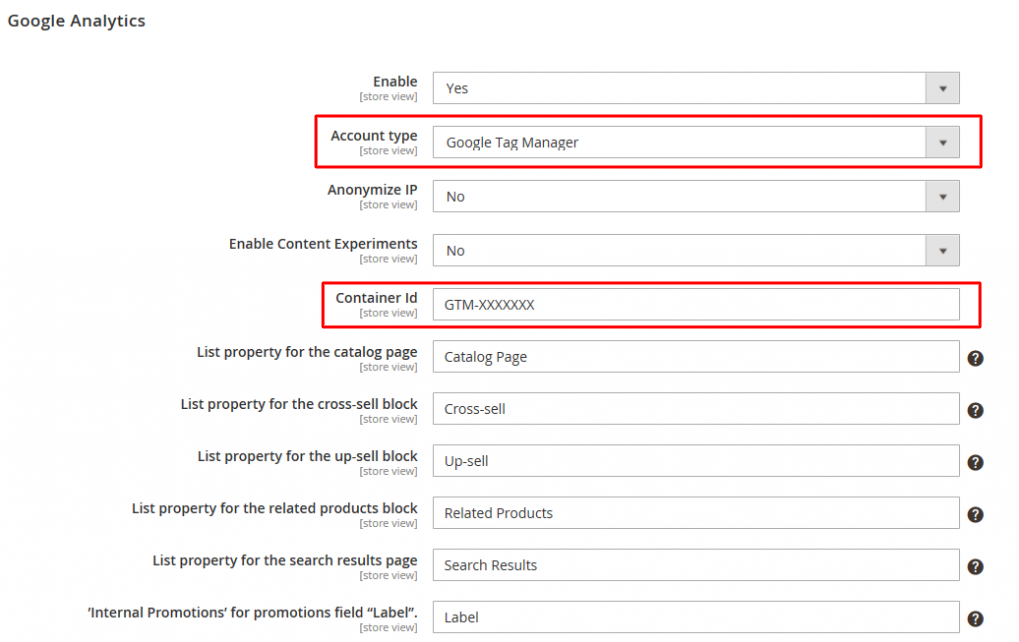
Simply go to Stores > Configuration > Sales > Google API in your Magento backend.
In the Google Analytics section, set theAccount type to Google Tag Manager and enter the container ID you received when creating your GTM container into the Container ID section.

Set up Your First Tag
Now that you’ve added GTM to your website, let’s create your first tag.
Go to your Google Tag Manager dashboard and click on Add a New Tag. On the next page, choose a tag type, select a trigger and click on Save.
You’ll then be taken to the tag overview page, where you’ll need to click on Submit to activate your tag.
Finally, you’ll want to click on Publish on the next page to publish your tag.
Start Using Google Tag Manager on Your Magento 2 Website
Google Tag Manager (GTM) is Google’s free solution for managing tracking tags. It simplifies the process of implementing tags on your website and provides you with a central location for viewing and managing all your tracking tags. It’s designed to be used alongside Google Analytics, with GTM handling the tracking of data and Google Analytics serving as a tool to analyze the data.
Google Tag Manager gives you more control over your data. It also saves time, allows you to organize better, reduces tracking errors and helps you improve website performance.
Magento 2 provides you with an easy way to implement GTM on your website, so get to it today.

Boris Mustapic
Boris Mustapic is a writer and content marketing specialist with a decade of experience in the digital marketing industry. Having built his own successful ecommerce business, he likes to share his knowledge with ecommerce enthusiasts. Apart from writing about marketing and ecommerce, Boris also enjoys a good book and a glass of red wine.


