


Want to add featured products to your Shopify store?
In this guide, we’ll show you the best three ways of doing so. We’ll dive into the specifics of each method and how to implement them step by step on your storefront.
In Shopify, featured products are any products that you choose to promote in a prominent place on your store, such as your homepage, checkout page, or even within the pages for other products.
It usually takes a couple steps for a visitor to find one of your products — they first need to navigate to one of your category pages, and from there they can discover products they may be interested in.
But with a featured products section, you’ll make it possible for visitors to discover products without jumping through those hoops.
There are several ways that you can use featured products to improve your Shopify store’s bottom line, including:
Now that you know why you should be adding featured products to your Shopify store, we can address exactly how you can do so.
You can add and edit products directly through Shopify’s backend user interface:
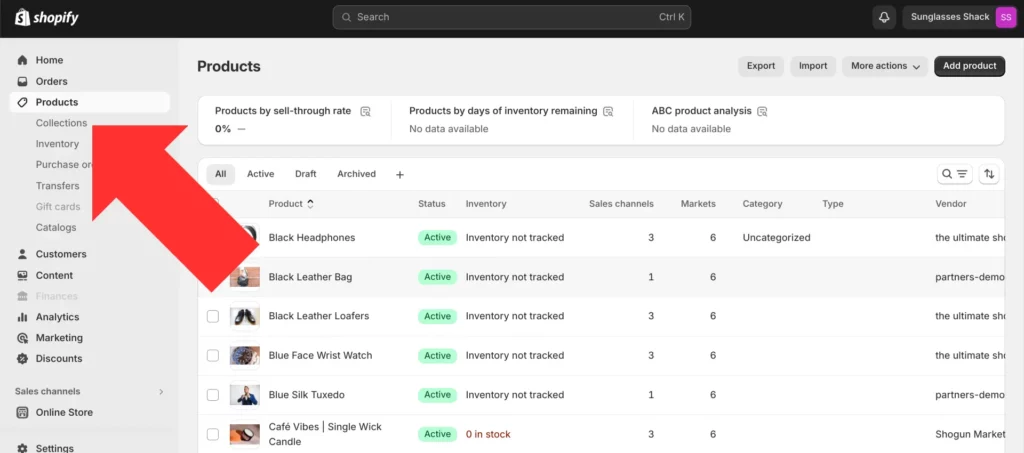
Step 1. After logging in to Shopify, select the “Products” option in the left sidebar.

Step 2. Select “Collections”.
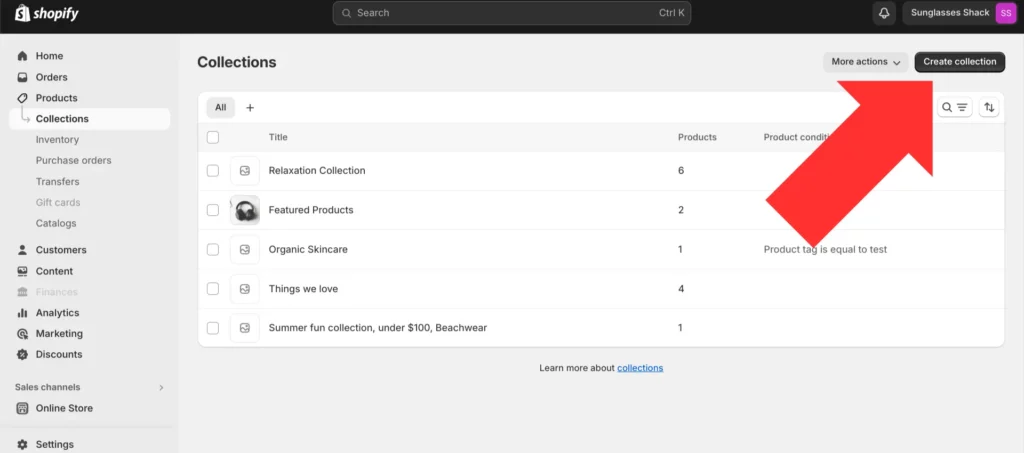
Step 3. Select “Create collection”.
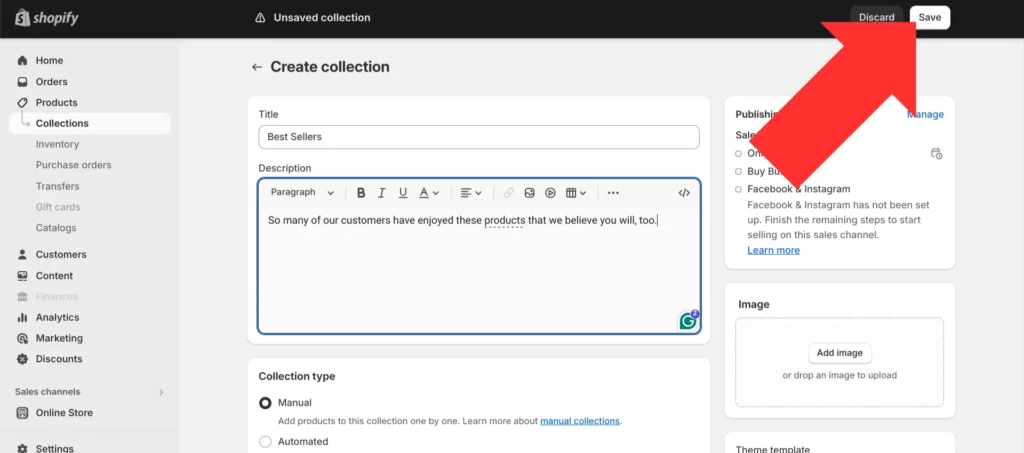
Step 4. Add a name and description for your collection, then select “Save”.
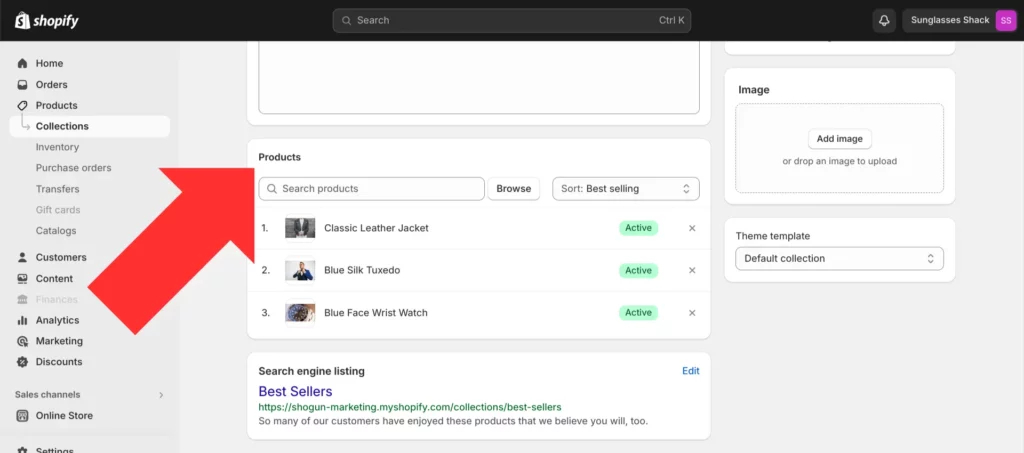
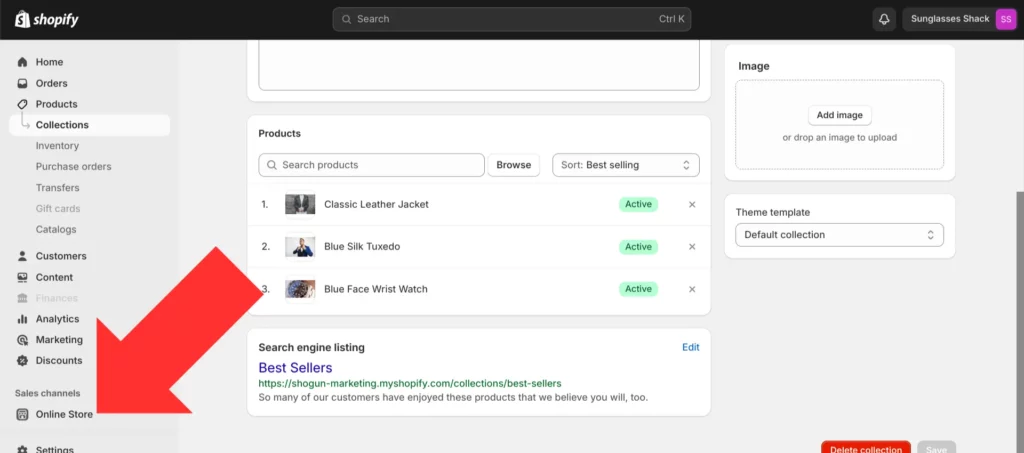
Step 5. Once the collection has been created, you can add the products you want to be included in the collection in the “Products” section.
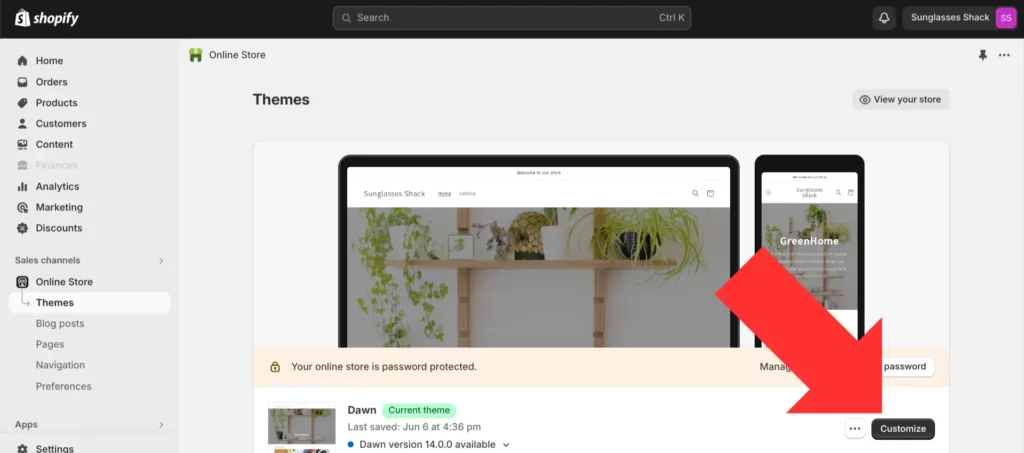
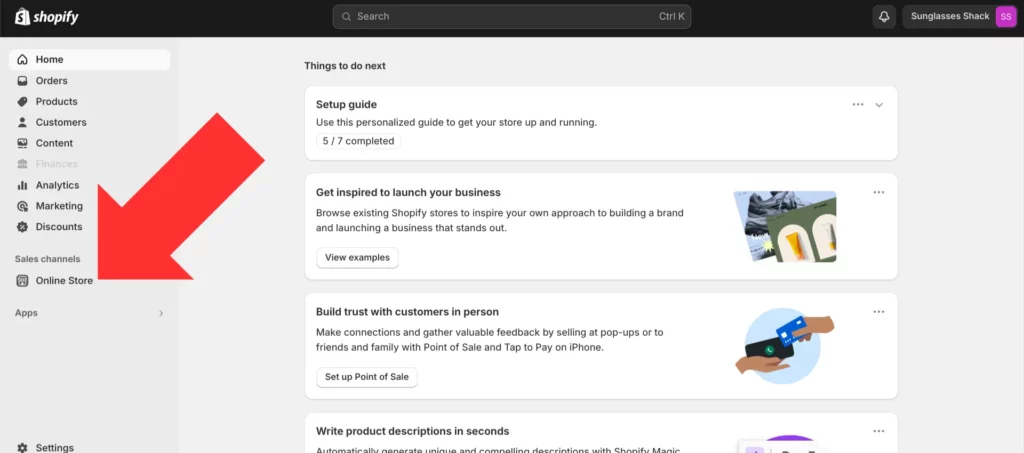
Step 6. Now that your collection is ready, select the sales channel that you would like to customize in the left sidebar of the Shopify dashboard.
Step 7. Click on the “Customize” button next to your theme to open the Shopify Theme Editor.
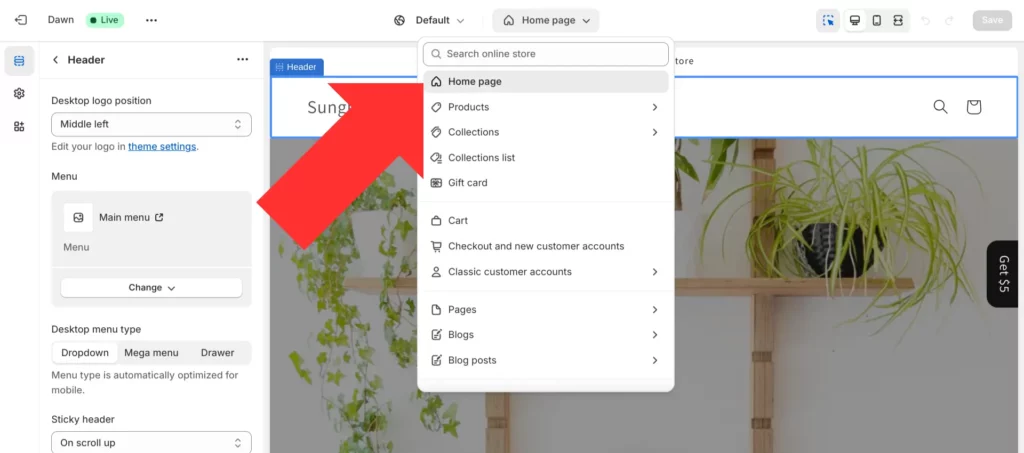
Step 8. Use the dropdown menu located near the top of the screen to select which page template you’d like to add your featured products collection to (homepage, product page, etc.).
Step 9. Some themes display featured products by default. For example, Shopify’s default Dawn theme already has a “Featured collection” section on the homepage. Otherwise, you would need to add it manually by selecting the “Add section” option in the left sidebar.

If you had to add the “Featured collection” section yourself, click on the section and then hit the “Select collection” button to add your featured products.
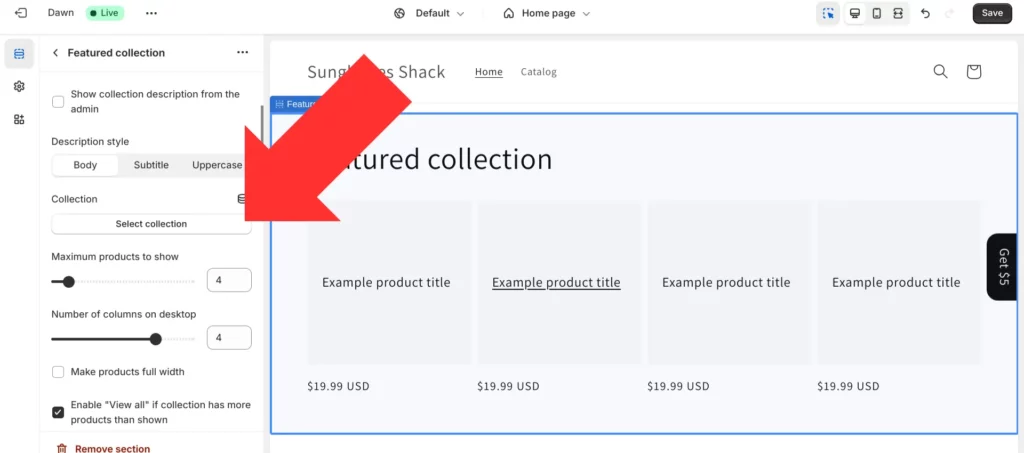
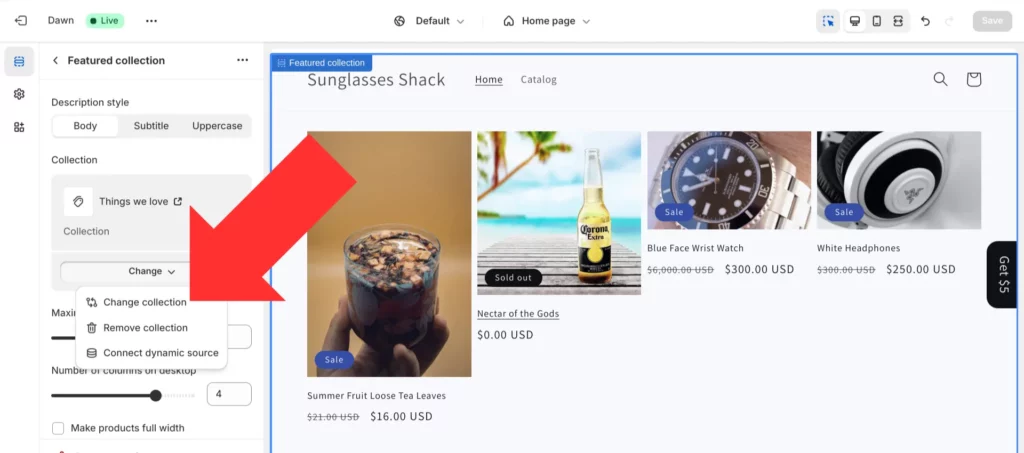
If the “Featured collection” section was already there, click on the section and then hit the “Change collection” option to add your featured products.
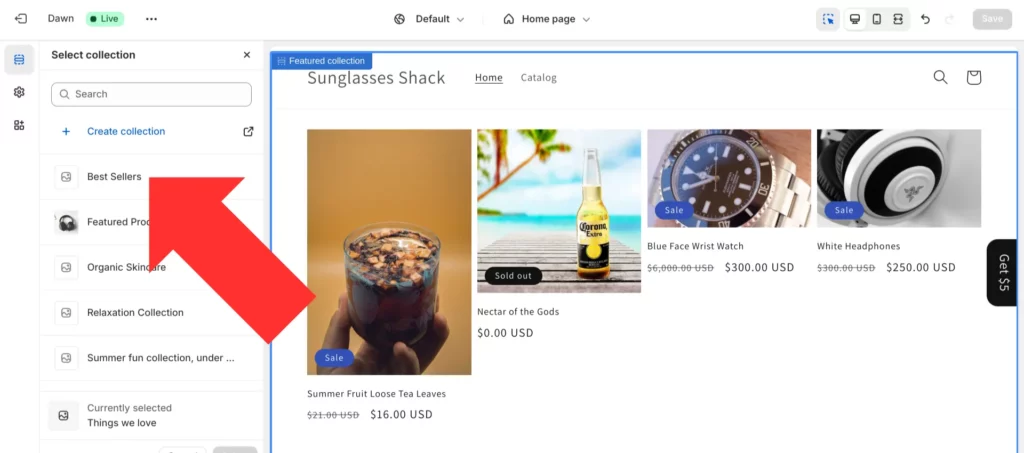
Step 10. Select the collection you created for your featured products earlier.
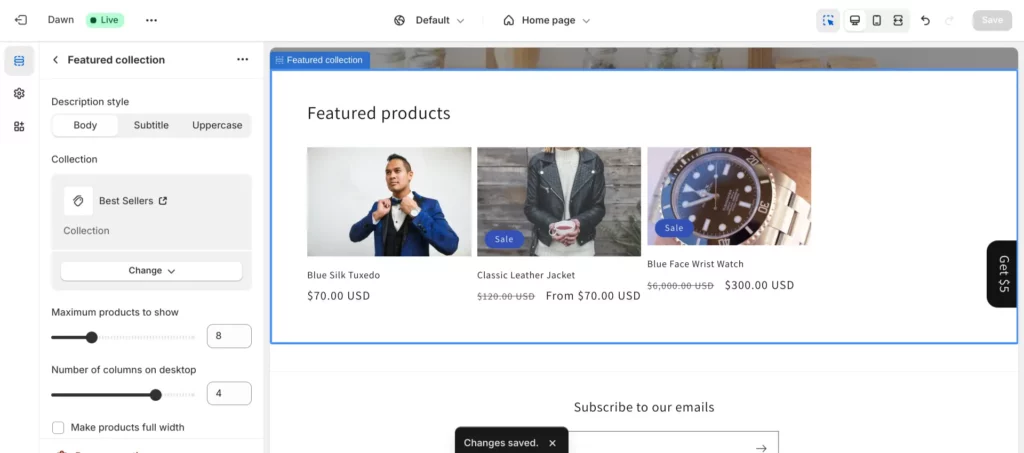
Step 11. After saving your changes, your featured products will now be displayed on the page.
For more control over the functionality and styling of your featured products section, you can edit your site code with Liquid, Shopify’s open-source templating language:
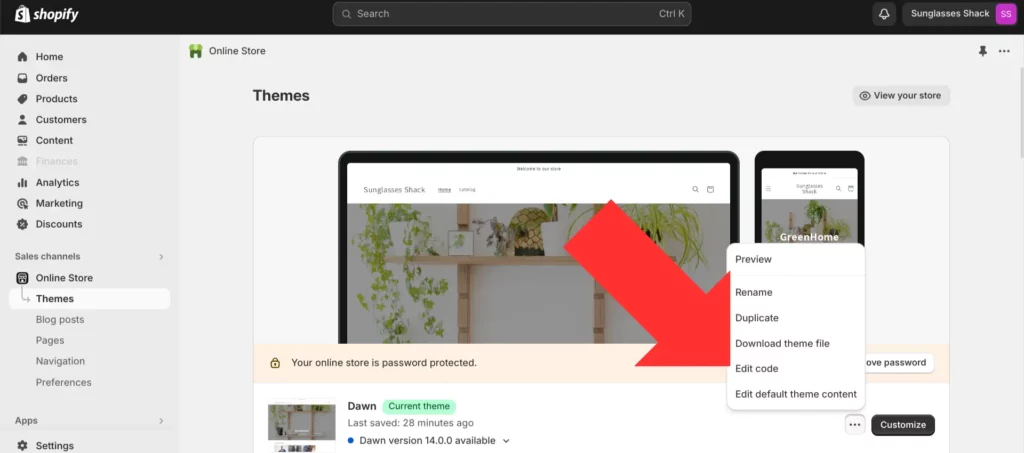
Step 1. From the main Shopify dashboard, click on the sales channel you want to customize in the left sidebar.
Step 2. Open the “…” dropdown menu and select “Edit code”.
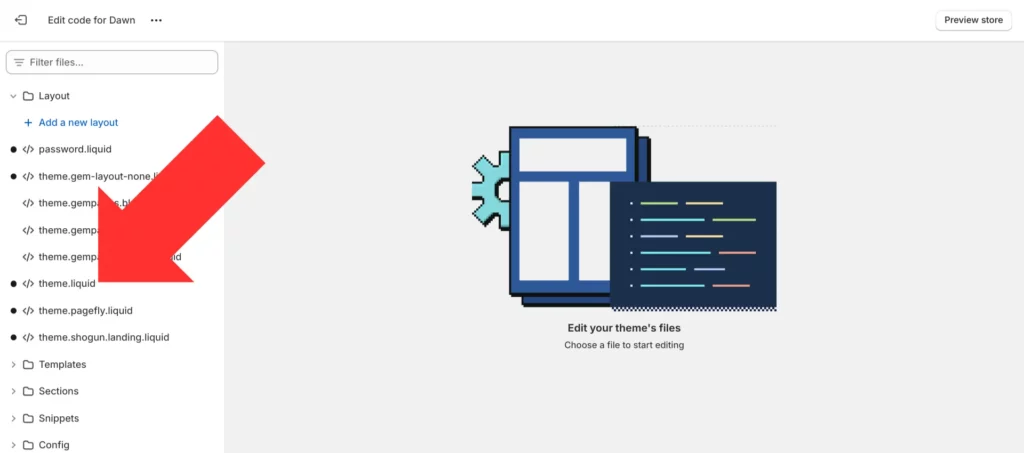
Step 3. Open the “Layout” folder in the left sidebar of the code editor, then click on the “theme.liquid” file.
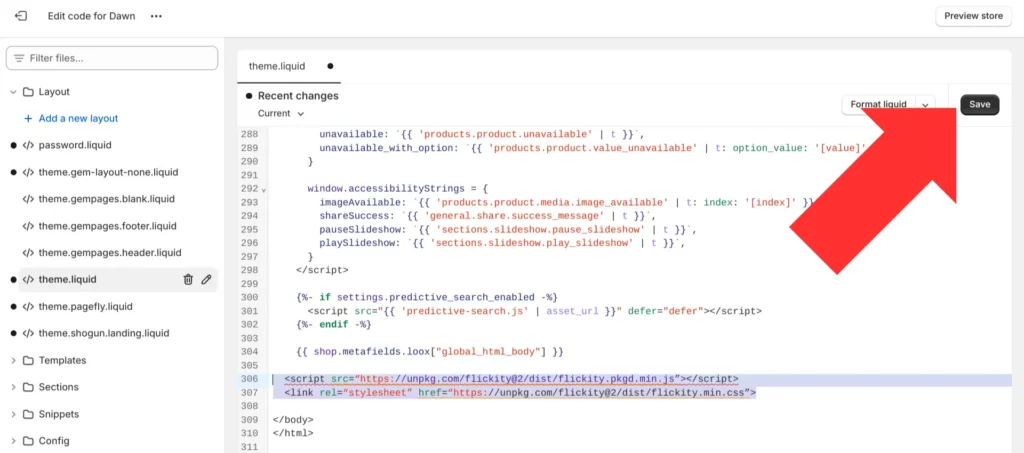
Step 4. Scroll all the way down to the bottom of the file. Just before the </body> tag, add the following code:
<script src="https://unpkg.com/flickity@2/dist/flickity.pkgd.min.js"></script>

<link rel="stylesheet" href="https://unpkg.com/flickity@2/dist/flickity.min.css">
Save your changes.
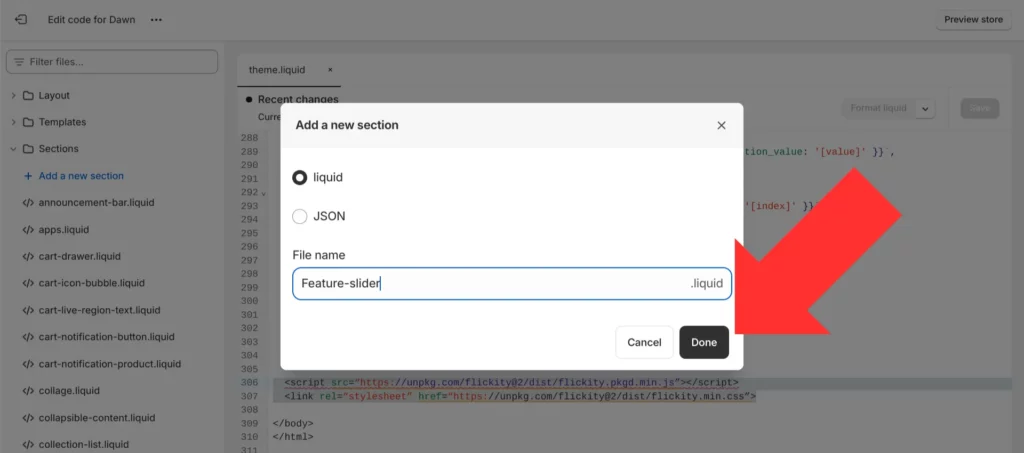
Step 5. Open the “Sections” folder and click on “Add a new section”.
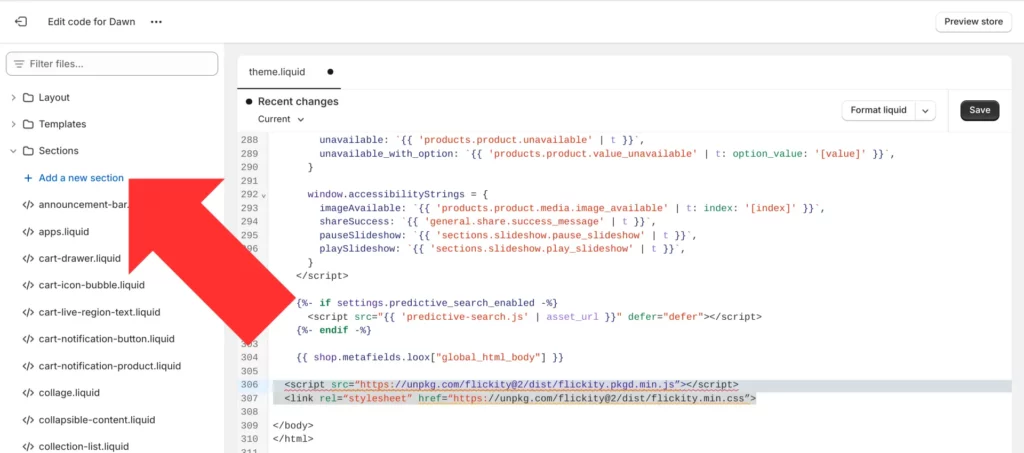
Step 6. Name this new section “Feature-slider”, choose the “liquid” extension, and then select “Done”.
Step 7. In this new section file, add the following code:
<script src="https://unpkg.com/flickity@2/dist/flickity.pkgd.min.js"></script>

<link rel="stylesheet" href="https://unpkg.com/flickity@2/dist/flickity.min.css">

{% assign collection_main = collections[section.settings.collection_main] %}

{% assign collection_limit = section.settings.collection_limit %}

{% assign cell_align = section.settings.cell_align %}

{% assign wrap_around = section.settings.wrap_around %}

{% assign img_width = section.settings.img_width | append: 'x' %}

<div class="flickity-section-{{ section.id }} flickity-index-slider collection" style="background-color: {{ section.settings.bg }}">

<div class="page-width">

<div>

<p class="text-title text-center" style="margin-bottom:{{ section.settings.title_mb }}px">{{ section.settings.title }}</p>

</div>

<div class="flickity-section__carousel carousel-{{section.id }} text-center"

data-flickity='{

"cellAlign": "{{ cell_align }}",

"pageDots": false,

"freeScroll": true,

"contain": true,

"wrapAround": {{ wrap_around }}

}'>

{% for product in collection_main.products limit: collection_limit %}

{%- if product.metafields.inventory.ShappifyHidden == 'true' -%}{%- continue -%}{%- endif -%}

{% assign first_variant = product.selected_or_first_available_variant %}

{% assign featured_img_src = first_variant.featured_img.src | default: product.featured_image.src %}

{% assign price = first_variant.price %}

{% assign compare_at_price = first_variant.compare_at_price %}

<div class="carousel__cell" style="width:{{ section.settings.cell_width }};margin-right:{{ section.settings.mr }}px">

<a href="{{ product.url }}">

<img src="{{ featured_img_src | img_url: img_width }}" alt="{{ product.featured_img.alt }}" />

</a>

<a href="{{ product.url }}">

<h5>{{ product.title }}</h5>

</a>

{% if compare_at_price > price %}

<s class="product__compare-at-price">{{ compare_at_price | money }}</s>

<p class="product__product-price">{{ price | money }}</p>

{% else %}

<p class="product__product-price">{{ price | money }}</p>

{% endif %}

</div>

{% endfor %}

{% comment %}

{% for block in section.blocks %}

{% assign block_product = all_products[block.settings.featured_product] %}

{% assign block_first_variant = block_product.selected_or_first_available_variant %}

{% assign featured_img_src = block_first_variant.featured_img.src | default: block_product.featured_image.src %}

{% assign price = block_first_variant.price %}

{% assign compare_at_price = block_first_variant.compare_at_price %}

<div class="carousel__cell" style="width:{{ section.settings.cell_width }};margin-right:{{ section.settings.mr }}px">

{% if block.settings.featured_product != blank %}

<a href="{{ block_product.url }}">

<img src="{{ featured_img_src | img_url: img_width }}" alt="{{ block_product.featured_img.alt }}" />

</a>

{% else %}

{{ 'product-1' | placeholder_svg_tag: 'placeholder-svg' }}

{% endif %}

<a href="{{ block_product.url }}">

<h5>{{ block_product.title }}</h5>

</a>

{% if compare_at_price > price %}

<s class="block-product__compare-at-price">{{ compare_at_price | money }}</s>

<p class="block-product__product-price">{{ price | money }}</p>

{% else %}

<p class="block-product__product-price">{{ price | money }}</p>

{% endif %}

</div>

{% endfor %}

{% endcomment %}

</div>

</div>

</div>

{% schema %}

{

"name": "Featured Products",

"settings": [

{

"type": "collection",

"id": "collection_main",

"label": "Choose a Collection"

},

{

"type": "range",

"id": "collection_limit",

"min": 2,

"max": 50,

"step": 1,

"unit": ".",

"label": "How many products to show",

"default": 4

},

{

"type": "color",

"id": "bg",

"label": "Background Color"

},

{

"type": "text",

"id": "title",

"label": "Title",

"default": "Featured Products"

},

{

"type": "range",

"id": "img_width",

"min": 200,

"max": 600,

"step": 5,

"unit": "px",

"label": "Image Width",

"default": 200

},

{

"type": "select",

"id": "cell_align",

"label": "Slide Alignment",

"options": [

{

"value": "center",

"label": "Center"

},

{

"value": "left",

"label": "Left"

}

],

"default": "center"

},

{

"type": "range",

"id": "title_mb",

"min": 30,

"max": 120,

"step": 1,

"unit": "px",

"label": "Title Margin Bottom",

"default": 48

},

{

"type": "select",

"id": "cell_width",

"label": "Choose number of slides to show on start",

"options": [

{

"value": "25%",

"label": "Four"

},

{

"value": "20%",

"label": "Five"

},

{

"value": "16.6666667%",

"label": "Six"

},

{

"value": "12.5%",

"label": "Eight"

}

],

"default": "25%"

},

{

"type": "radio",

"id": "wrap_around",

"label": "Enable Wrap Around (endless scrolling)",

"options": [

{

"value": "true",

"label": "True"

},

{

"value": "false",

"label": "False"

}

],

"default": "true"

},

{

"type": "range",

"id": "mr",

"min": 0,

"max": 48,

"step": 1,

"unit": "px",

"label": "Cell Margin Right",

"default": 16,

"info": "Save page to see changes."

}

],

"presets": [

{

"name": "Featured Products",

"category": "Slider"

}

]

}

{% endschema %}
Save your changes.

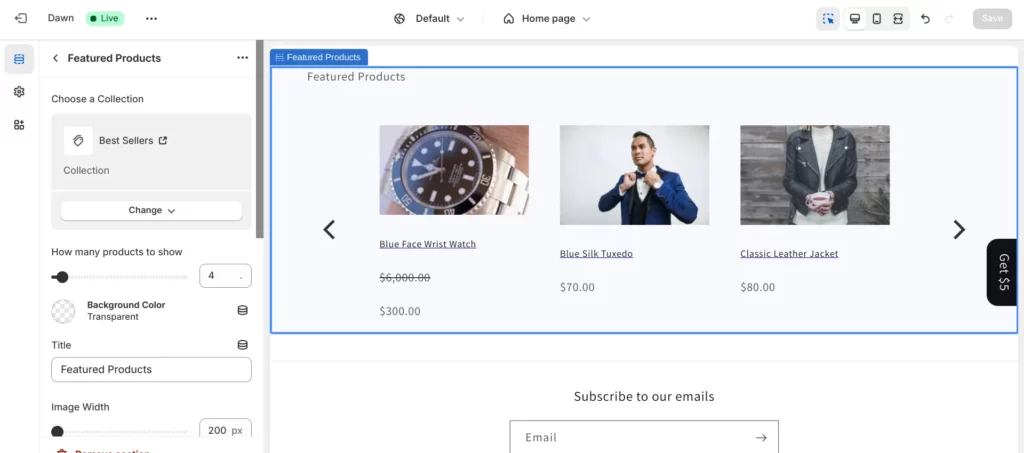
Step 8. Now, whenever you’re editing a page template in the Shopify Theme Editor, you’ll see a new option for adding a section — Featured Products.
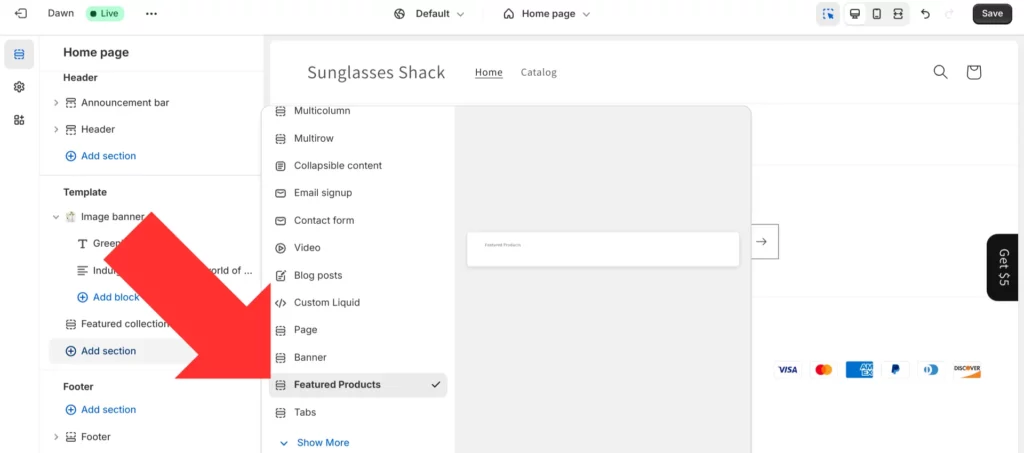
This custom-coded section provides you with a variety of settings to choose from, including how many products are displayed, background color, product image width, and more.
When you write your own code for your featured products section, you can always make edits to the code to get whatever customization options you want. But unless you already have extensive web development experience, this can be a very difficult and time-consuming process.
For those looking for a customizable solution that can be implemented independently by marketing and merchandising teams, natively integrated software like Shogun offers the perfect solution:
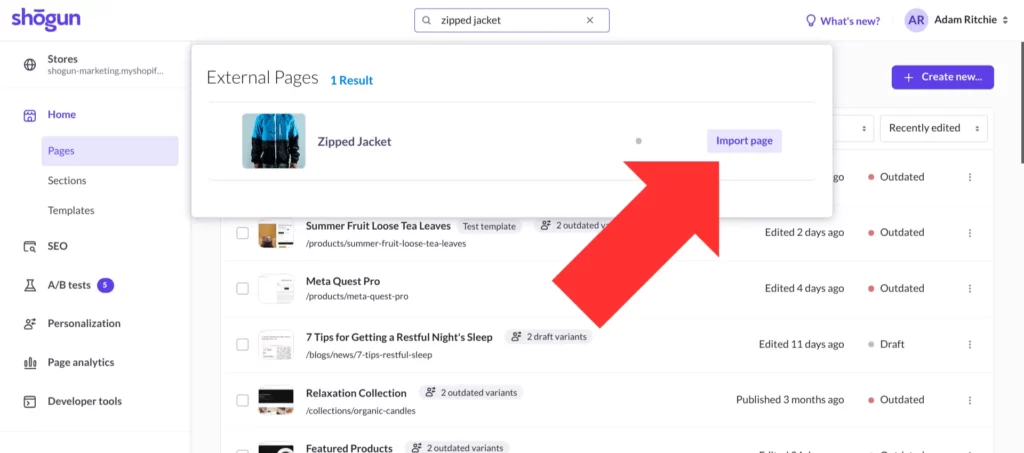
Step 1: After installing Shogun, launch the software and select the page that you would like to customize — this will open the page in Shogun’s visual editor.
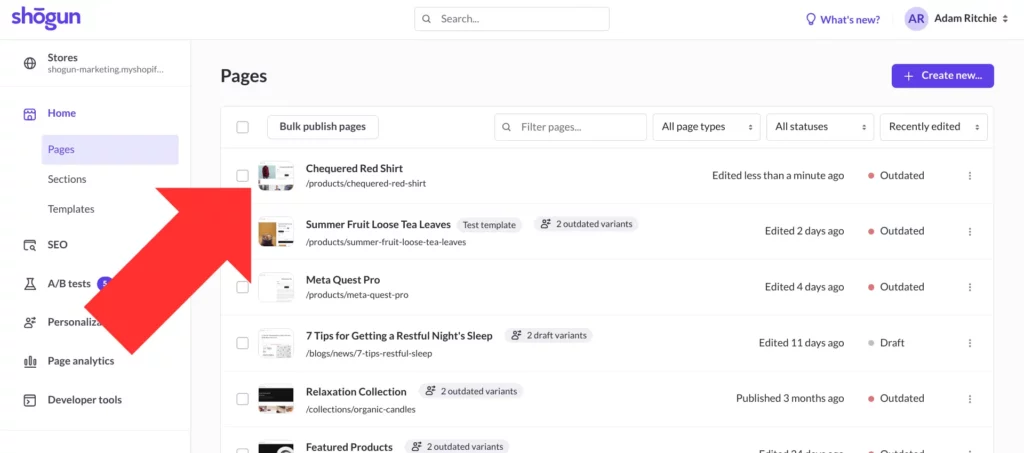
If you can’t find the page you want to customize, you may still need to import it from your Shopify store. In that case, you would simply need to enter the name of the product into the search bar near the top of your screen and then select “Import page”.
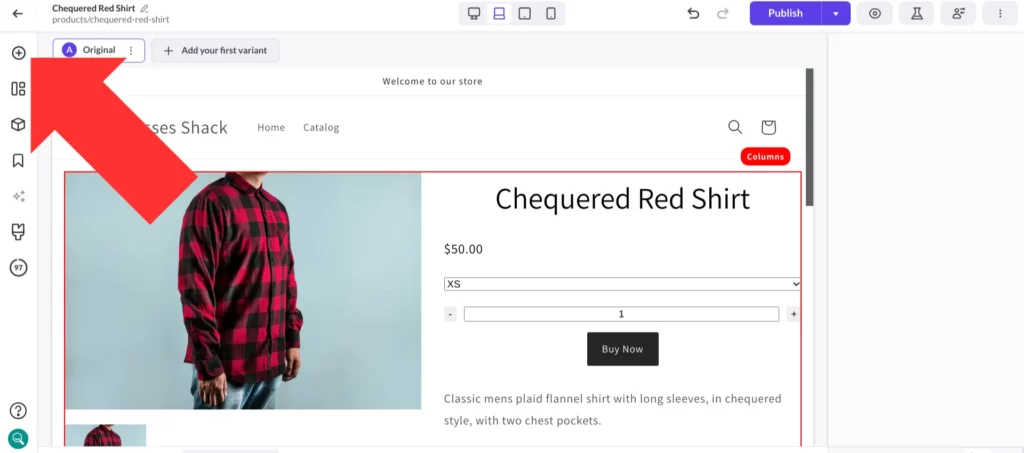
Step 2: Select the “Elements” icon — it looks like a plus sign inside a circle and is located in the left sidebar of the visual editor.
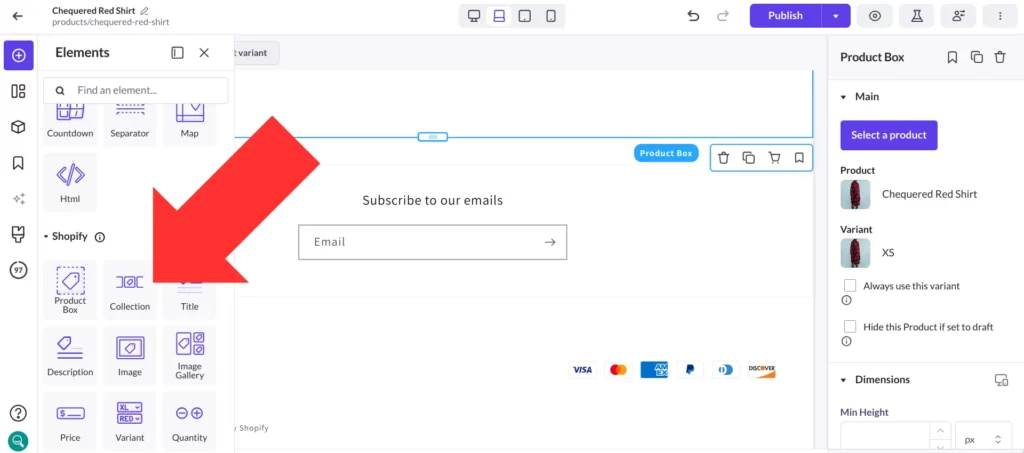
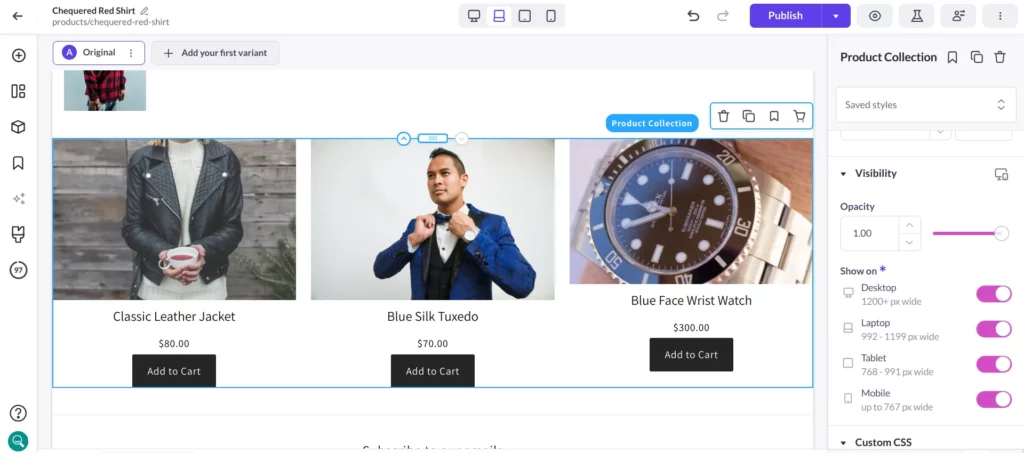
Step 3: Click on the “Collection” element icon and drag it to wherever you want your featured products to appear on the page.
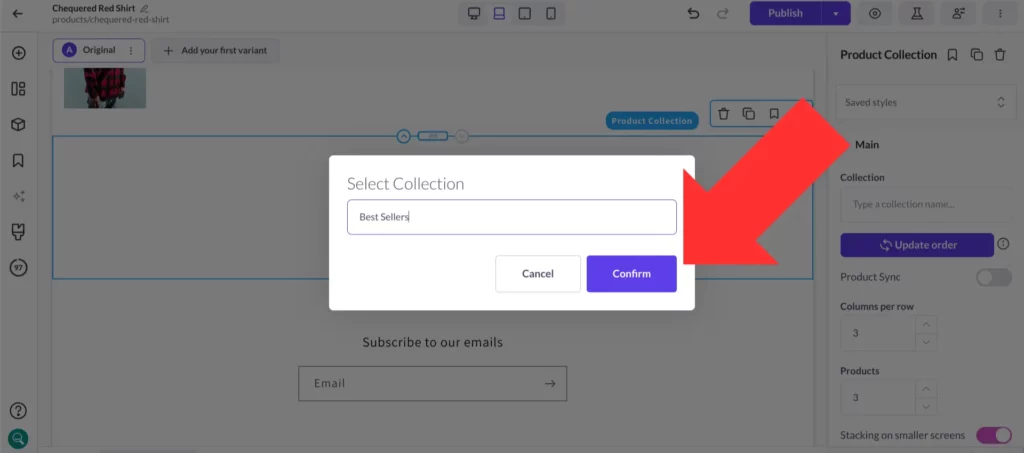
Step 4. Select the Shopify product collection you want to display, then select “Confirm”.
You’ll find that there is a wide variety of options for customizing your featured products section in Shogun, such as the border styling, the number of columns per row, whether out-of-stock items are hidden, and whether or not the section is shown at all on certain types of devices.
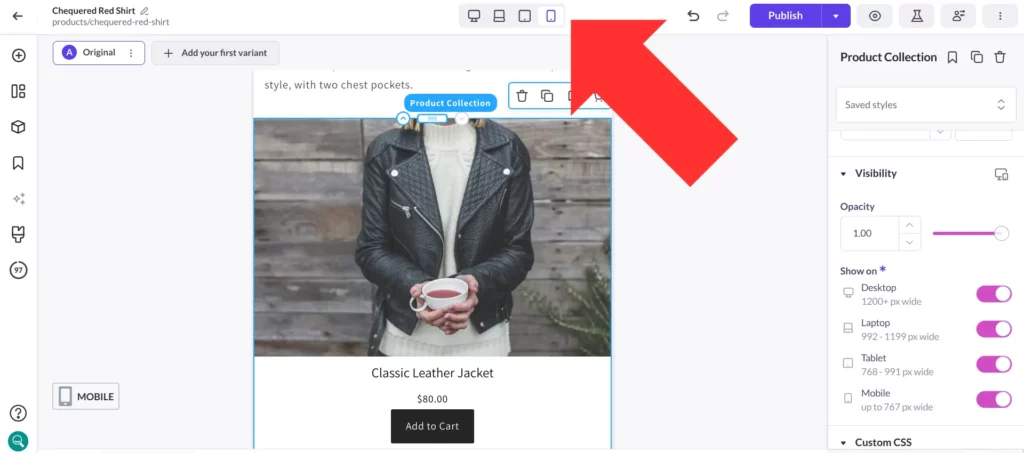
Indeed, you can use the screen setting buttons in the visual editor to toggle between which version of the page you’re editing (desktop, laptop, tablet, or mobile) and design different layouts for different types of devices — Shogun gives you full control of the mobile experience.
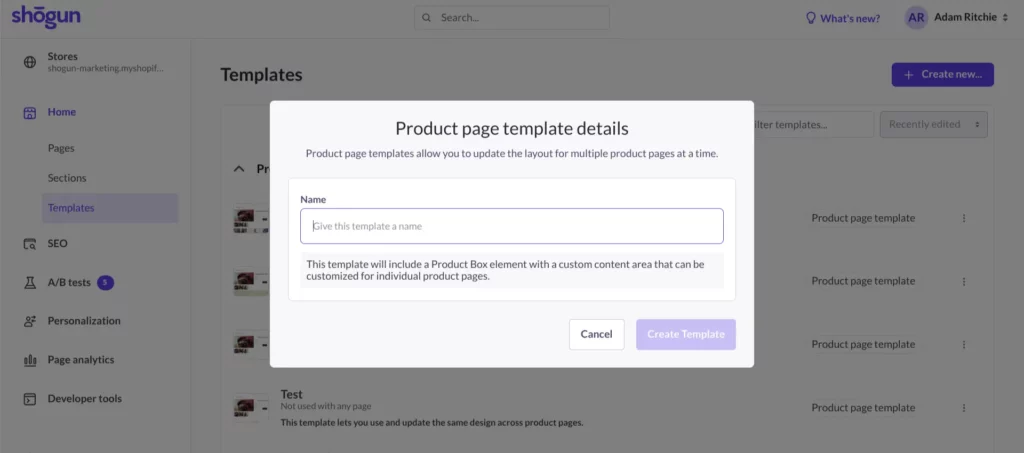
Want to use the same featured products section on multiple product pages? You can save time while setting this up by taking advantage of Shogun’s Product Page Templates tool. Just create a new template that includes the featured products section, then bulk import all the pages that you would like to add this section to.
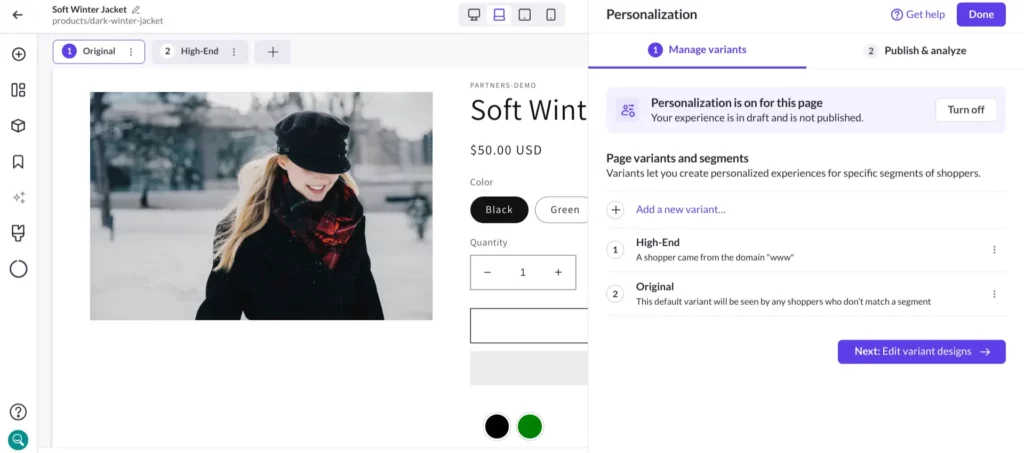
Finally, it’s worth mentioning that you can use Shogun’s Personalization feature to show a featured products section to some visitors but not others.
Shogun allows you to create audience segments based on several different types of conditions, including which URL the visitor is coming from, the visitor’s physical location, and previous purchase history.
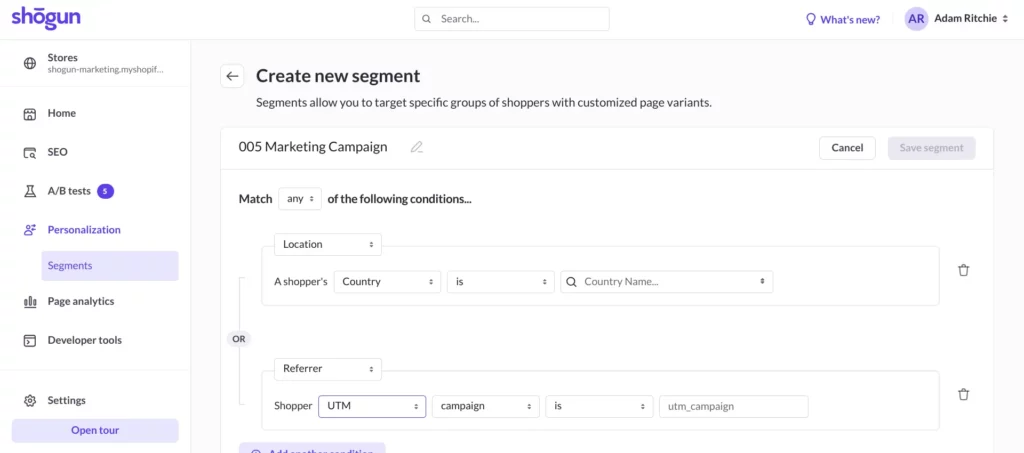
Then, you can create different variants of the same page and assign a segment to each variant. For example, the featured products section in one variant could promote your most high-end items to the people who have spent the most money on your store, while everyone else is directed to a different page variant and shown more affordable options in the featured products section.
By simultaneously speaking to the needs of different types of visitors, you can provide a more persuasive experience and increase your overall conversion rate.
With the visual editor, personalized experiences, and all the other powerful tools that Shogun has to offer, you’ll be able to create truly exceptional content for your online storefront.
