How To Set Shipping Rates by Location in Shopify
A 2022 survey of over 2,000 ecommerce merchants and consumers found that free shipping is a particularly persuasive promotional offer:
- 62% of online shoppers will only buy from retailers that offer free shipping
- An additional 35% say that free shipping isn’t a dealbreaker, but still a preference
- Only 3% of online shoppers don’t care about shipping costs
If you can make free shipping work logistically, then you will likely be able to turn many more of your visitors into customers.
Of course, you might only be able to offer free or discounted shipping rates in certain areas, such as near infrastructure like manufacturing facilities or distribution warehouses.
This guide will review how to set different Shopify shipping rates for different areas, and we’ll also show you how to set up a free shipping banner that is only visible to visitors who can access this offer.
Adding a shipping zone for the targeted regions
Before we go further, let’s quickly define some key terms that Shopify uses in their shipping settings:
- Shipping profile: A set of shipping rules for particular products or locations.
- Shipping zone: A group of countries or regions with the same shipping rate.
- Shipping rate: The amount of money the customer is charged for shipping — your shipping rates can be free, flat, or calculated by a third-party service such as UPS or FedEx.
To offer free shipping in a specific location, you’ll need to add a shipping zone with the location to a shipping profile and then set the shipping rate to free:
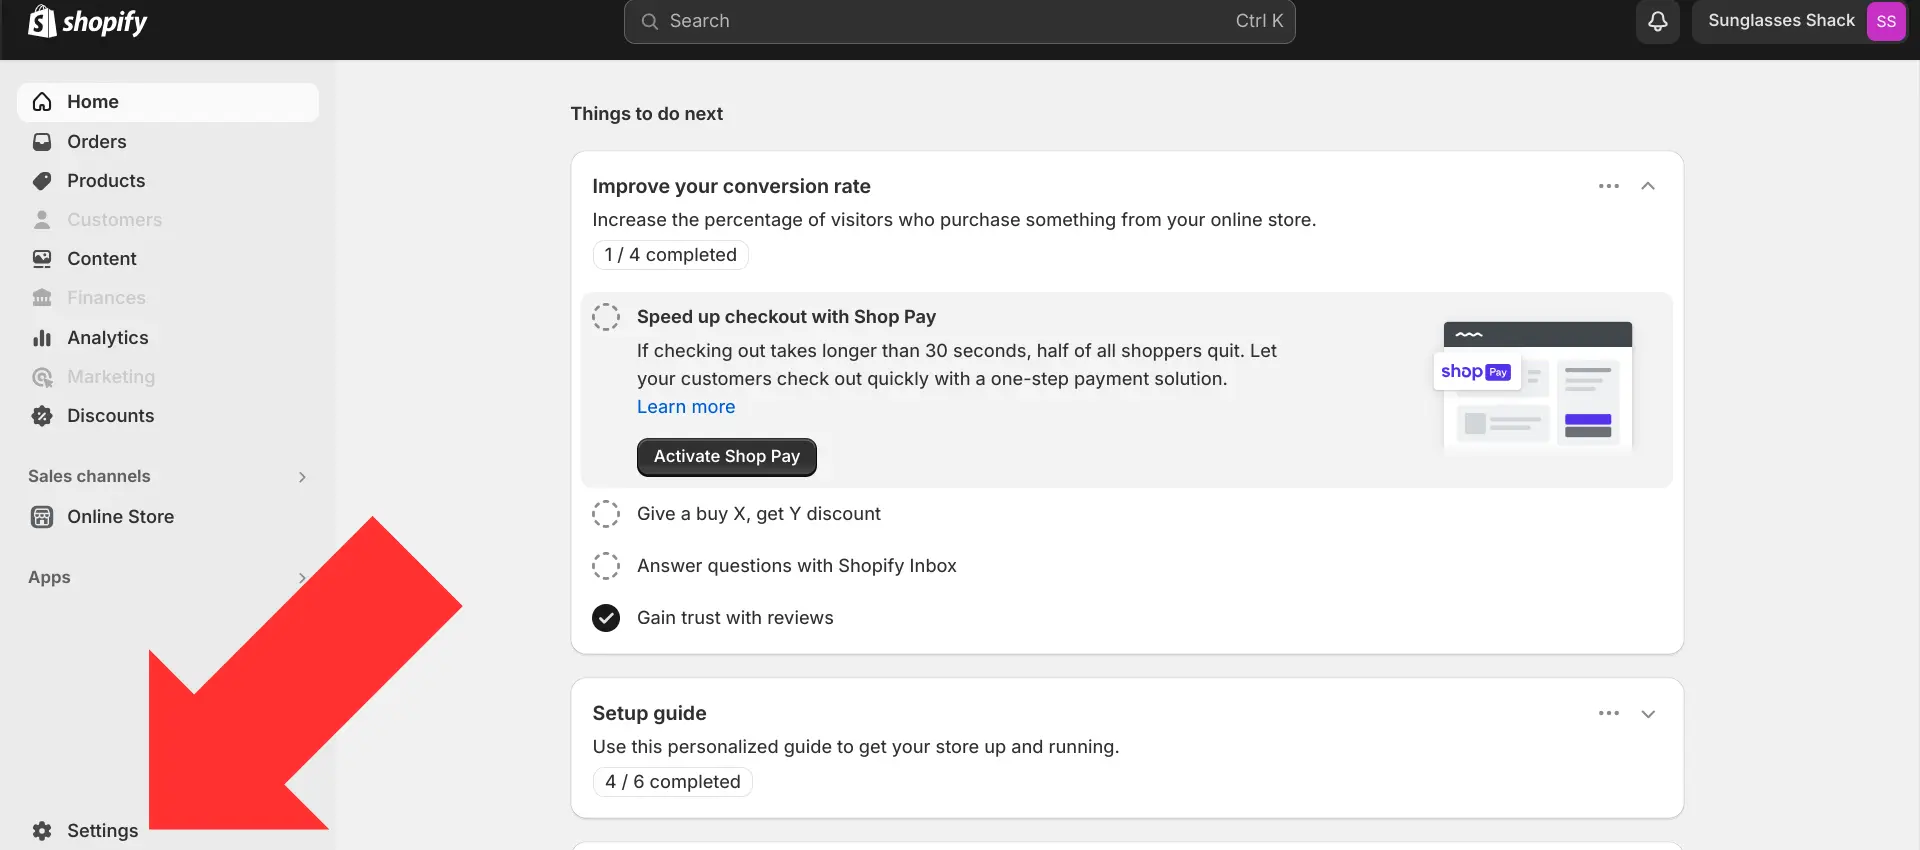
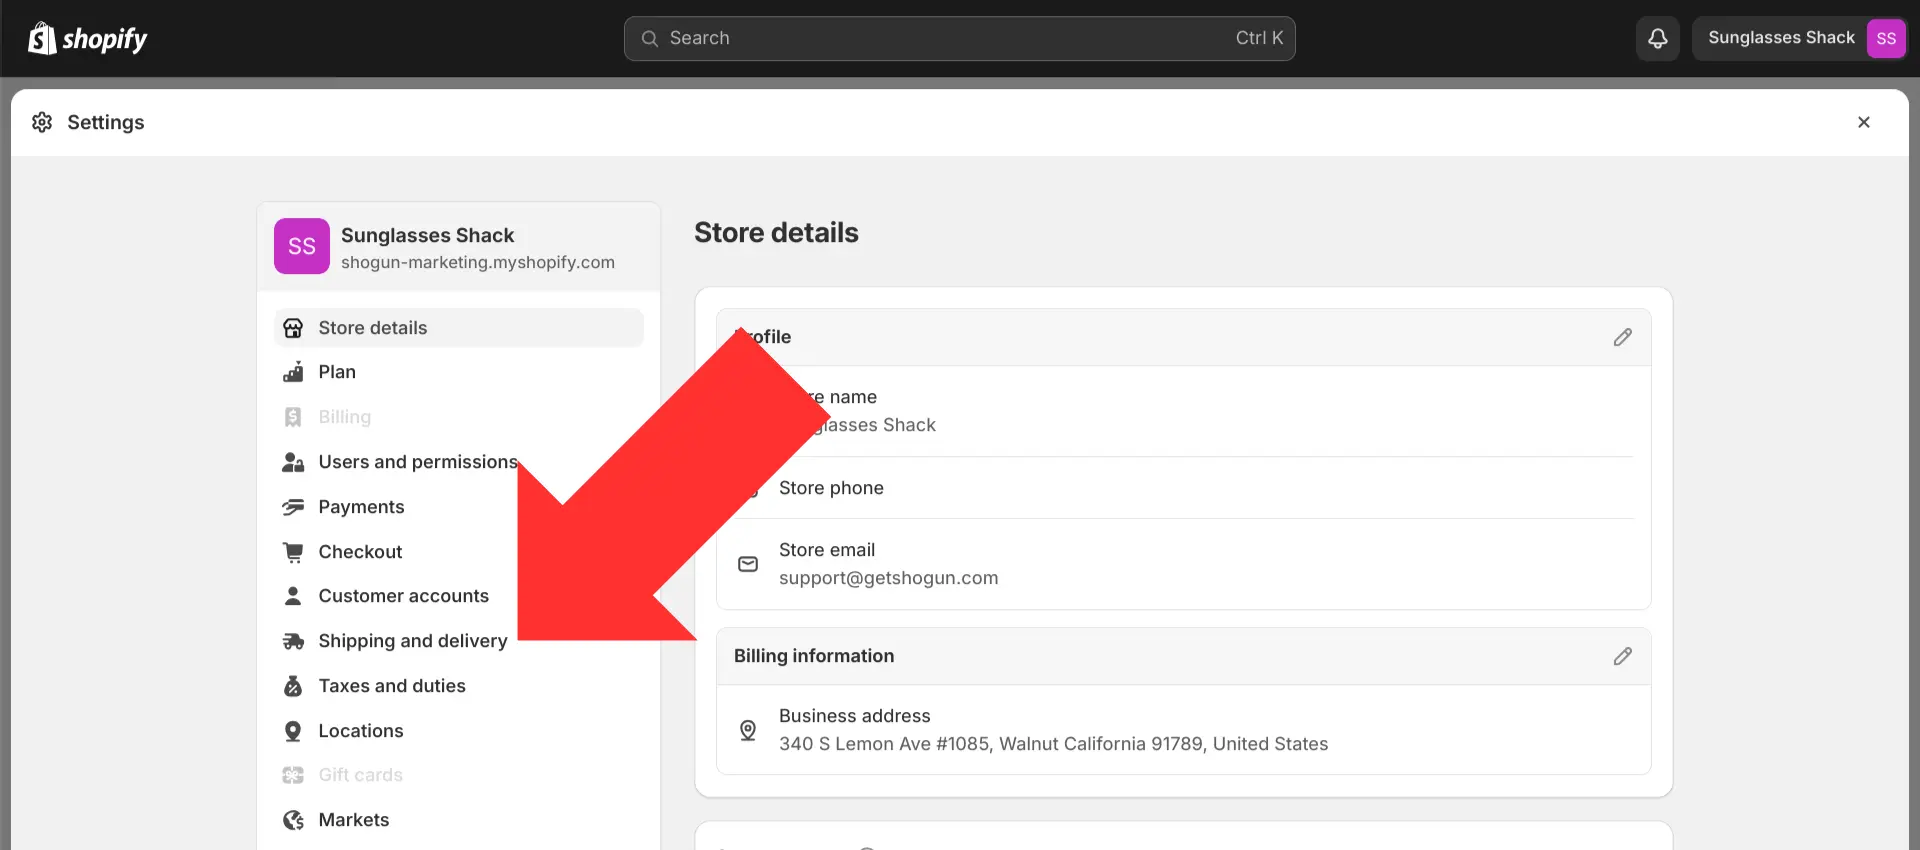
Step 1. After logging in to Shopify, select the “Settings” option in the left sidebar of the main dashboard.
Step 2. Select “Shipping and delivery”.
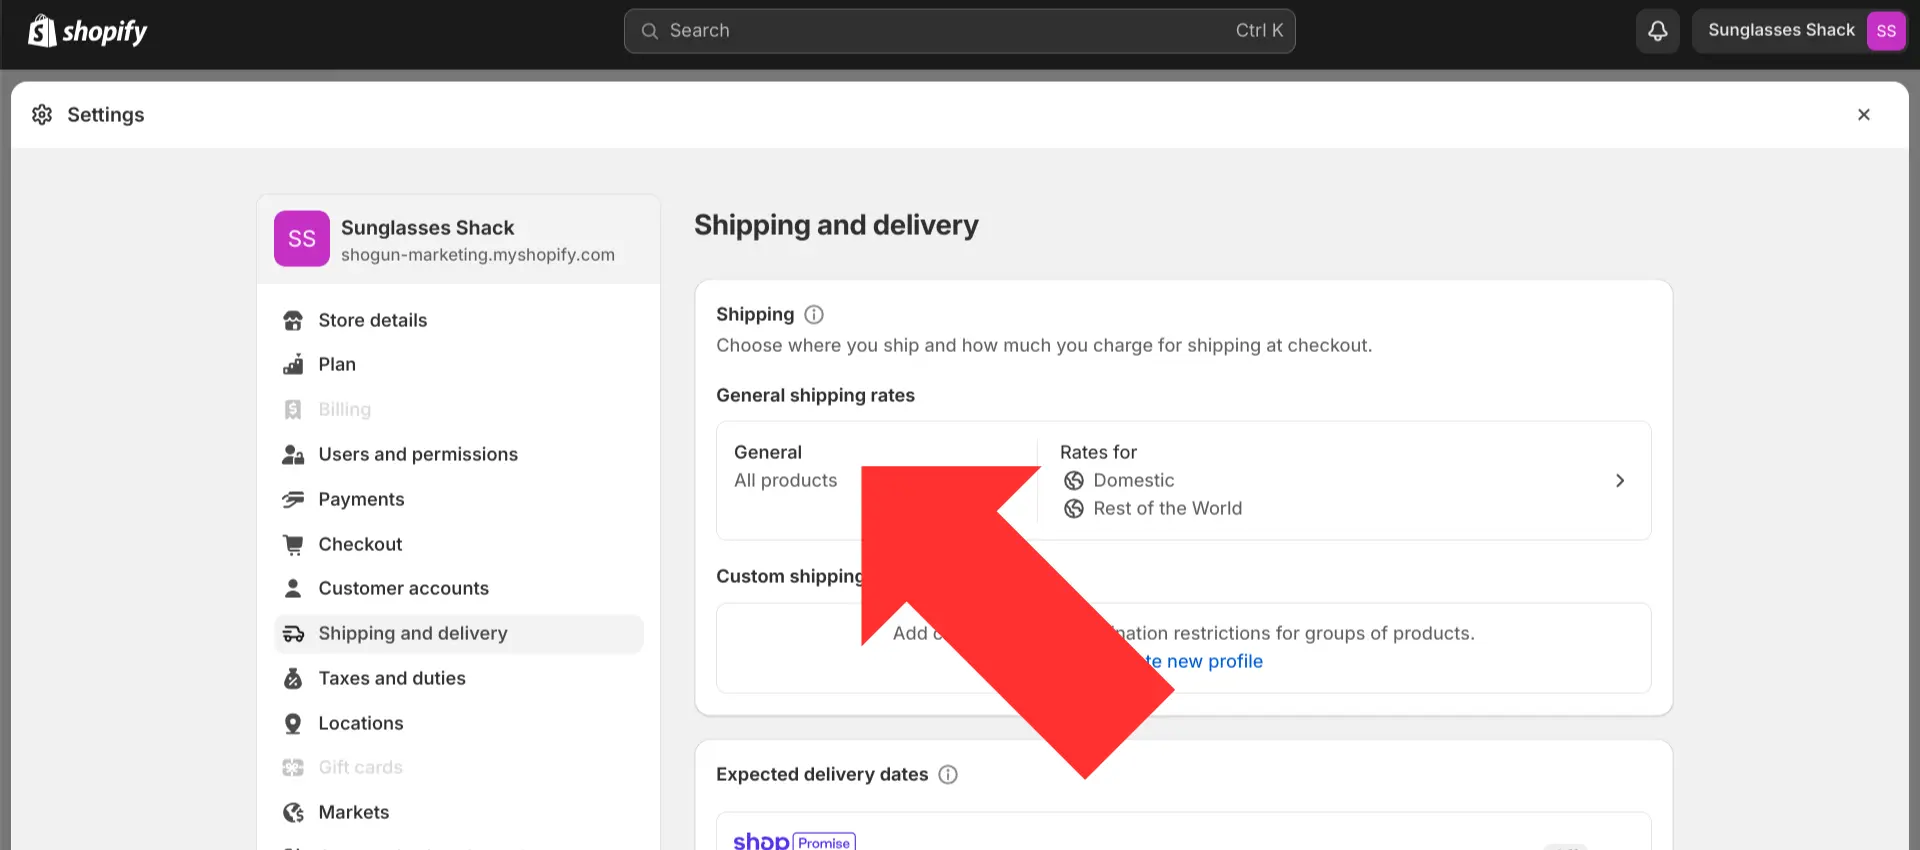
Step 3. Select the shipping profile you want to customize (here, we’ll just edit the general shipping profile that covers every product, which all Shopify stores have by default).
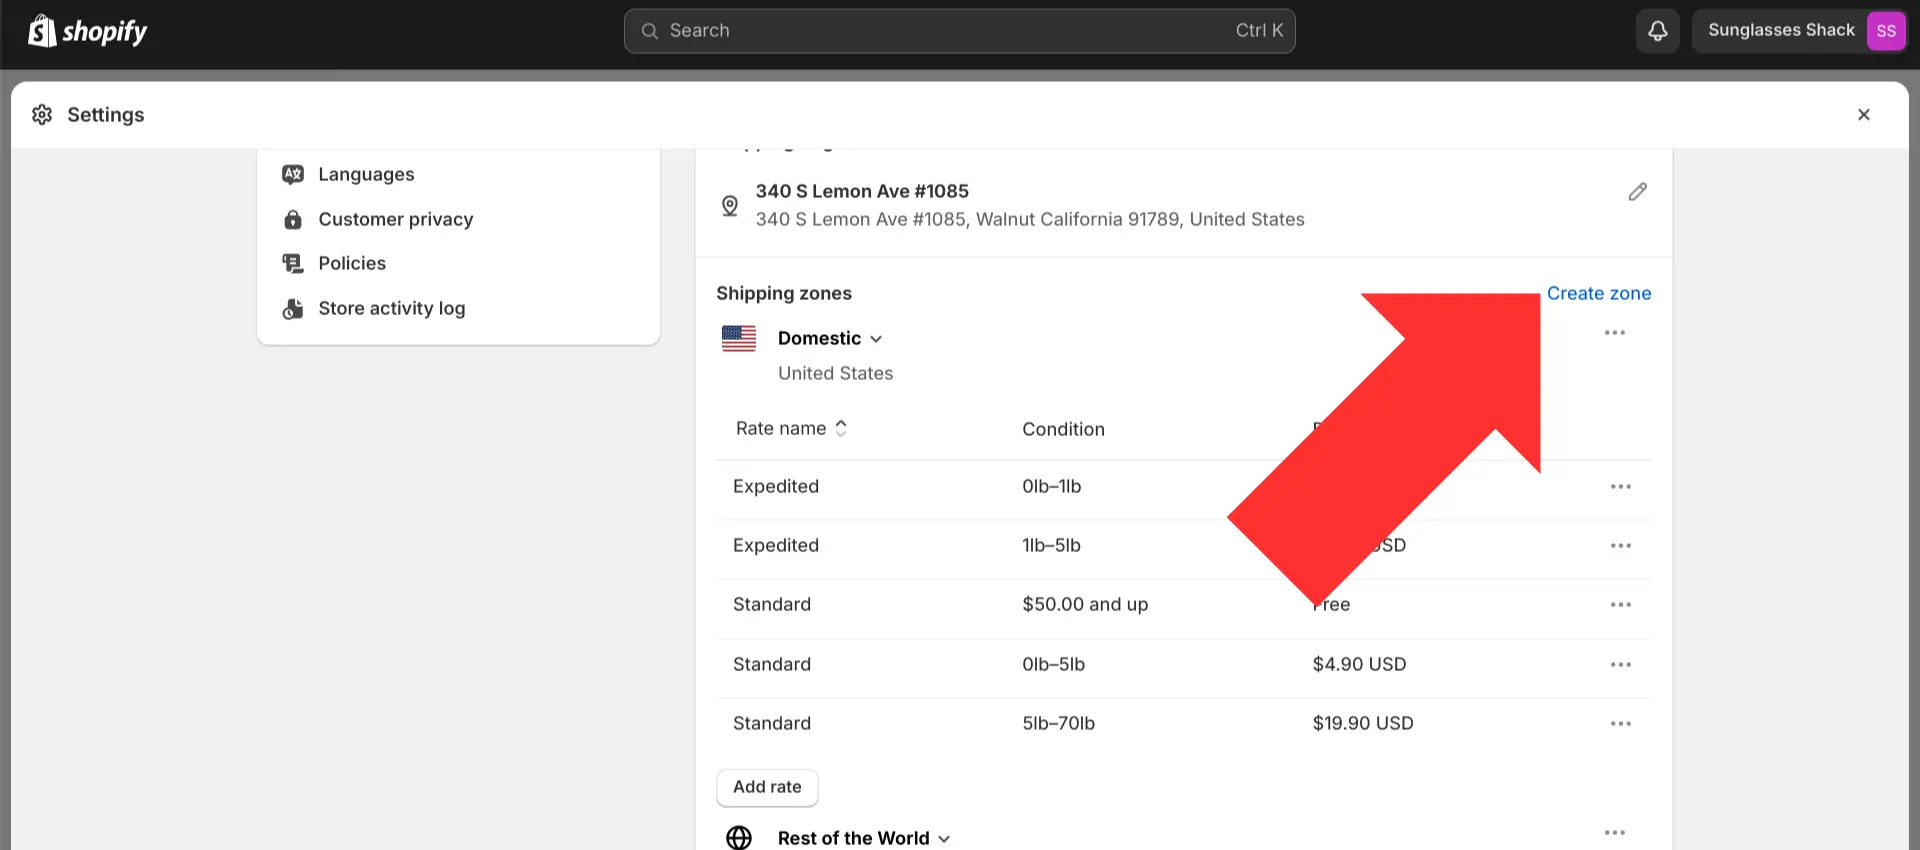
Step 4. Scroll down to the “Shipping zones” section. For this example, let’s say you want to offer free shipping to customers in the Canadian province of British Columbia. To do so, you would first need to select “Create zone”.
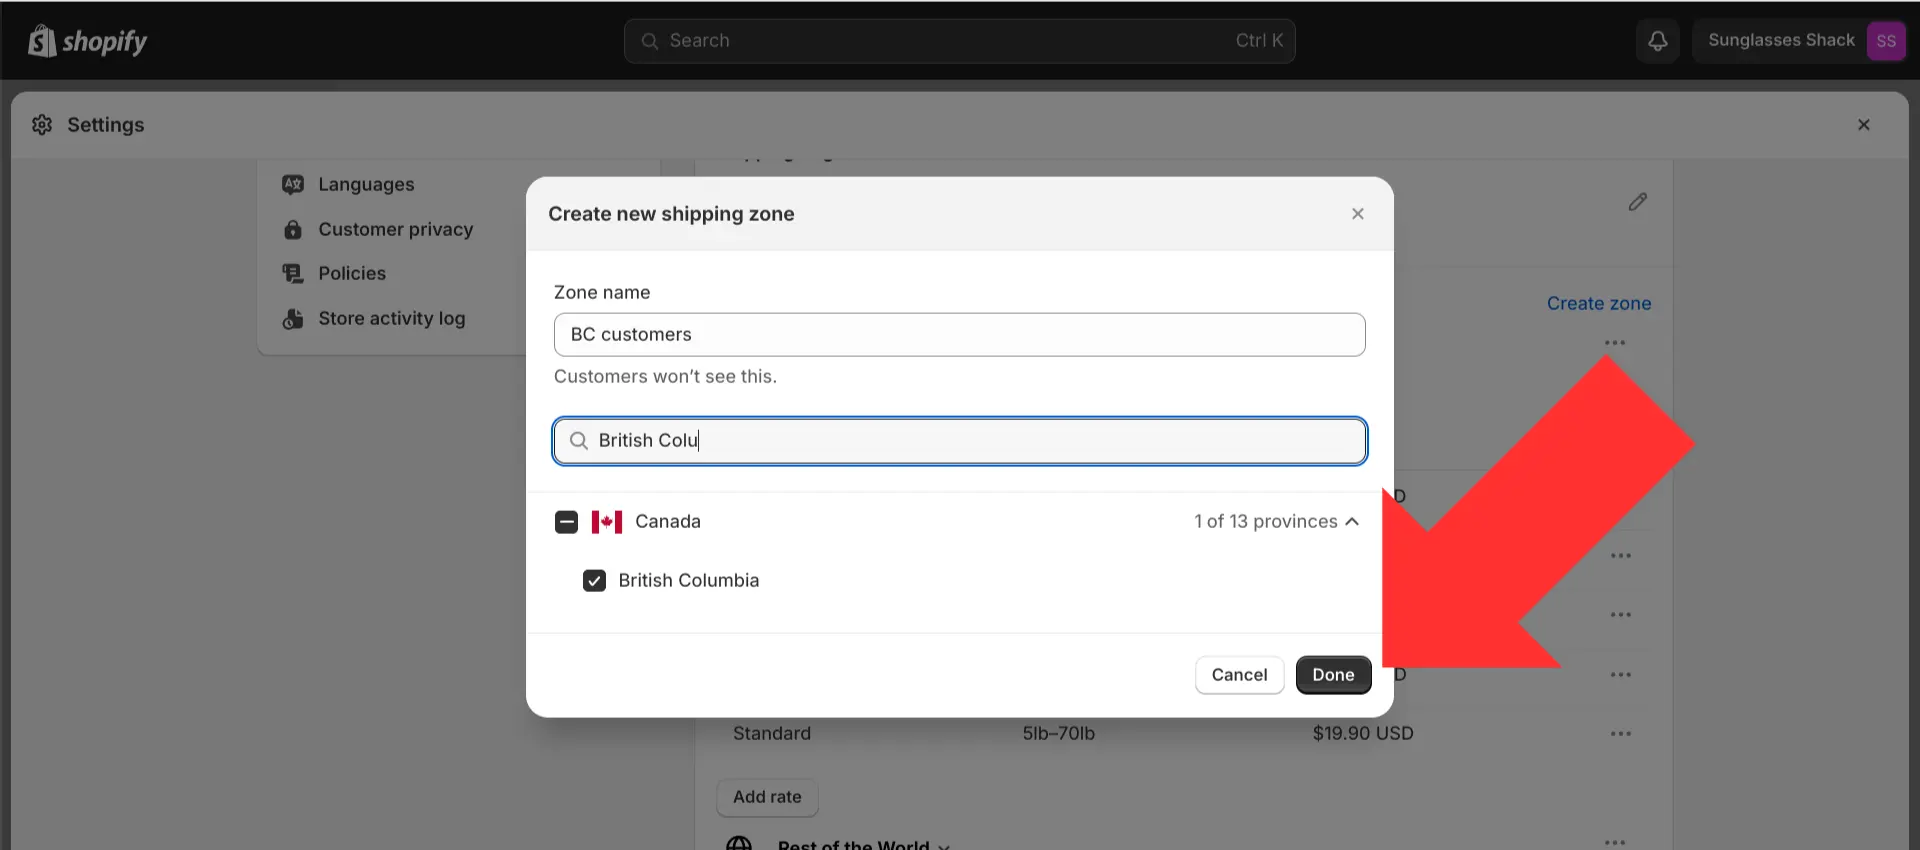
Step 5. Enter a name for your new shipping zone, then use the search bar to find the countries or regions that you want to add to the zone. To set Shopify shipping rates by zip code or city, you’ll need the help of a third-party app — this isn’t an available option in the default Shopify settings.
Once everything is set up for your new shipping zone, select “Done”.
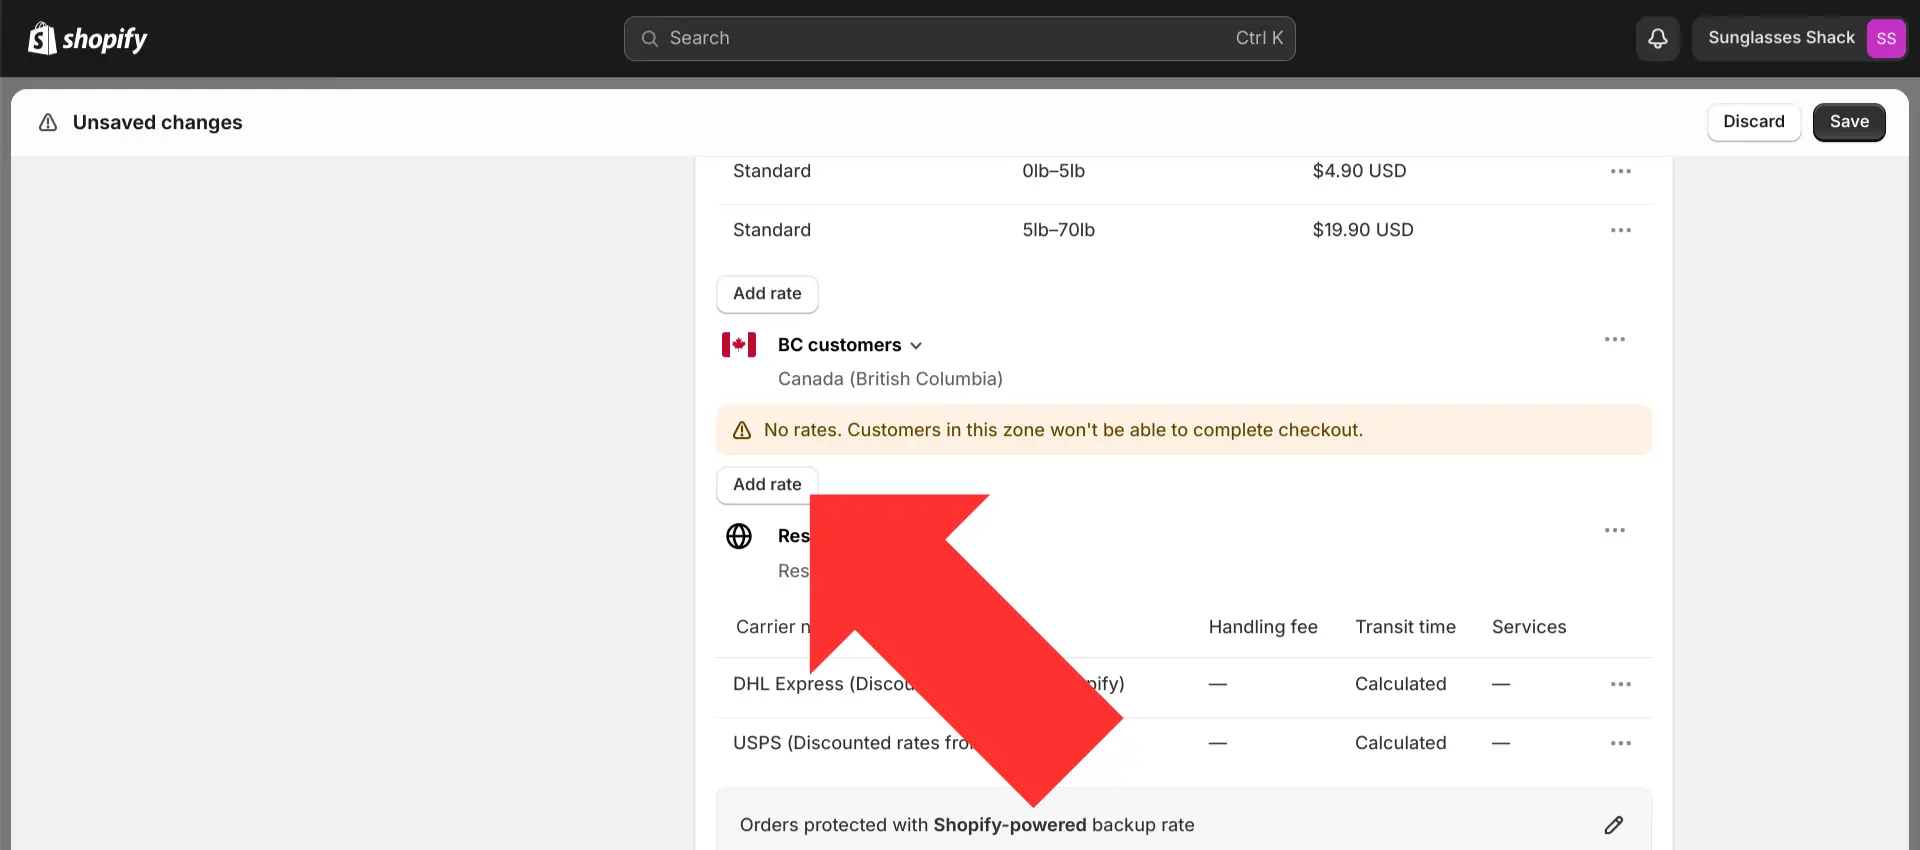
Step 6. Customers located in your new shipping zone won’t be able to check out until you establish the shipping rates. Select the “Add rate” option for your new shipping zone.
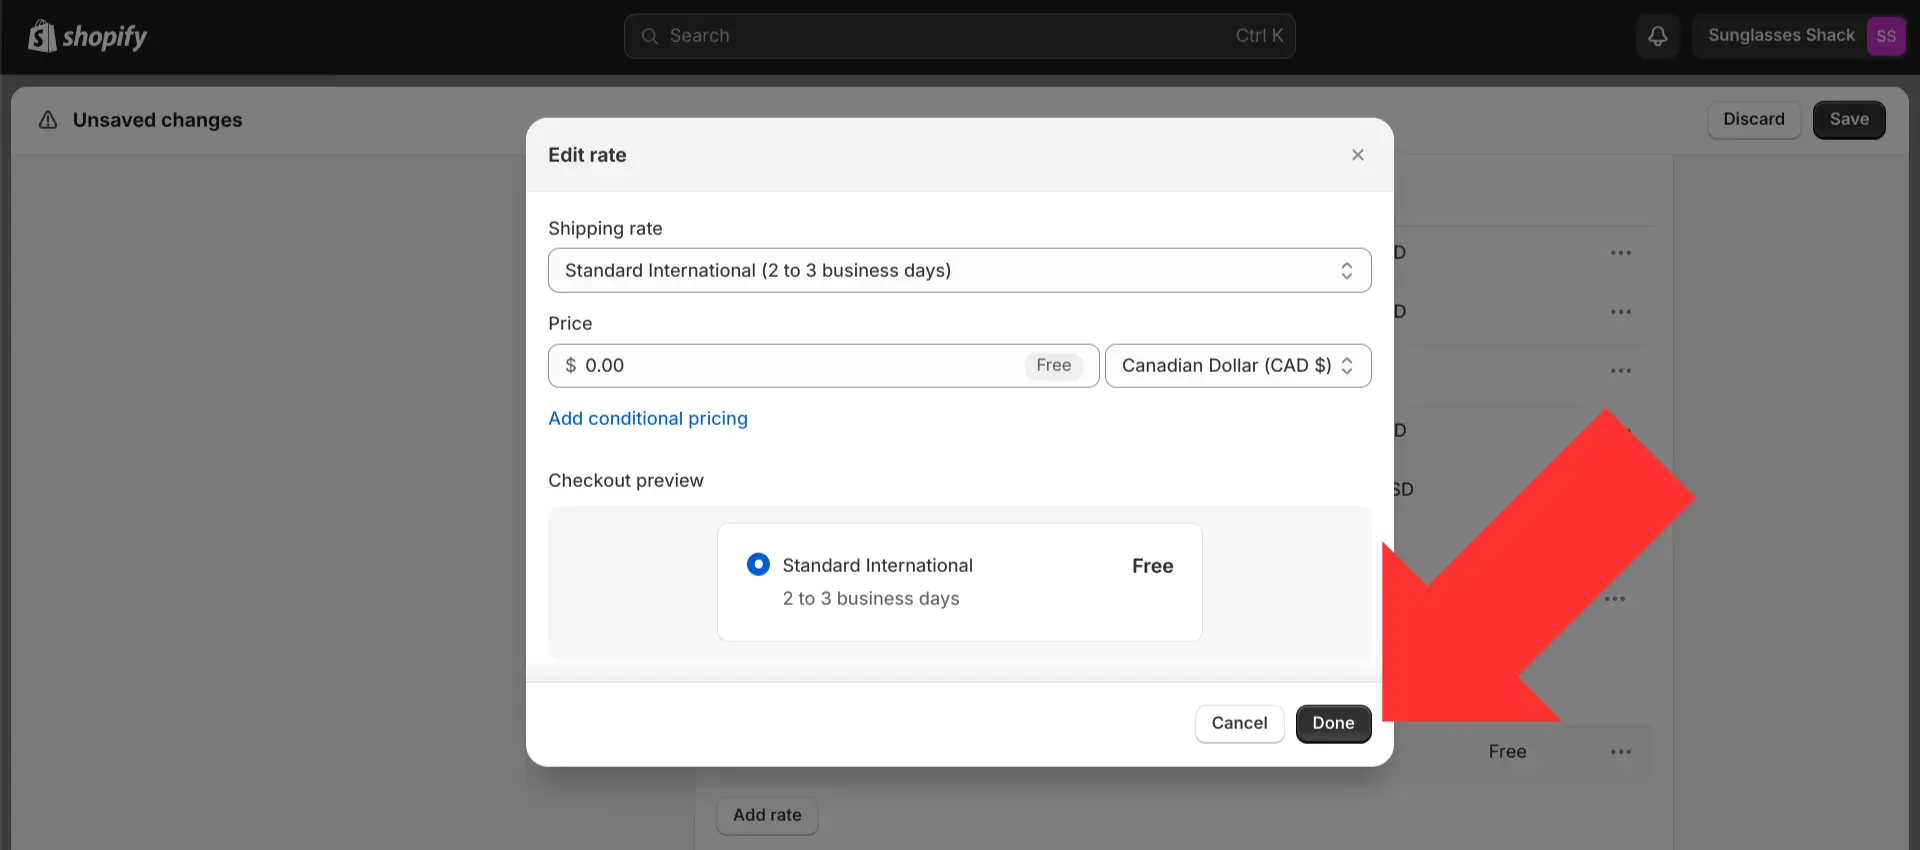
Step 7. To offer free shipping, choose the “Use flat rate” option, set the expected delivery date (you can choose from pre-selected options, such as 1-2 business days, 6-10 business days, etc., or enter custom data), set the price to $0.00, and then select “Done”.
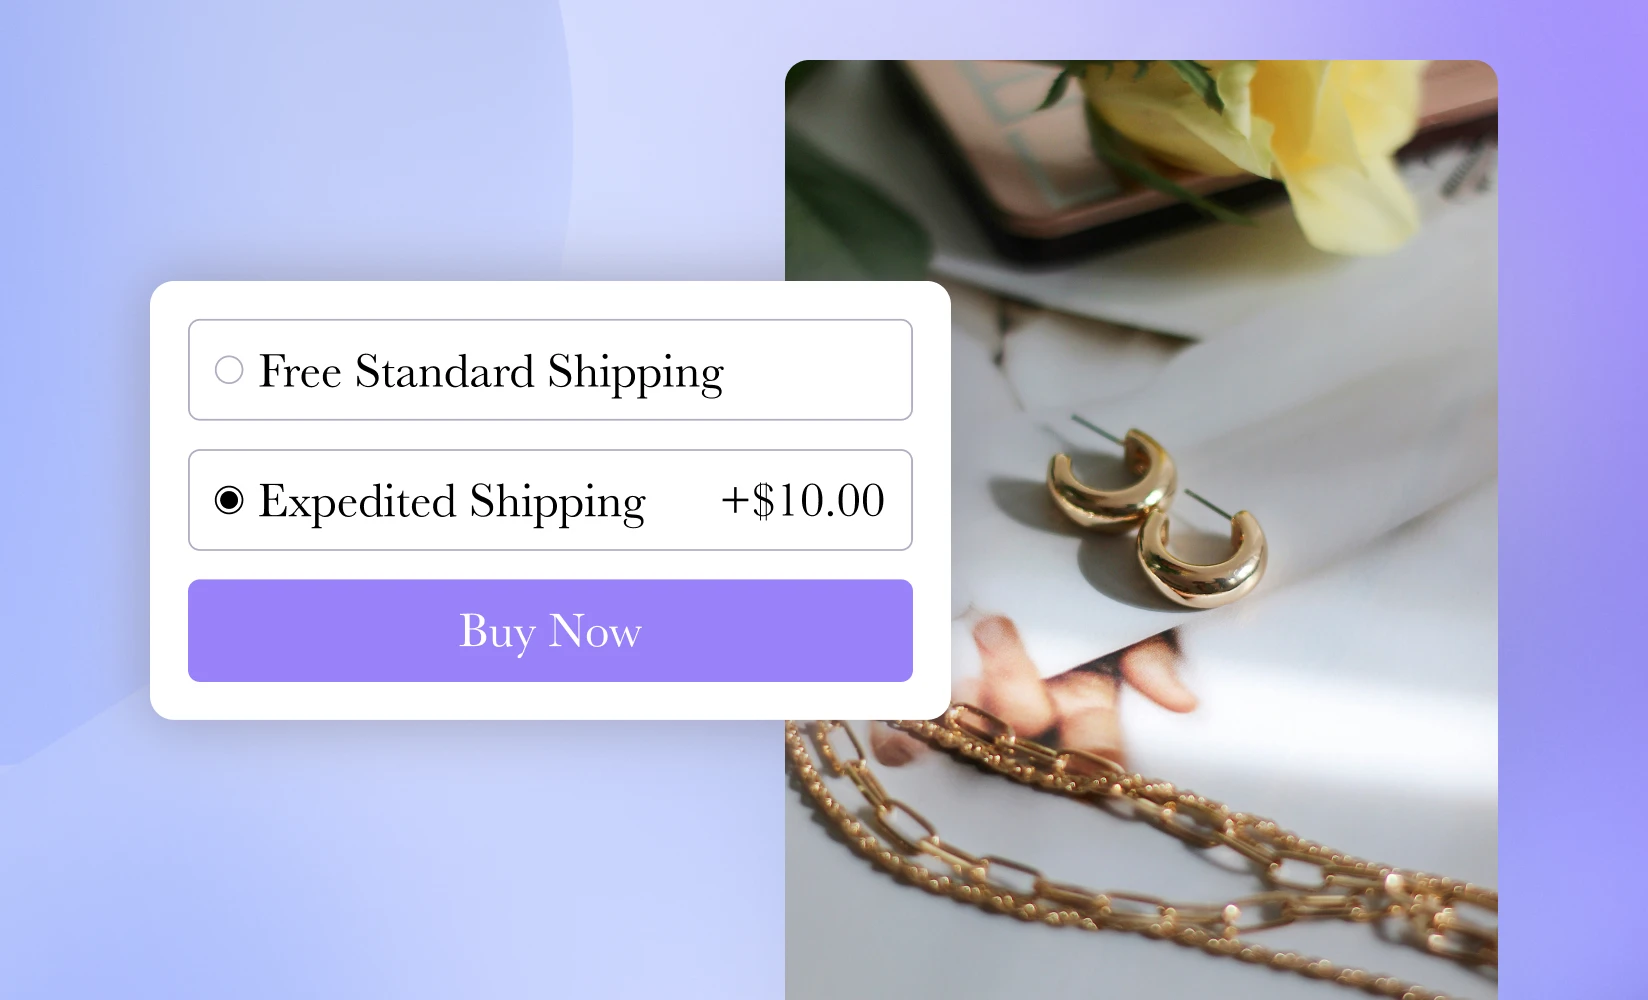
It’s worth noting that you can set up several different rules and conditions for the same shipping zone. For example, you could make free shipping the standard option but charge a fee for expedited shipping.
Creating a free shipping banner for your products based on shopper location
Offering free shipping isn’t going to do your store’s bottom line much good if your customers don’t even know about it.
A banner that reads “Free Shipping” on your product pages would certainly increase awareness — but unless you offer free shipping to everyone, such a banner would be misleading to those who don’t have access to this offer.
Shogun’s Targeted Experiences feature provides a solution for such scenarios. On the same page, you’ll be able to display a free shipping banner to some visitors but not others.
Personalize your Shopify product pagesWith Targeted Experiences, you can make your content more relevant by displaying different versions of the same page to different types of visitors.Get started now
To demonstrate exactly how this tool works, let’s go back to the example we went over above and imagine that you want to display a free shipping banner to your British Columbia customers only:
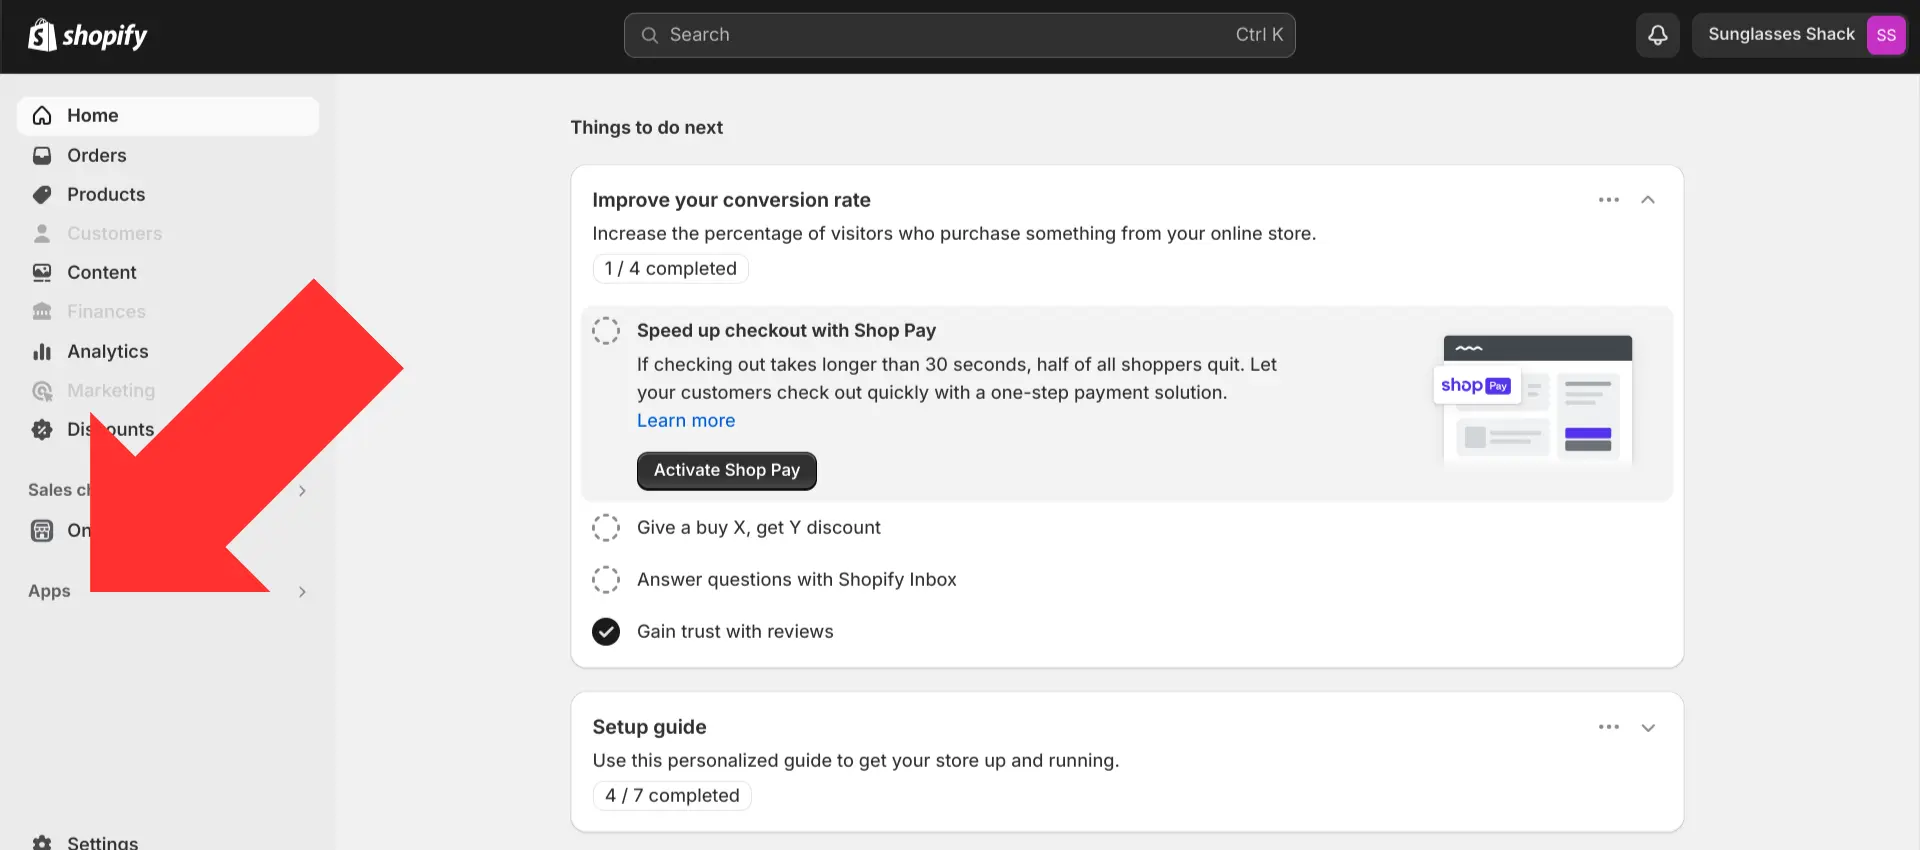
Step 1. After installing Shogun, select the “Apps” option in the left sidebar of the main Shopify dashboard.
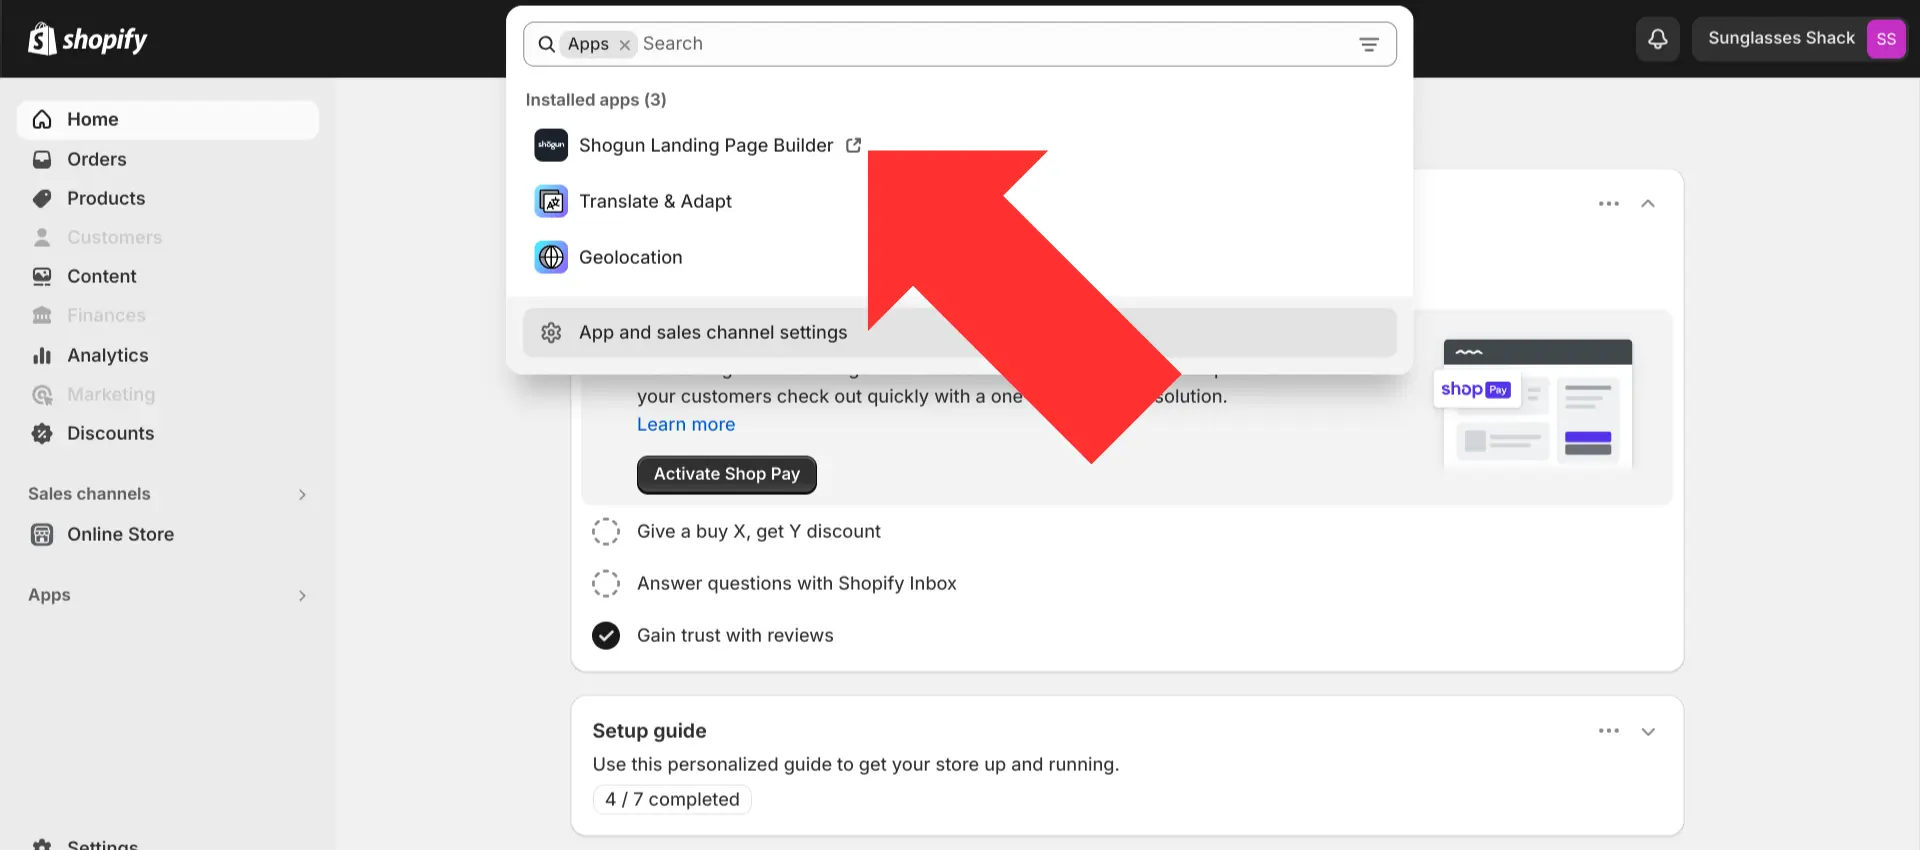
Step 2. Open Shogun.
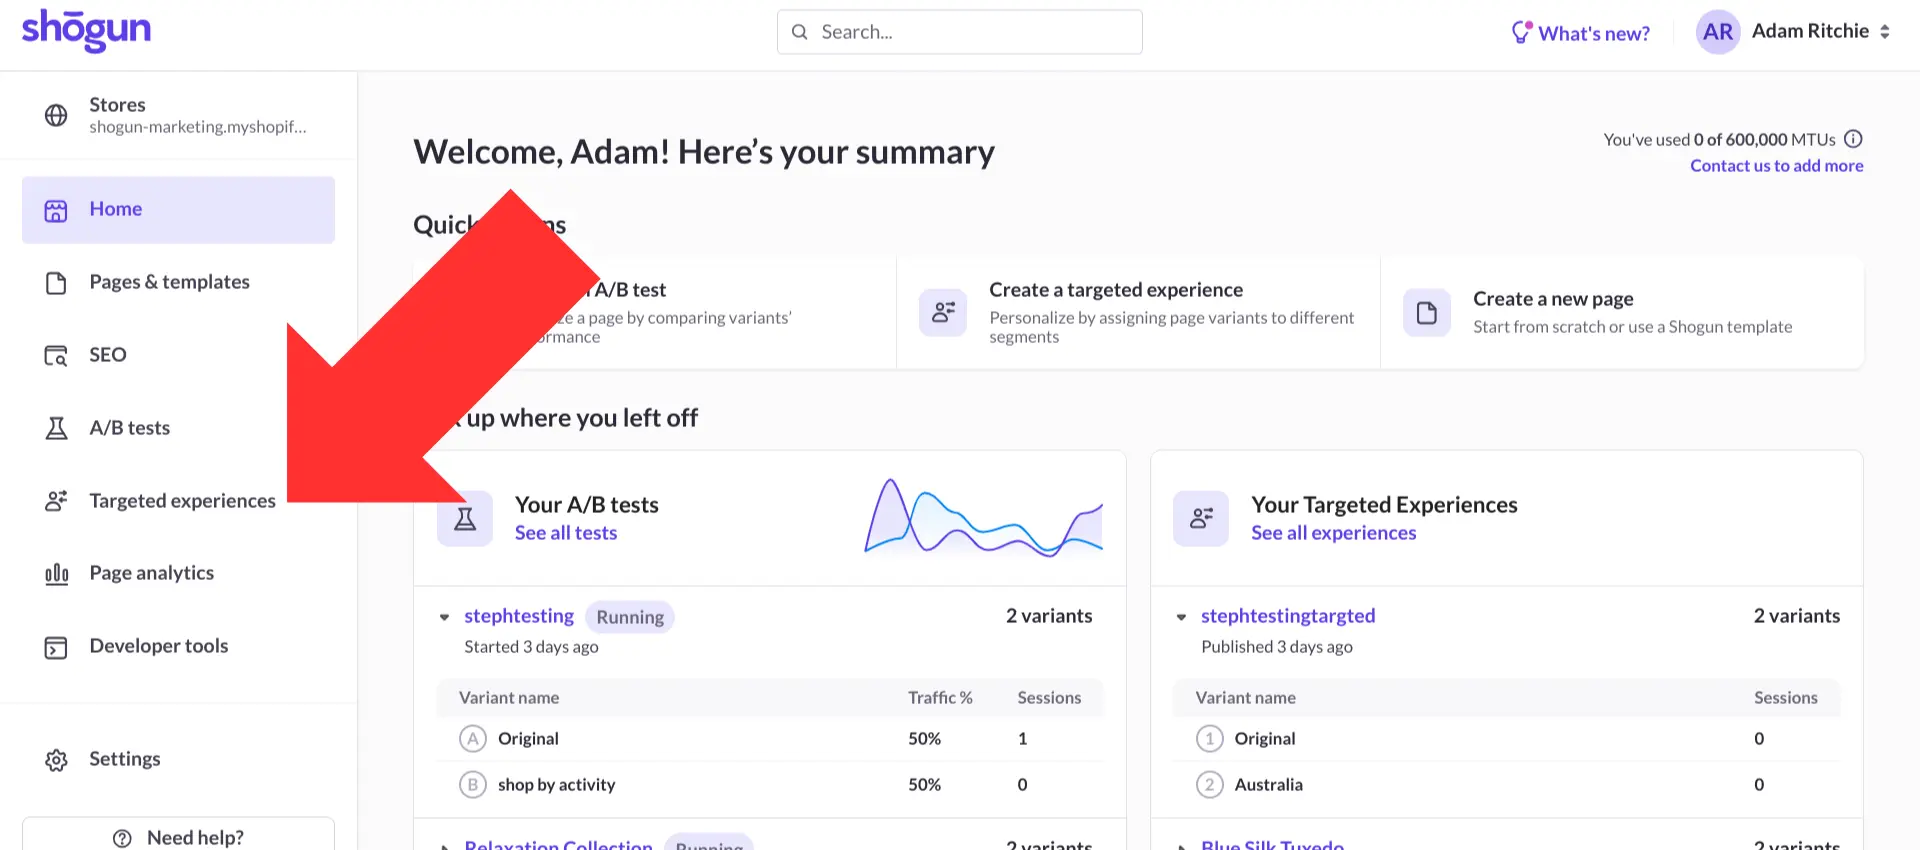
Step 3. First, you’ll need to create an audience segment for the type of visitor you’ll be targeting. Select the “Targeted experiences” option in the left sidebar of the main Shogun dashboard.
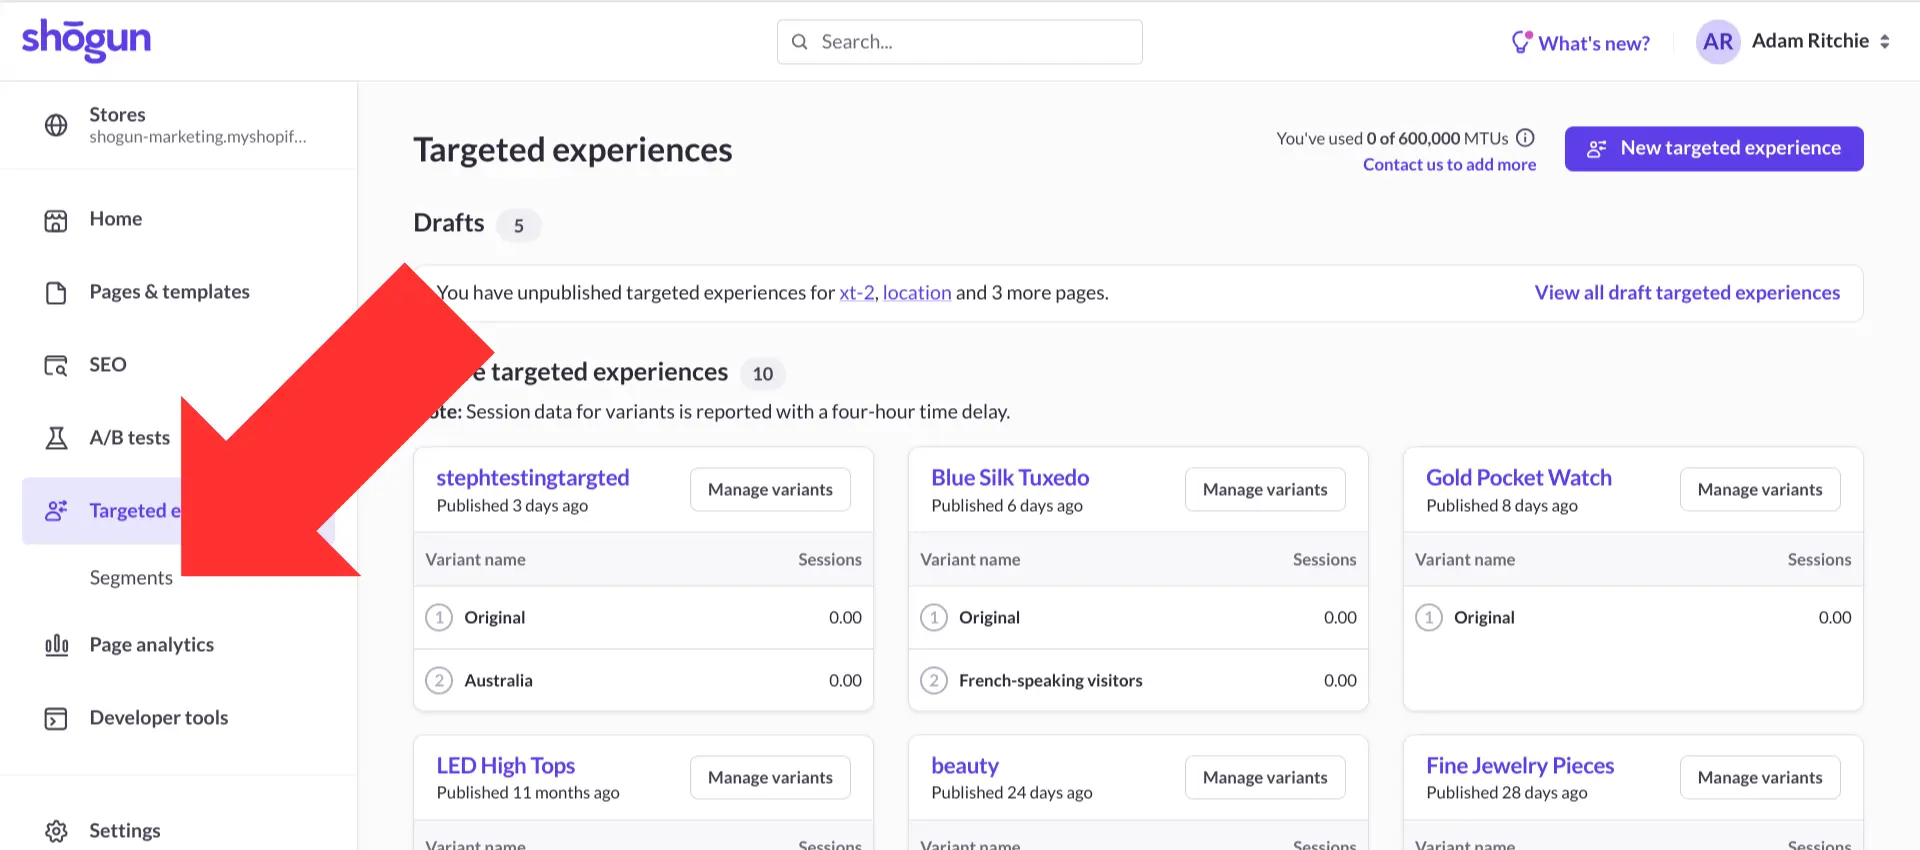
Step 4. Select “Segments”.
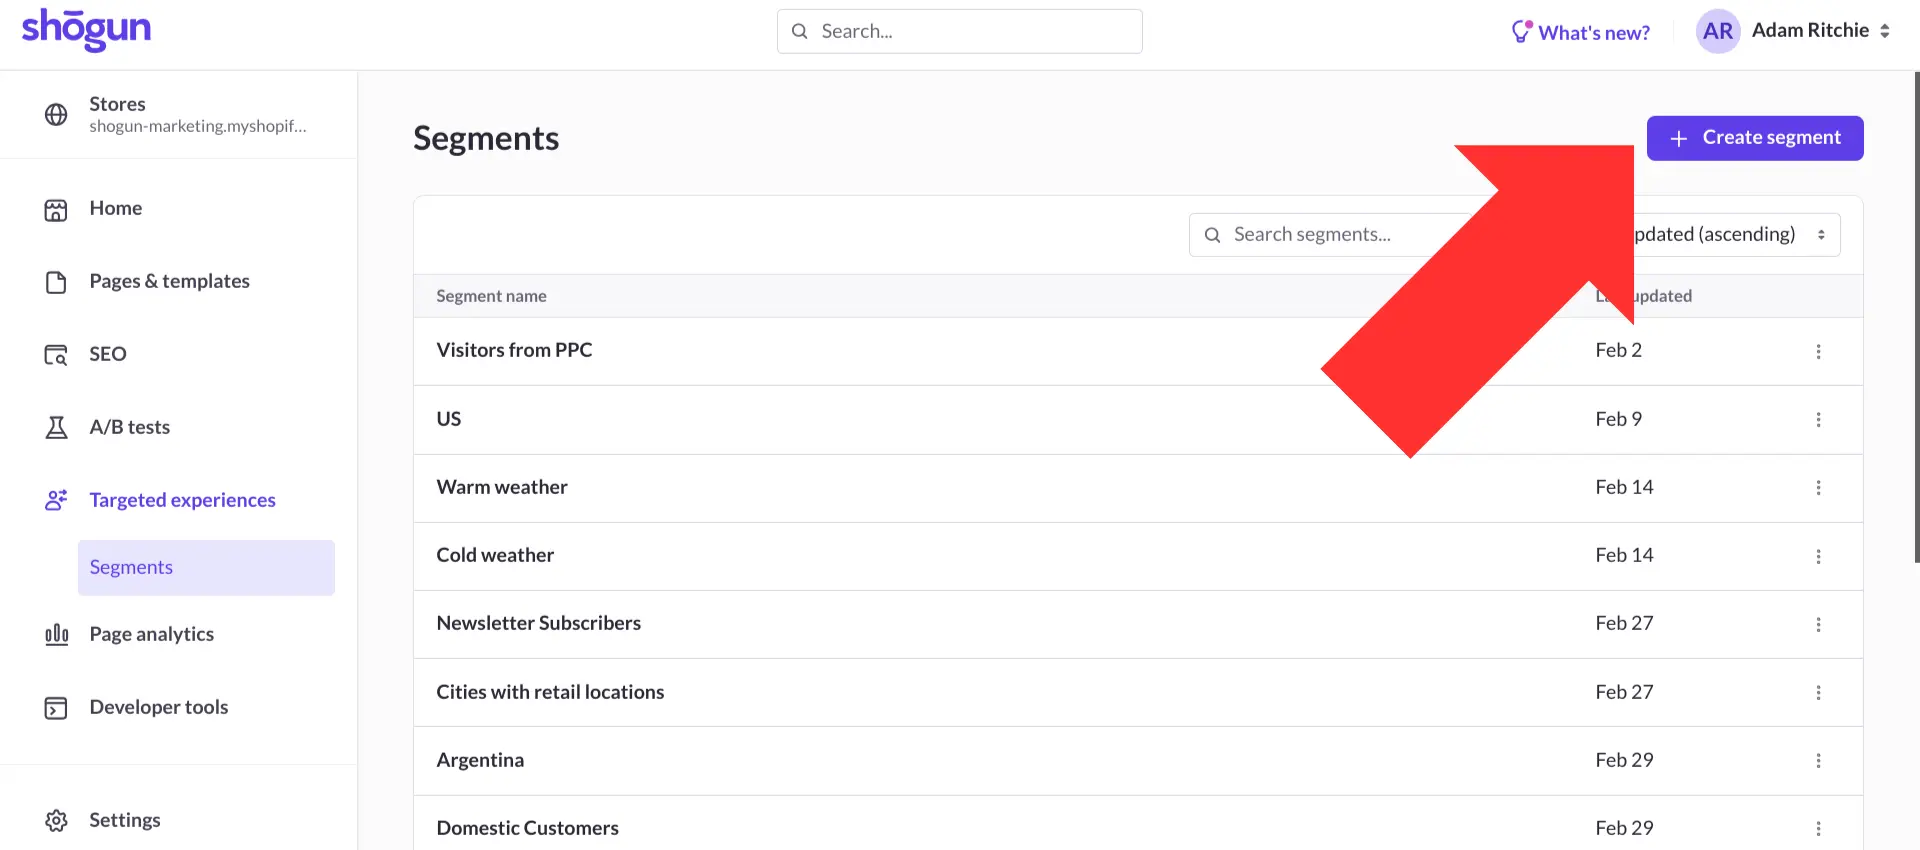
Step 5. Select “Create segment”.
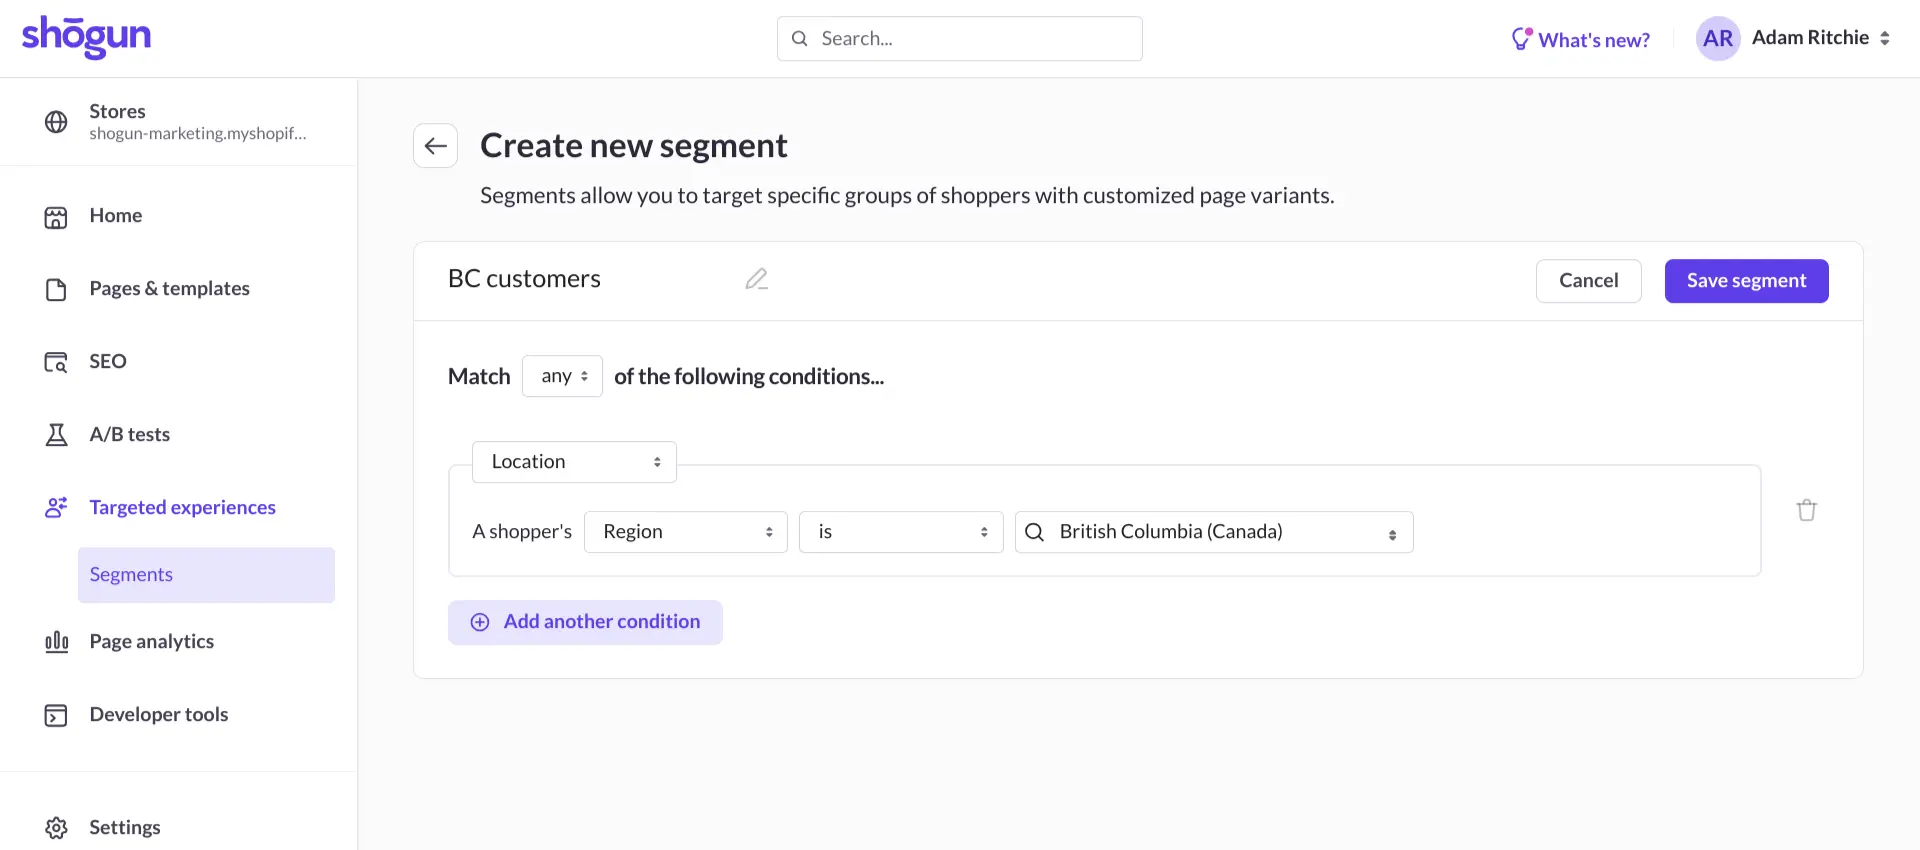
Step 6. Shogun provides you with several different types of conditions that you can use to build your Targeted Experiences segments, including URL parameters, referring domain, and the visitor’s location. In this example, we’ll create a segment with the condition that the visitor must be from British Columbia.
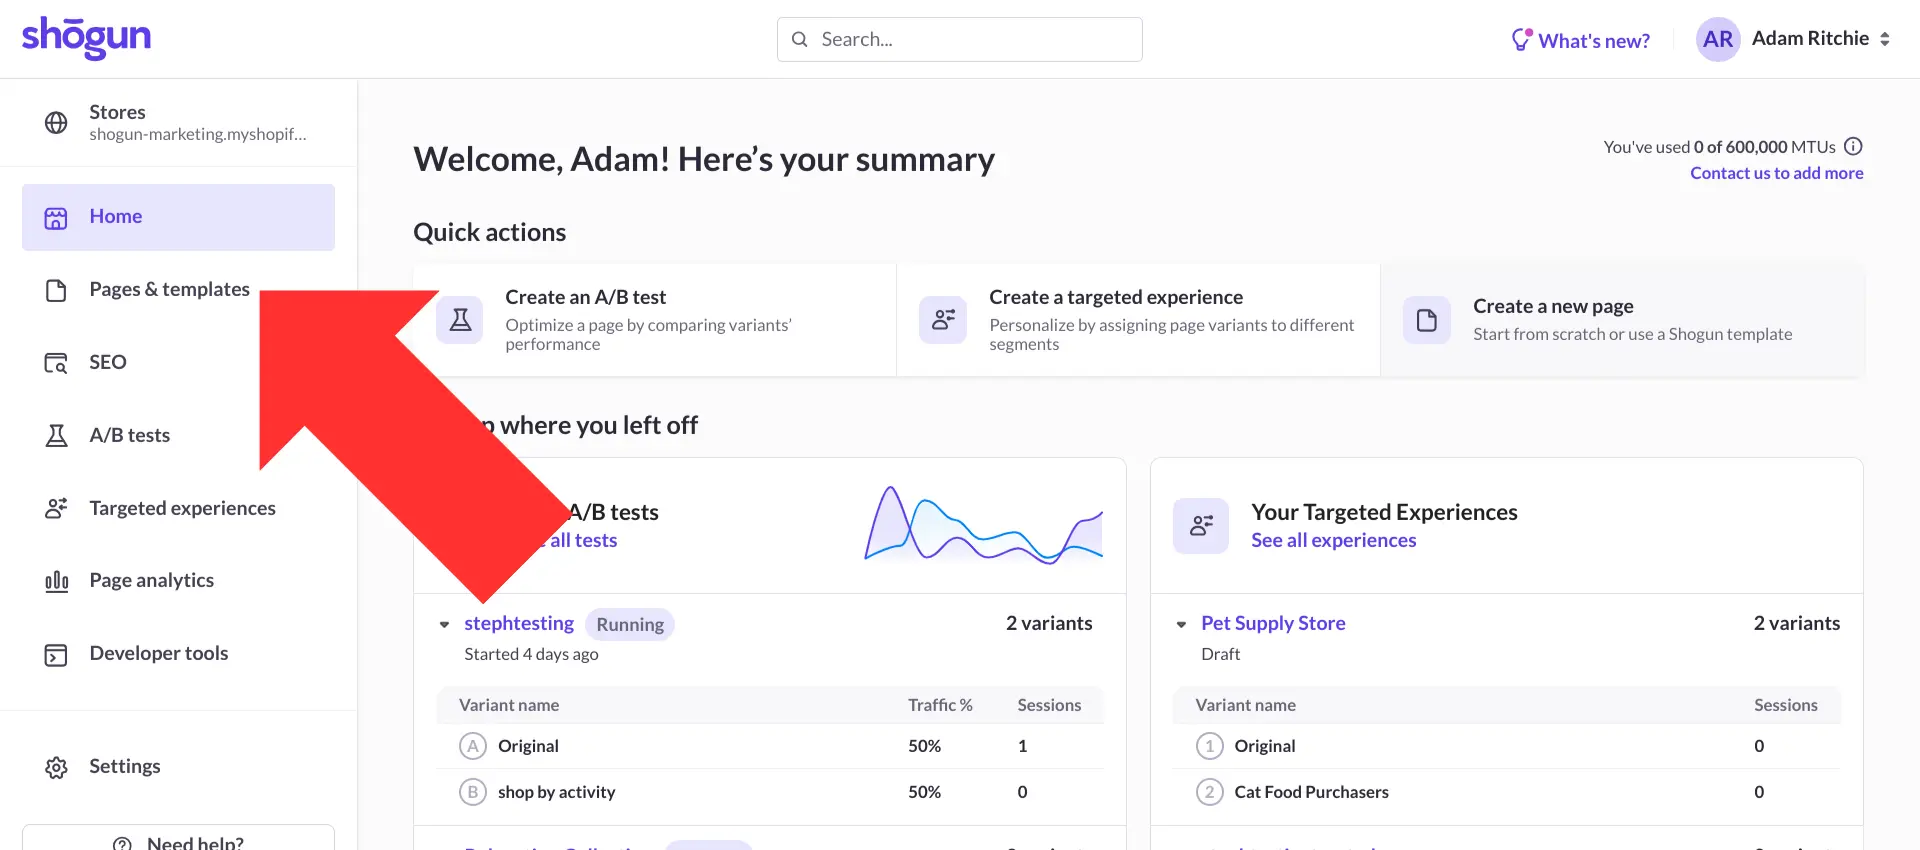
Step 7. To create a second version of a product page that displays the free shipping banner, select the “Pages & templates” option in the left sidebar of the main Shogun dashboard.
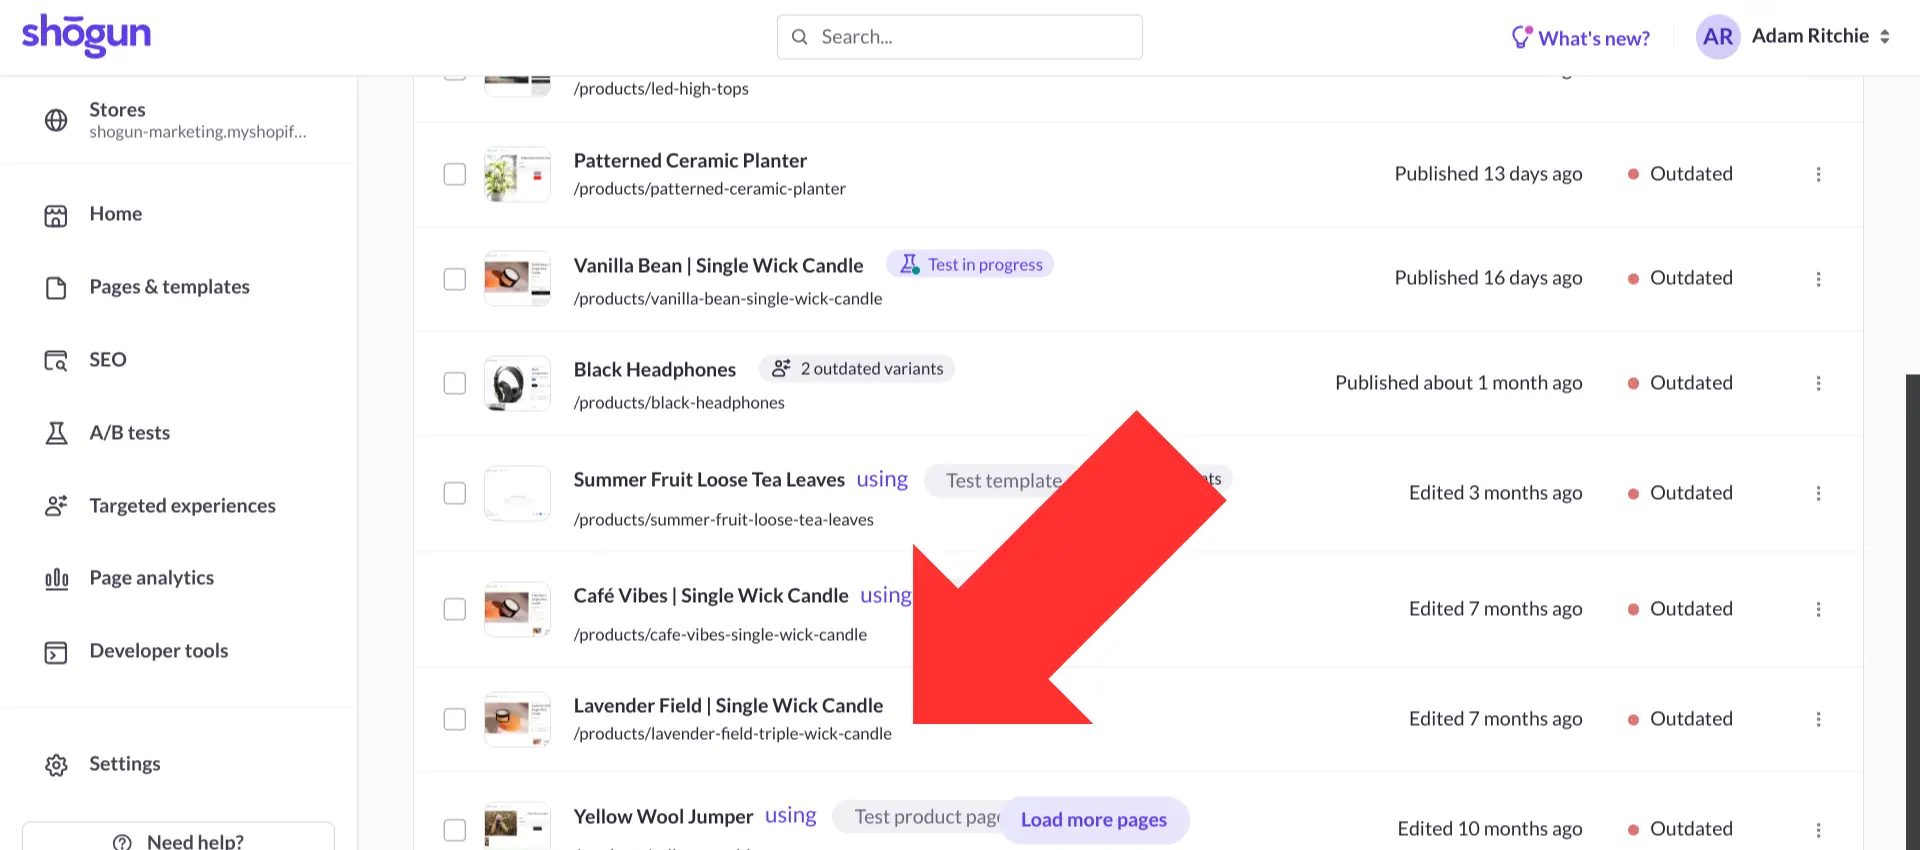
Step 8. Select any product page that you would like to customize.
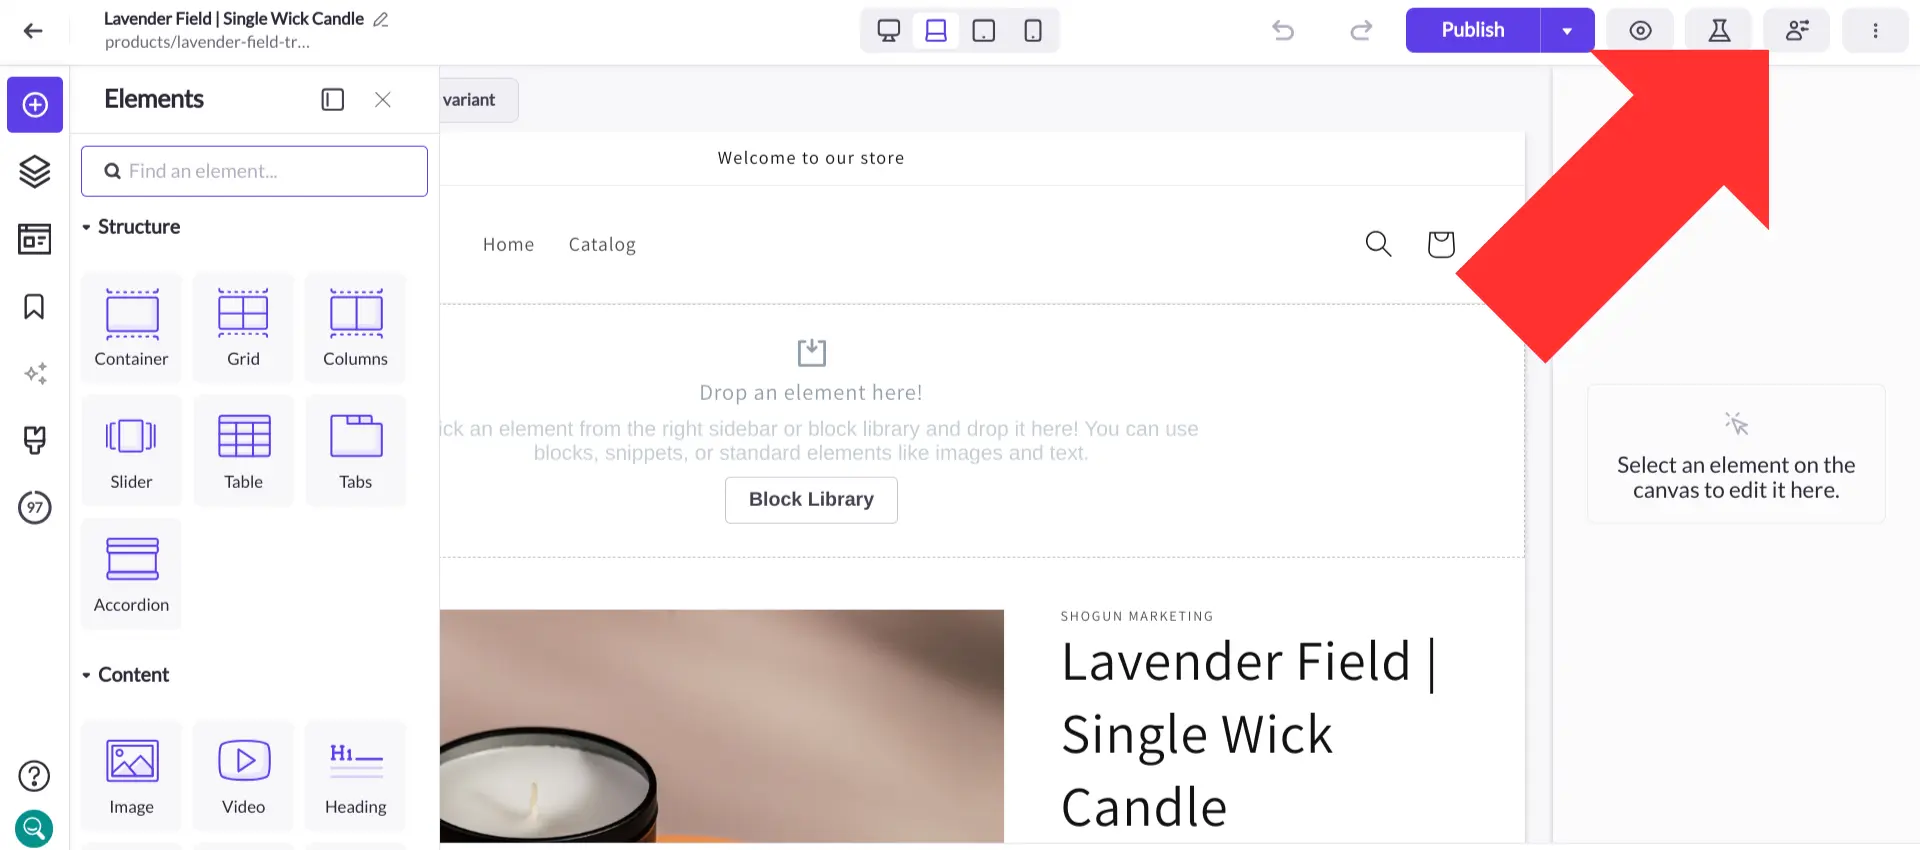
Step 9. This will open the page in Shogun’s visual editor. Click on the Targeted Experiences icon that’s located near the top-right corner of your screen.
Step 10. Toggle the “Enable targeted experiences” option on.
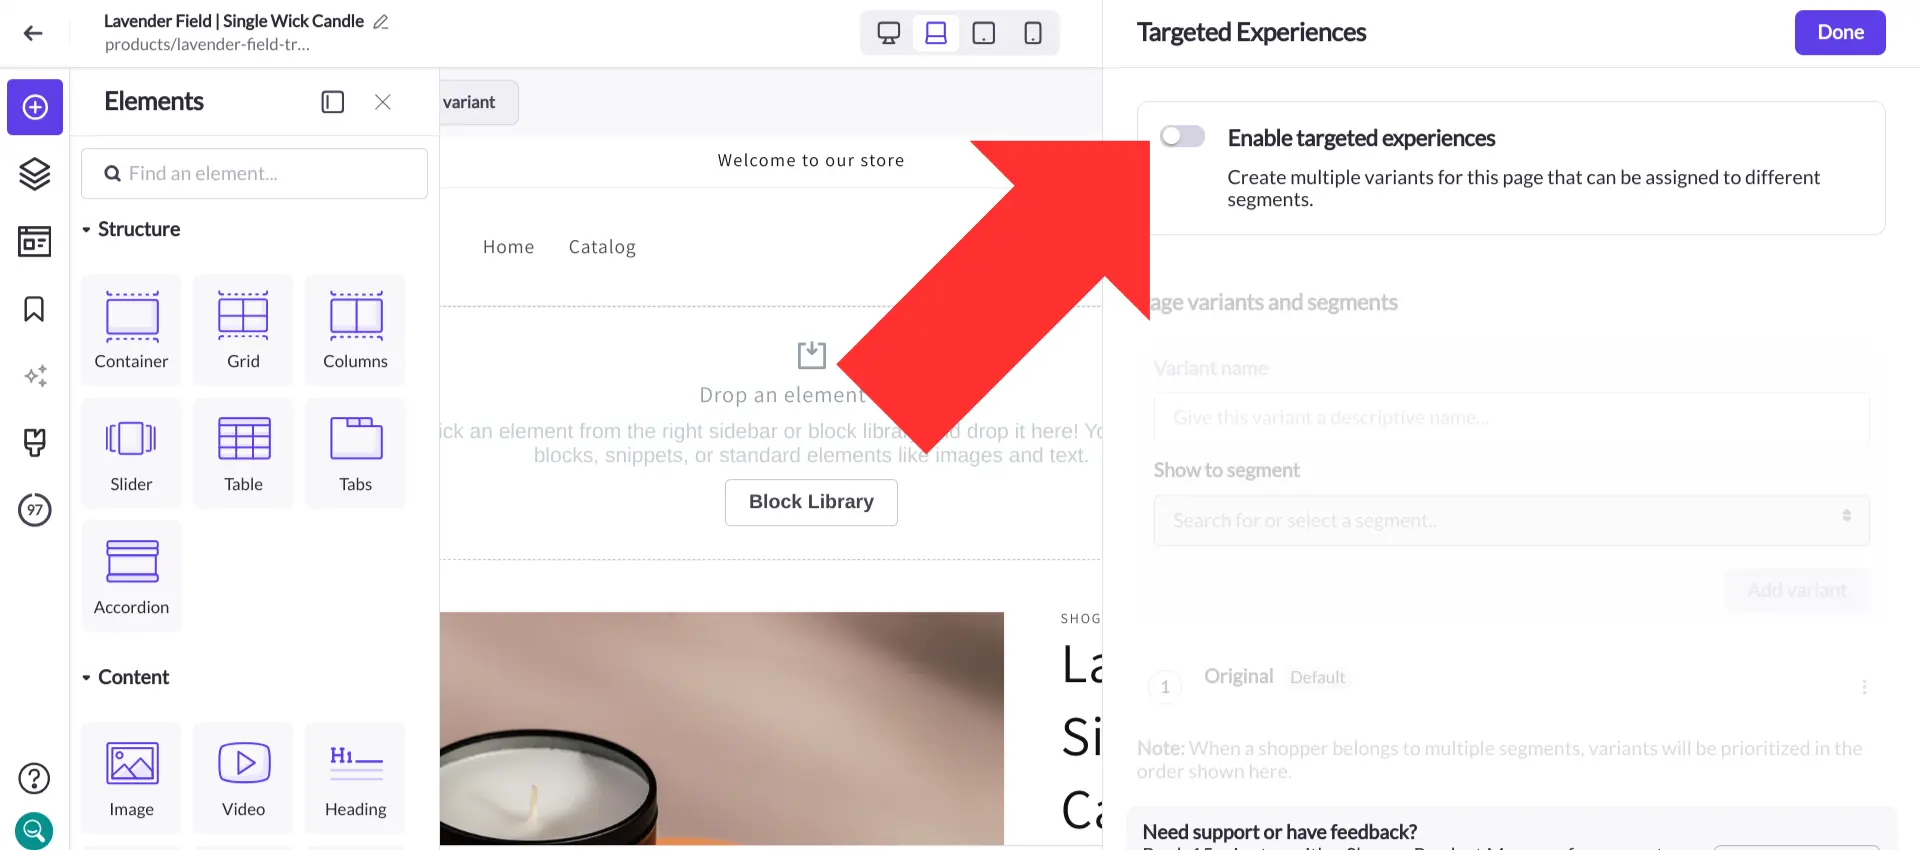
Step 11. Choose a name for the new page variant, select the segment you just created for the location you want to target, and then select “Add variant”.
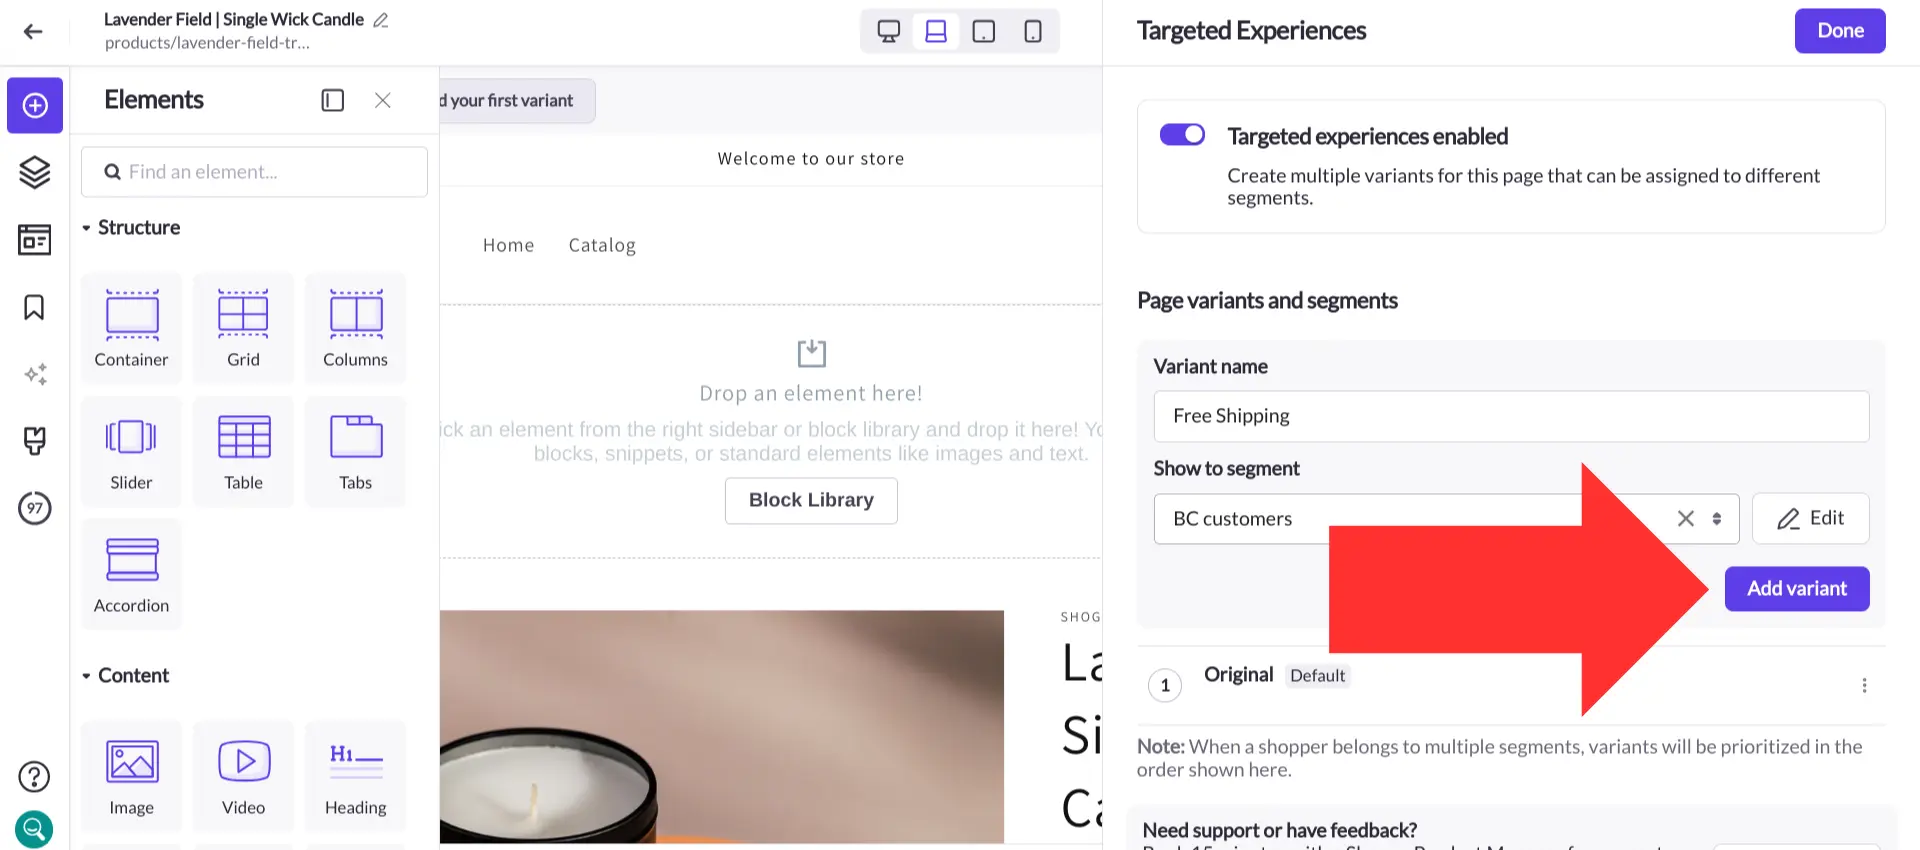
Step 12. The visual editor allows you to customize the new page variant however you want — in this case, you can use the text element to quickly add a simple free shipping banner.
Once you’re done making your edits, save your changes and hit “Publish All”.
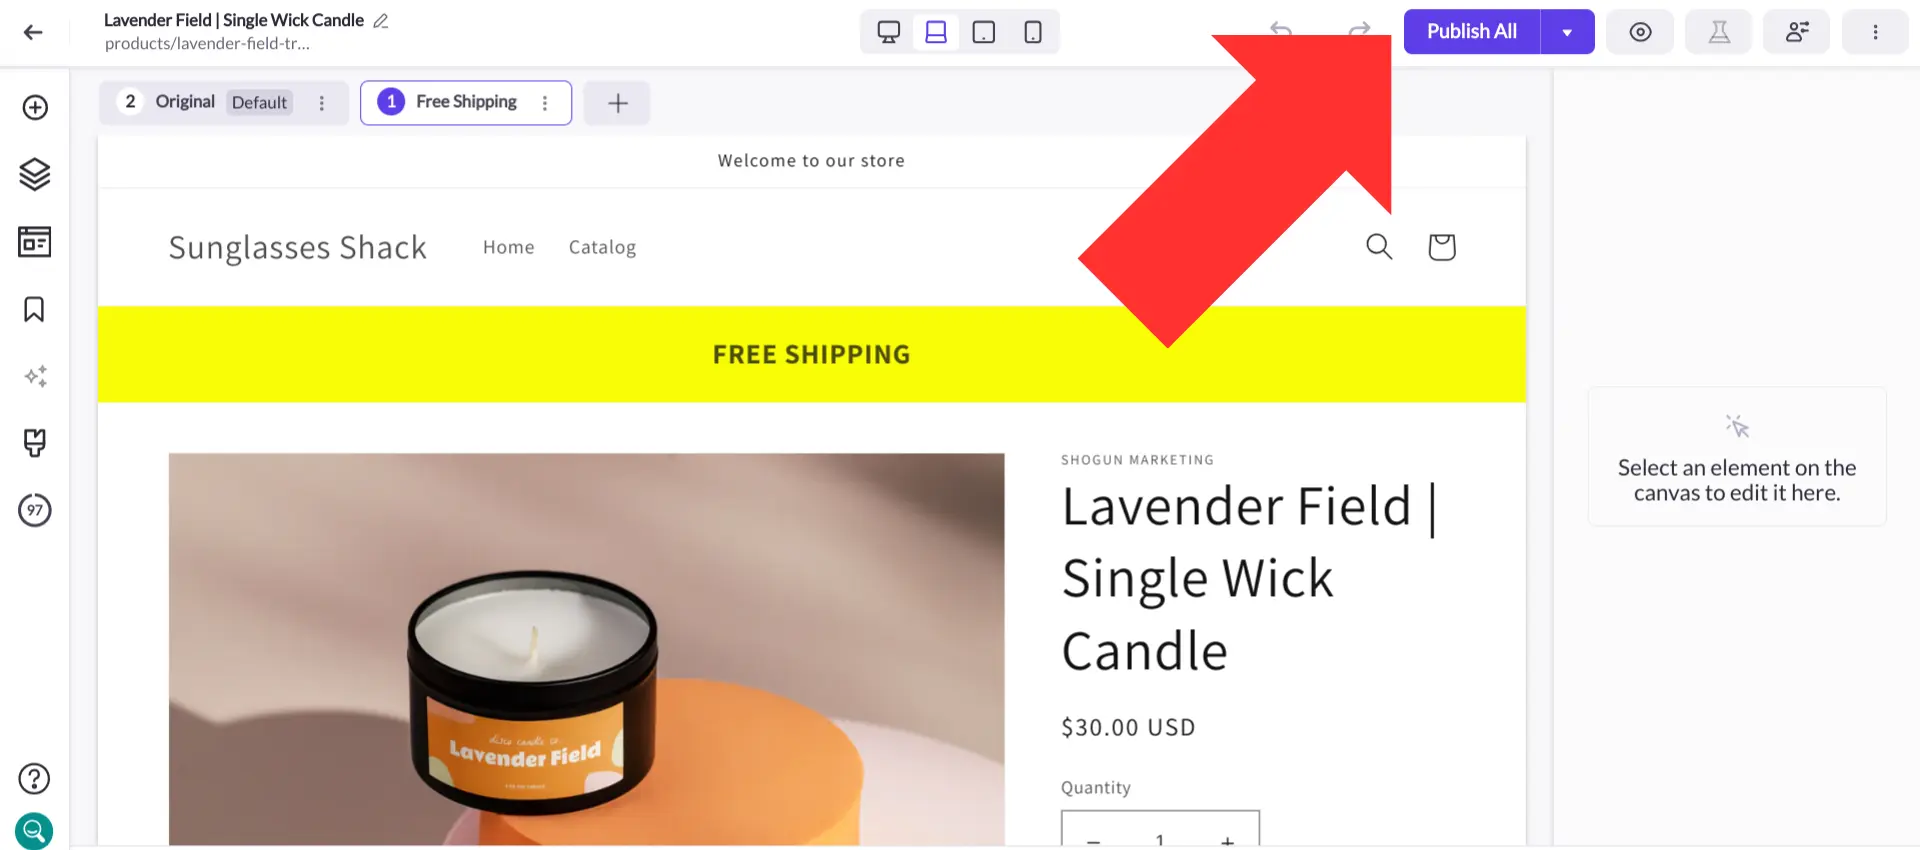
Now visitors located in British Columbia will see a free shipping banner on your product page, while everyone else will still see the original version. More visitors will be aware of free shipping when it’s available (which should then lead to more sales), while those who don’t have access to free shipping won’t be confused by a promotion that doesn’t apply to them.
This is just one example of the many ways that you could use Targeted Experiences to make your Shopify storefront more personalized, improve customer loyalty, and raise revenue.
Personalize your Shopify product pagesWith Targeted Experiences, you can make your content more relevant by displaying different versions of the same page to different types of visitors.Get started now

Phill Moorman
Phill, the VP of Marketing at Shogun, is a seasoned expert in ecommerce. With a keen focus on strategic marketing, Phill drives growth and cultivates brand success in the dynamic online marketplace.

