Adding a Custom Liquid Section to Shopify Like a Pro
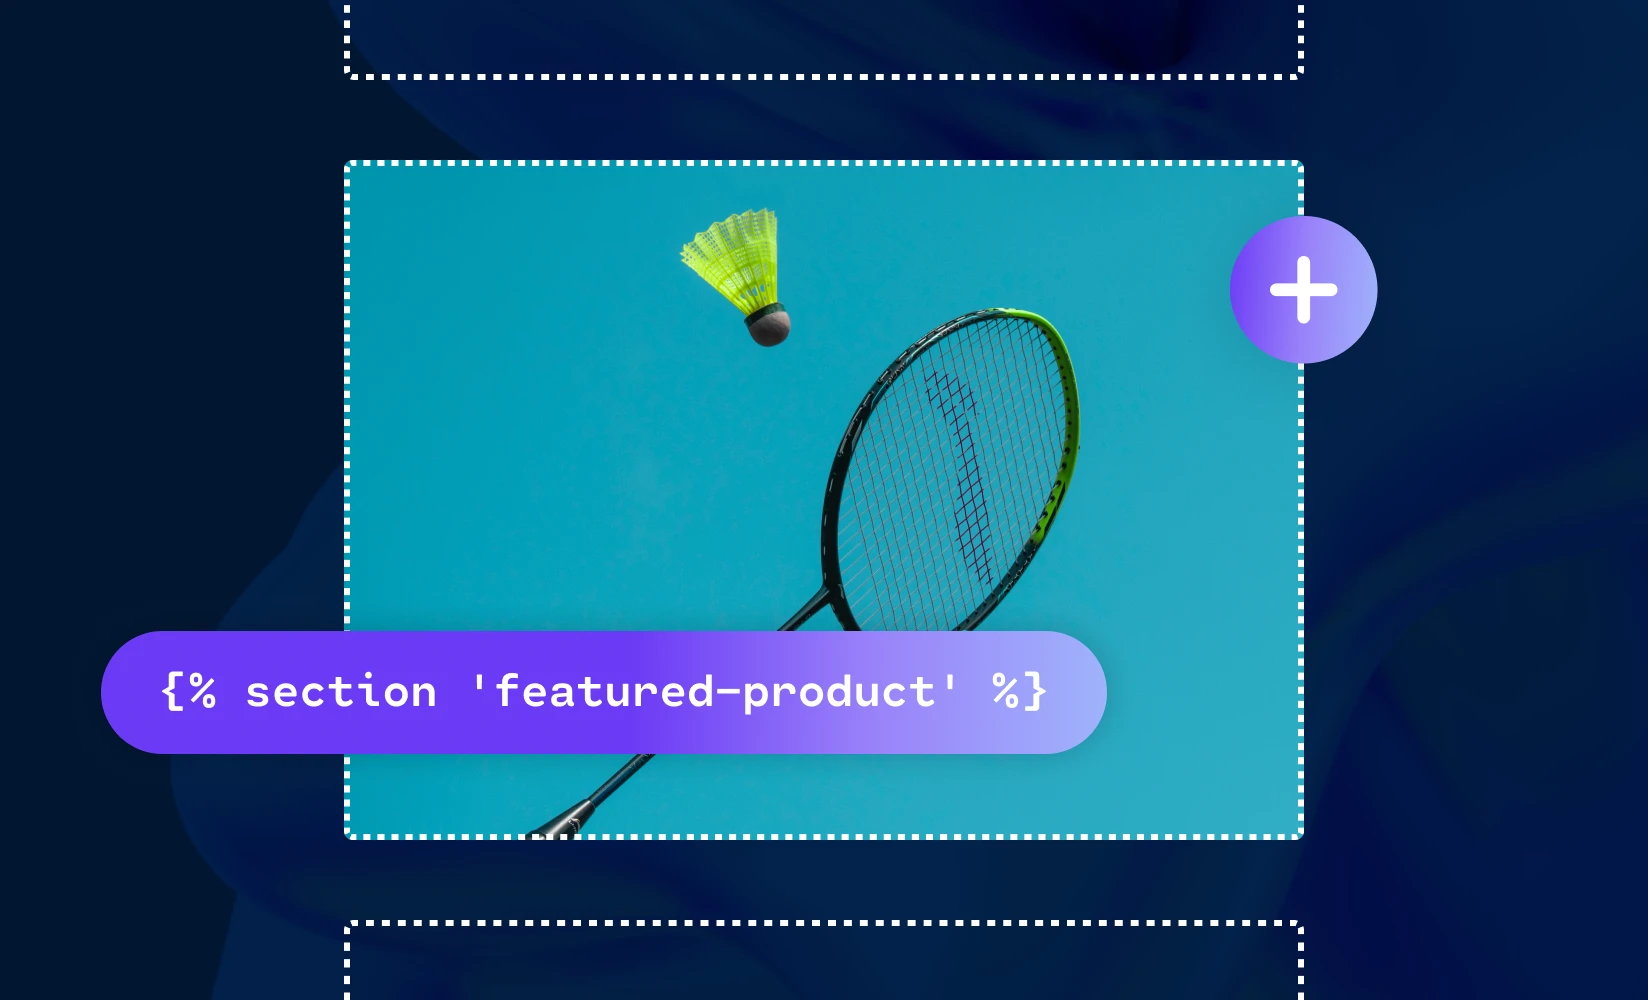
An effective way to make your store unique is to find an edge by using Shopify custom liquid section elements to create an immersive and personalized experience for prospective customers.
This guide will show you how to add custom sections using the Liquid templating language.
How the Pros Use Shopify Liquid Sections to Customize Their Store
Sellers who make use of Liquid Shopify sections to bring their store to life definitely have an edge over the competition. These sections allow shoppers to feel a level of personal touch that stores using a generic template might not have. But what exactly are these sections, and what can you do with them?
Liquid ‘Sections’ are customizable building blocks within a Shopify theme. They’re essentially modular components that come together to enhance the aesthetic and functionality of your store. Just like with other coding languages, Liquid lets you customize the elements that make your store what it is.
Adding a Liquid Section to Your Shopify Store Step-by-Step
Let’s go through the step-by-step process of adding a Liquid section to your Shopify store. If you’re confident in your ability to code or are willing to learn Shopify Liquid, it can be a great way to take your ecommerce site to the next level.
Step 1: Navigate to Your Online Store
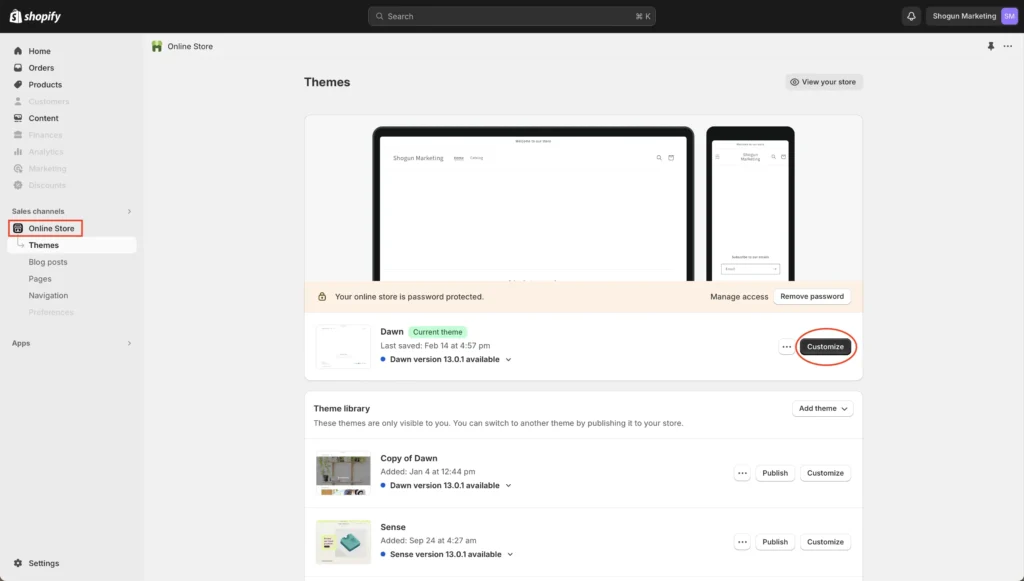
To start, log in to your Shopify dashboard and click on ‘Online Store’ > ‘Themes’ in the left-hand navigation menu. Click ‘Customize’ and you’ll be led to your website.
Step 2: Write Your Liquid Code
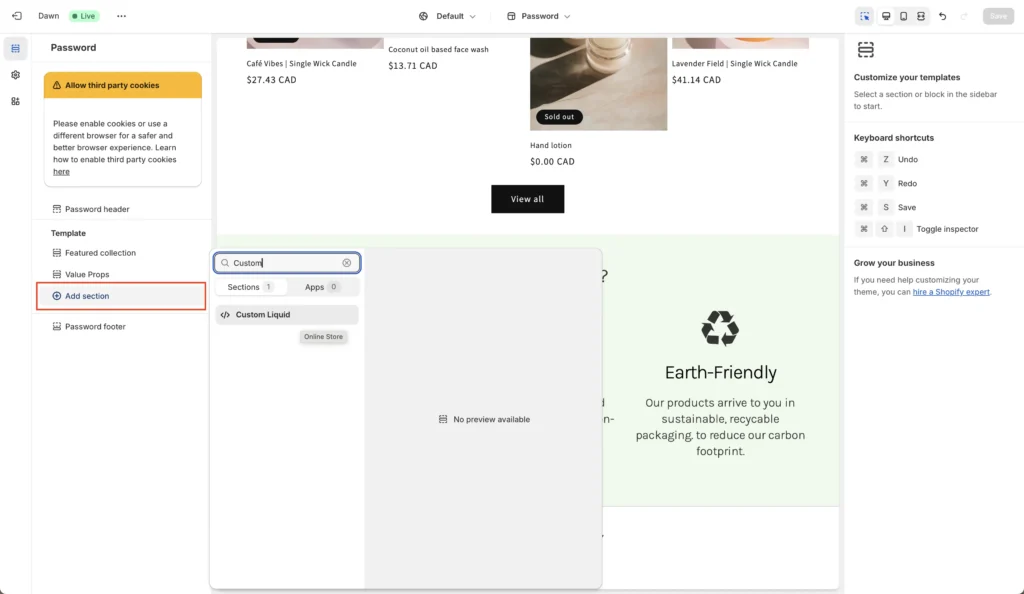
Add a section using the button on the left-hand navigation bar and search for ‘Custom Liquid.’ You’ll see a textbox on the right-hand side where you can enter all sorts of liquid code to your liking.
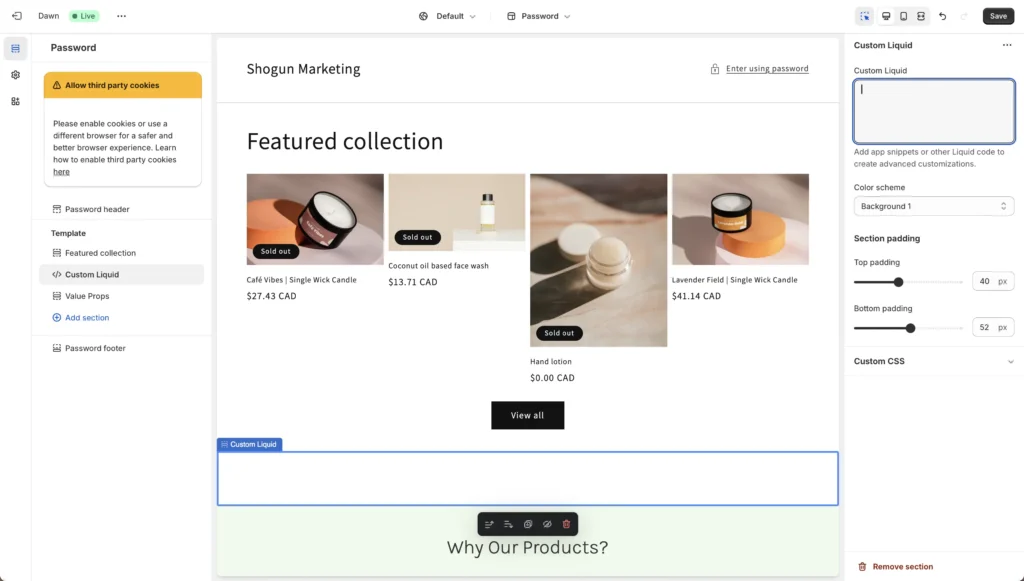
Liquid code will help you create content for this section, whether text, products, collection templates, images, or other custom elements. If you’re completely new to Liquid, Shopify has some basic tutorials and examples you can use, or you can look at our Shopify Liquid Tutorial to get started.
For example, here is Liquid for a custom hero that can be applied to collection pages:
<div class="collection-hero">
    <div class="collection-hero__intro">
      <h1 class="collection-hero__title">
          Browse {{collection.title}}
      </h1>
      <div class="collection-hero__description">
          {{collection.description}}
      </div>
    </div>
    {% if collection.image %}
        <div class="collection-hero__image">
            <img src={{ collection.image | image_url }} alt="{{collection.title}}" />
        </div>
    {% endif %}
</div>
Using Shogun to Create Sections on Shopify
Although Shopify Liquid caters to many e-commerce owners’ needs, online store owners sometimes need an efficient and user-friendly way to create sections on Shopify. Shogun’s flexible visual editor and dynamic features are a fantastic alternative if you want to customize and optimize your site like never before.
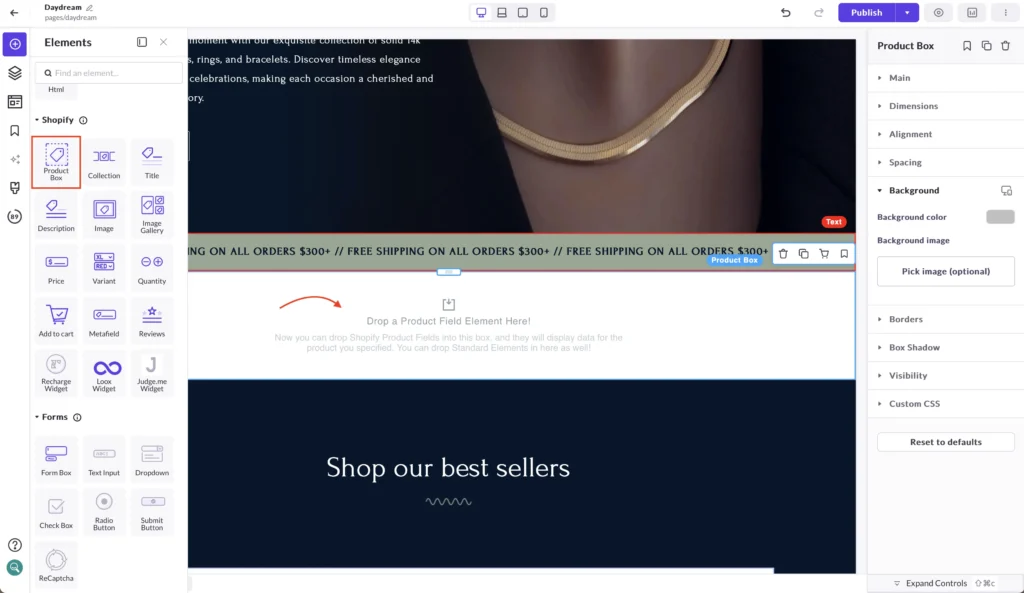
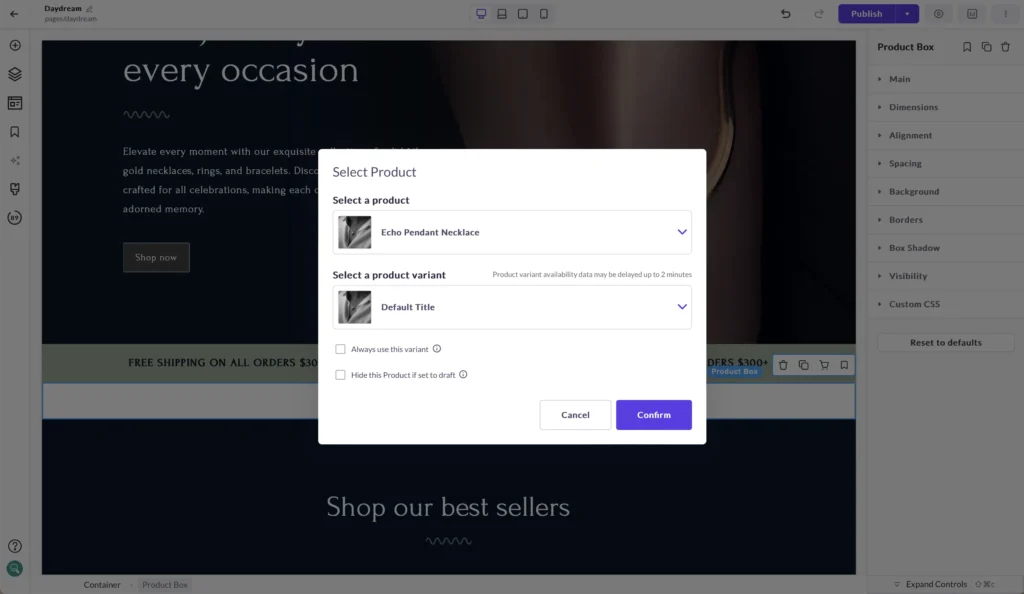
Instead of dealing with any type of coding, the visual editor lets you build a whole host of Shopify sections using Elements. If we want to add a product to this jewelry storefront, we can simply place a Product Box onto the editor canvas and use the Shopify elements to craft a product section to our liking.
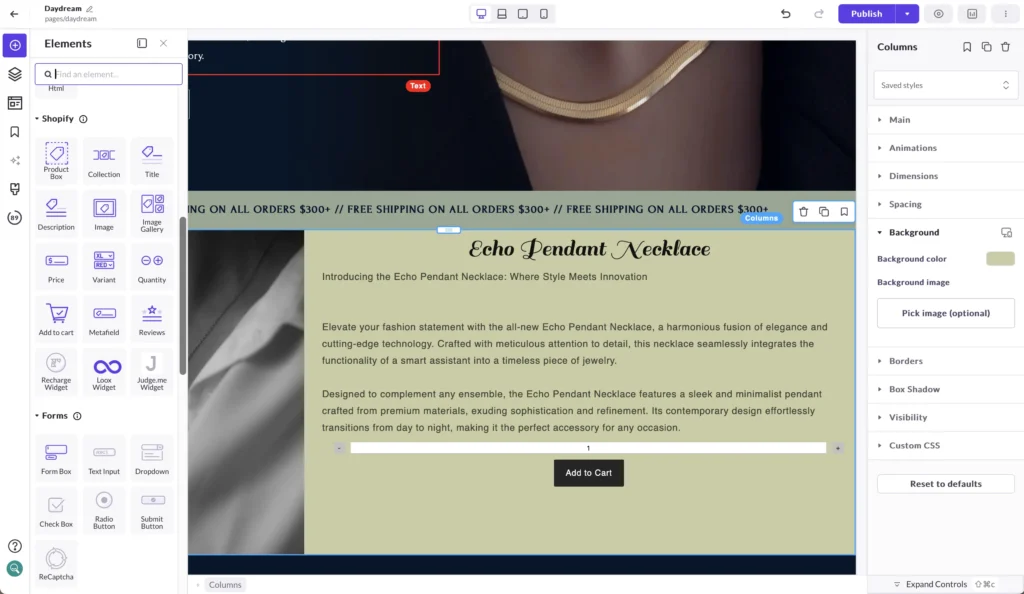
Using Shogun, developers and non-developers can create personalized sections that reflect their brand, mold their website to their preferences, and make creating and editing any page on your Shopify store much simpler.
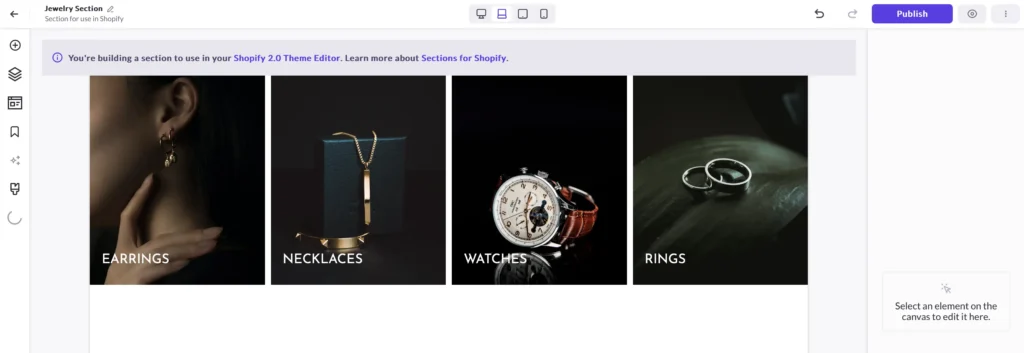
There’s even the Shogun Theme Sections feature, where you can build sections from scratch and use them throughout your store. For example, you can create a ‘Shop by Category’ section and have that placed on any page you like when editing on Shogun. If you want that section to appear on multiple product pages, you can do that without having to manually create it over and over again for each page.
Not custom enough? Shogun lets you create reusable Custom Elements from the ground up using coding languages like Liquid, CSS, and HTML. At this level, the customization is endless, and developers can craft bespoke elements that break free of all generic templates.
From fluid visual editing to creating reusable custom elements, embrace the flexibility of Shogun’s next-level features and showcase your store at its best. Ready to harness the power of customization? Explore Shogun today and build a Shopify store that truly stands out.
Create customized sections for Shopify with ShogunBuild content sections for your Shopify theme with an advanced visual editor. Get started now

Phill Moorman
Phill, the VP of Marketing at Shogun, is a seasoned expert in ecommerce. With a keen focus on strategic marketing, Phill drives growth and cultivates brand success in the dynamic online marketplace.

