Adding Reusable Dynamic Sections to a Page in Shopify
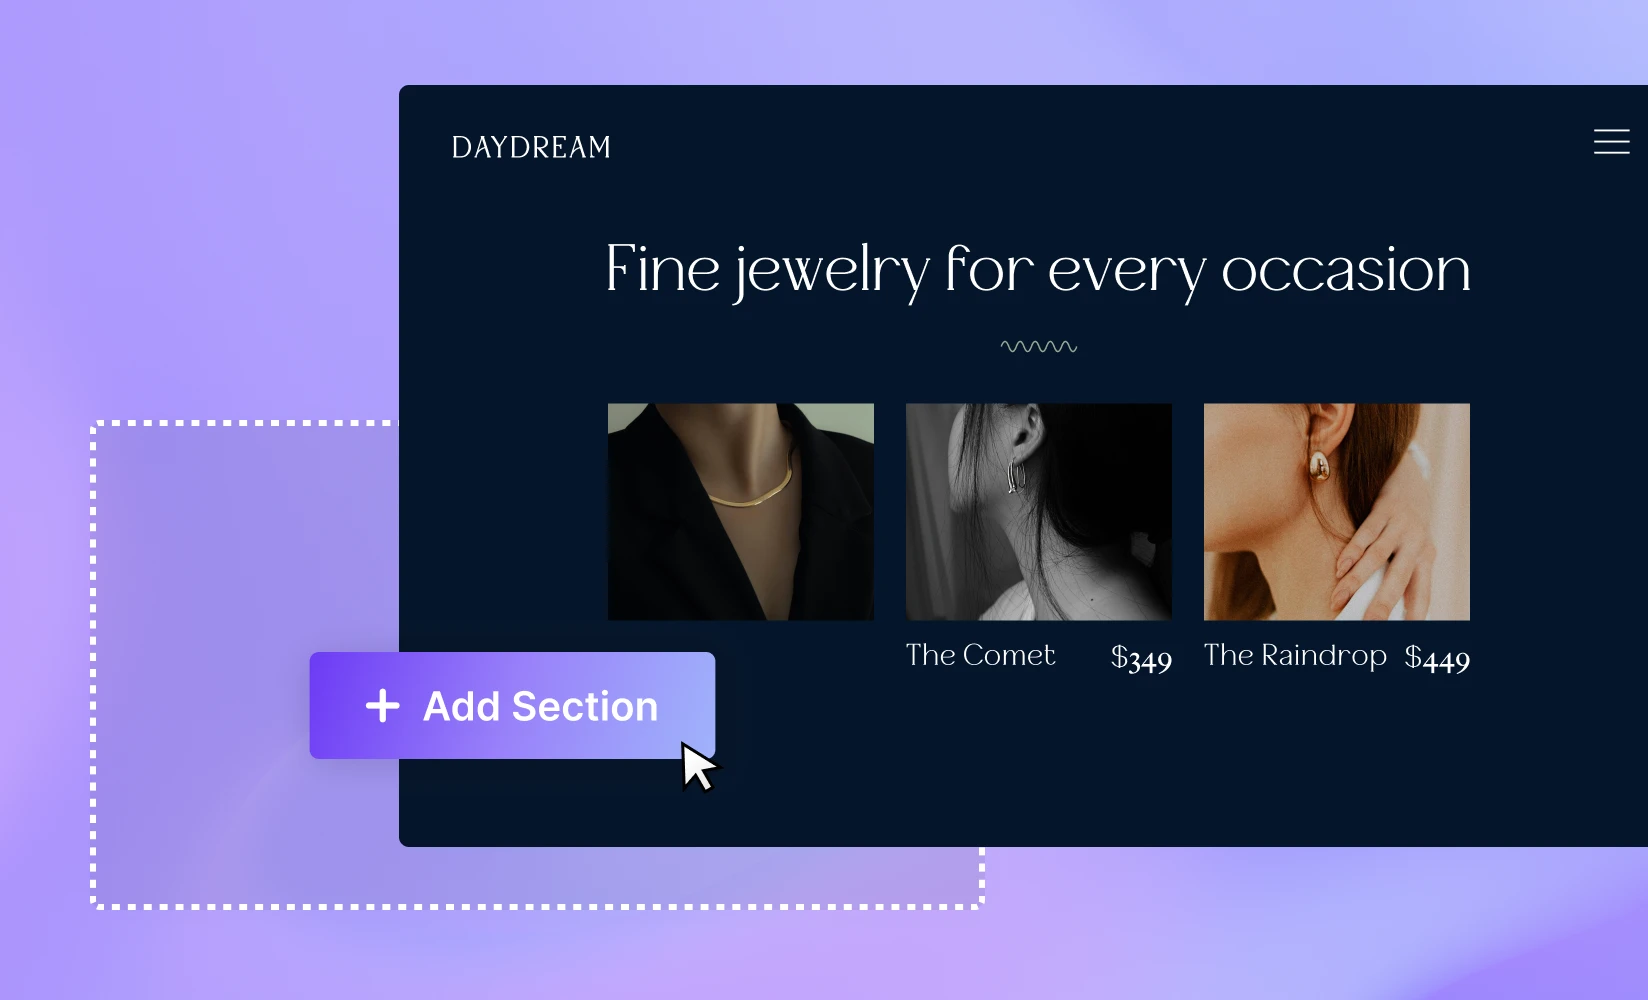
The Shopify 2021 Online Store 2.0 update introduced new themes as well as customizable blocks called Shopify sections that keep your content exciting, engaging, and, most importantly, versatile. But what about dynamic sections? What makes these different from regular sections within a Shopify theme?
What are Shopify dynamic sections?
Dynamic sections are Shopify’s reusable sections for any page on your store (except gift card and checkout pages) – customizable parts of your online store’s content that you can add, reorder, or remove however you want to. These might be anything ranging from a slideshow and featured product collection to a gallery, map, newsletter, or more. Meanwhile, static sections are sections on your page that don’t move within the theme layout files, such as your header and footer. However, they can still be converted into dynamic sections.
The power behind Shopify’s dynamic sections is their ability to fully tailor the shopping experience to meet the needs and wants of your potential customers. They can be organized to highlight your top-selling items, draw attention to seasonal sales, share customer testimonials, or even tell a captivating brand story – all things that are essential for driving user engagement and conversions.
For merchants, Shopify sections help you avoid working with a boring, monotonous layout, and they also keep your content rich and your design aesthetic consistently appealing. These real-time changes make sure that store owners are always equipped to keep their content fresh and stimulating for their target audience.
Create reusable sections for your Shopify store with ShogunStart creating sections with a no-code visual editor Get started now
Adding Dynamic Sections to your Shopify store
If you’re interested in trying out Shopify dynamic sections on your ecommerce store, here are a few simple steps to take.
Step 1: Customize your theme
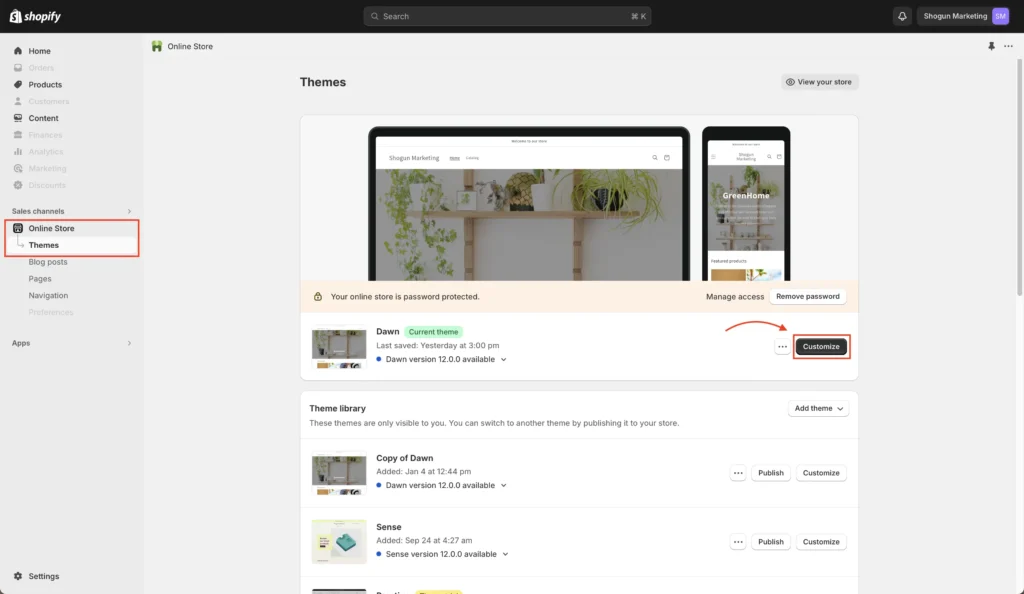
Log in to your Shopify dashboard and navigate to your ‘Themes’ under your ‘Online Store’ in the left-hand navigation sidebar. Under your main theme, click ‘Customize.’
Step 2: Add a new section
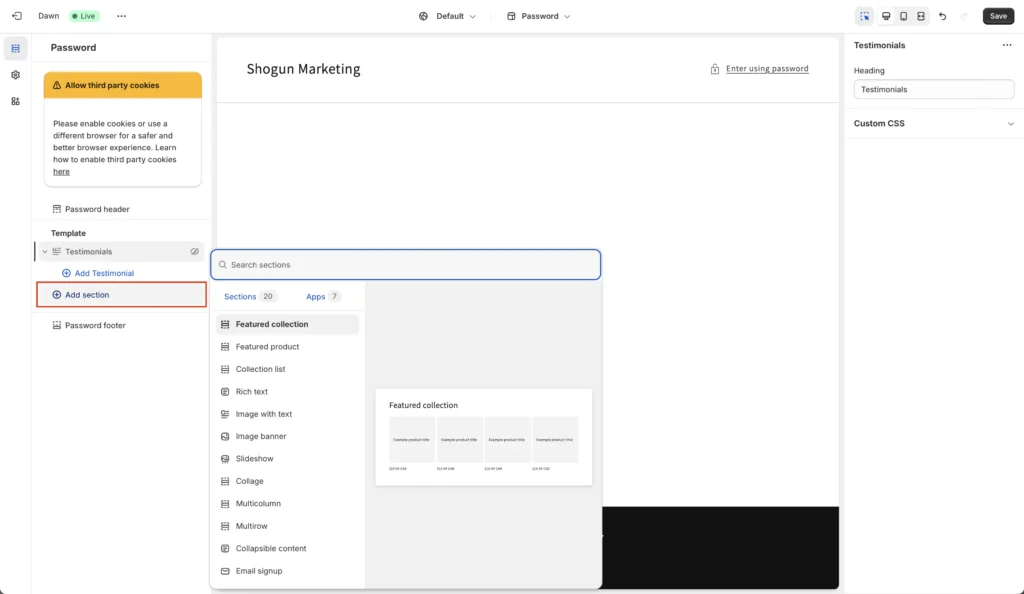
Once you’re in the editor, click ‘Add section,’ and you’ll be presented with a list of sections you can add to your page. In this example, we’ve chosen to add a ‘Collections List’ to show off a range of store collections.
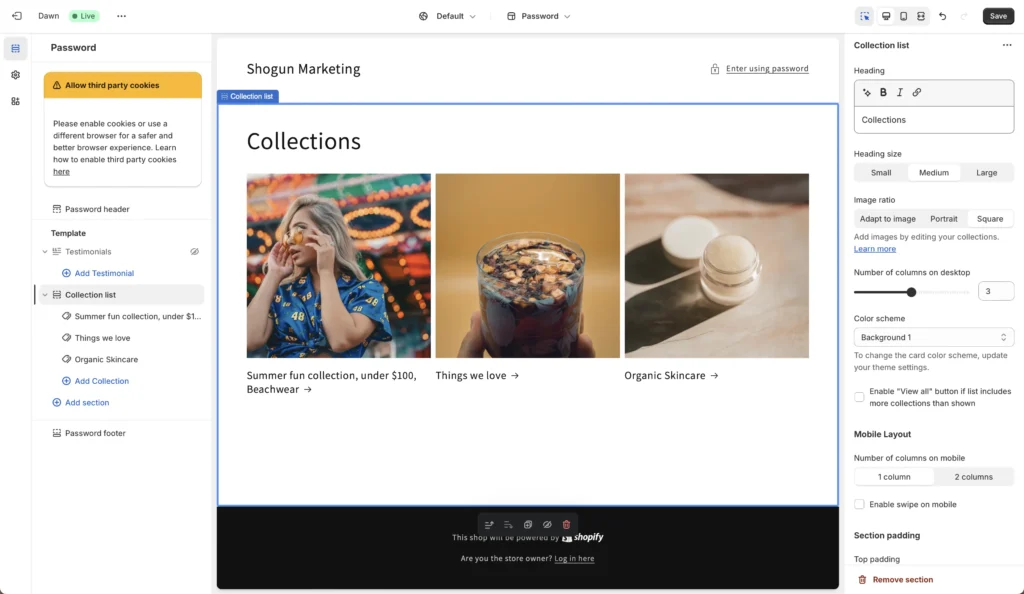
On the right-hand sidebar, you’ll typically see more customization options you can play with to get your new section the way you want it to appear. When you’re happy with it, click ‘Save.’
Brands looking for specific customizations might need to use Liquid code to create exactly what they need. While Shopify’s Liquid coding language provides that extra flexibility, it often requires a steep learning curve for those who aren’t familiar with code.
Using Shogun to create Dynamic Sections on Shopify
Shogun also elevates the customization experience tenfold with a diverse array of pre-designed templates, a robust block library, custom overlays, animations, and more. This makes it easy to create highly customized content sections with a visual editor. Here’s how you can use Shogun to create dynamic sections for your Shopify store.
Step 1: Create a section with Shogun
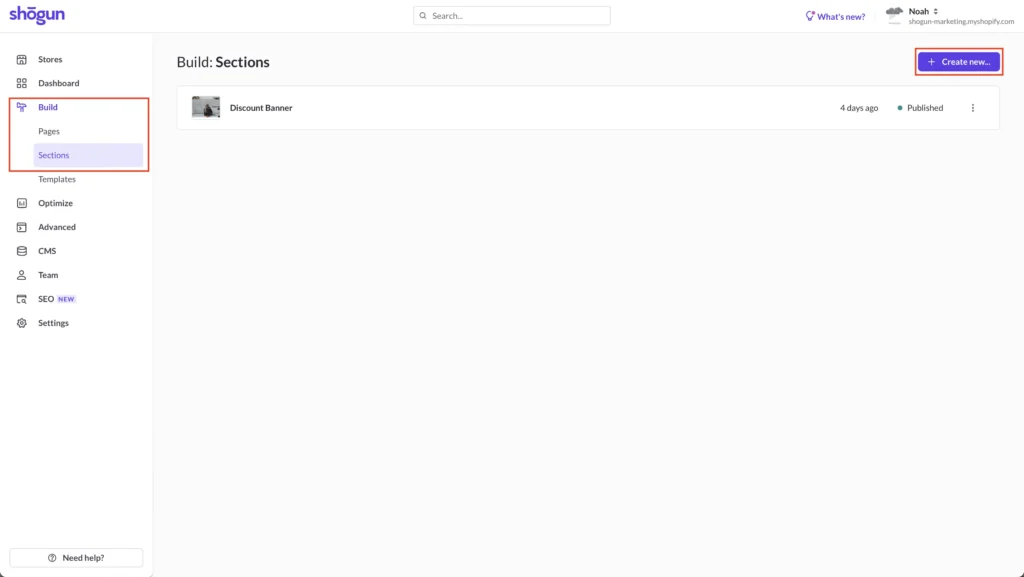
Head over to the Shogun dashboard, click on ‘Build’ in the left-hand sidebar, and then click on ‘Sections.’ Click ‘Create new…’ to make a new section.
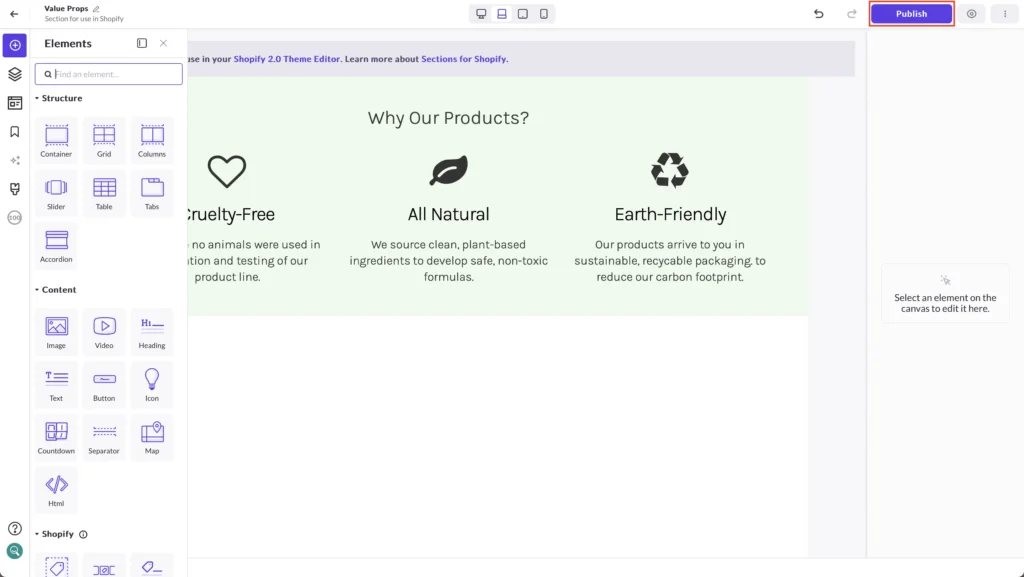
You’ll be brought to the section creator, where you can experiment with Shogun’s great range of Elements and more. In this example, we’ve created a value proposition section with the help of Shogun’s block library menu. When you’re done, click ‘Publish,’ and the new section will be made available in the Shopify Theme Editor.
Step 2: Add it to a page using the Shopify Theme Editor
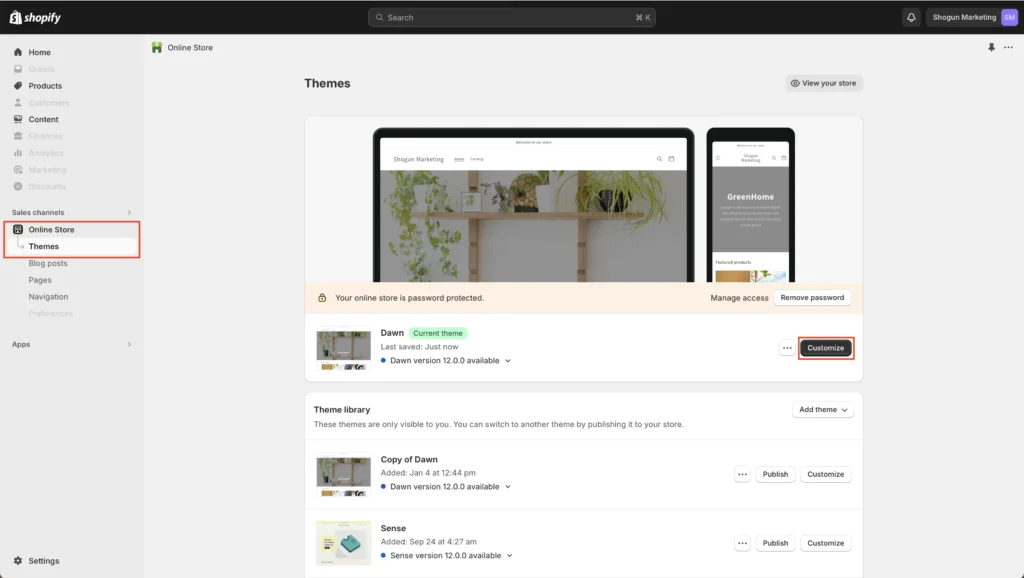
To add your new section you created on Shogun to your Shopify store, head back to your Shopify dashboard and navigate to ‘Online Store’ -> ‘Themes’ -> ‘Customize.’
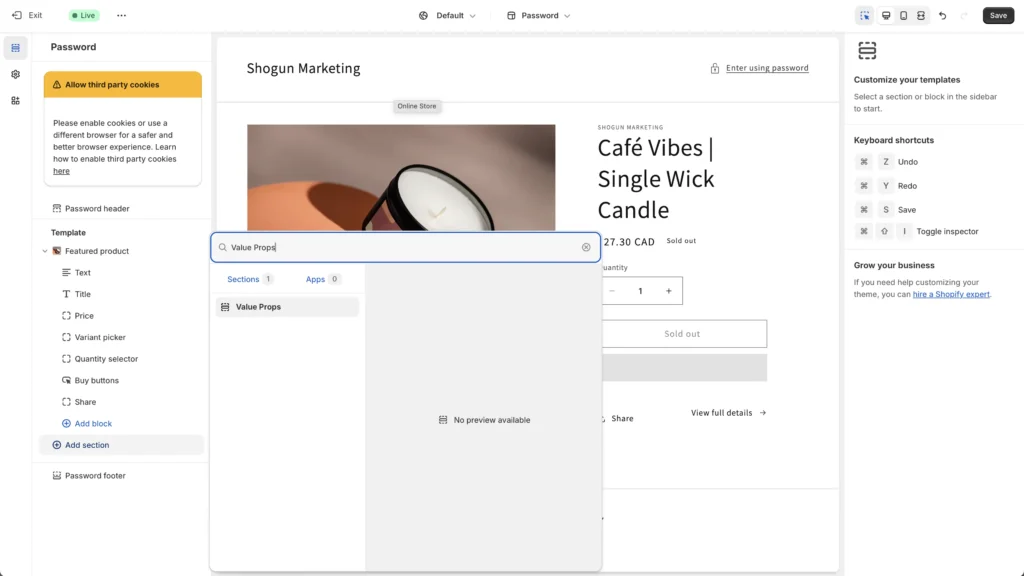
In the Shopify Theme Editor, click ‘Add Section’ and search for your new section by title. Our section was titled ‘Value Props.’ Click on the section and it should appear on your page. Drag it to wherever you want to place it on your page.
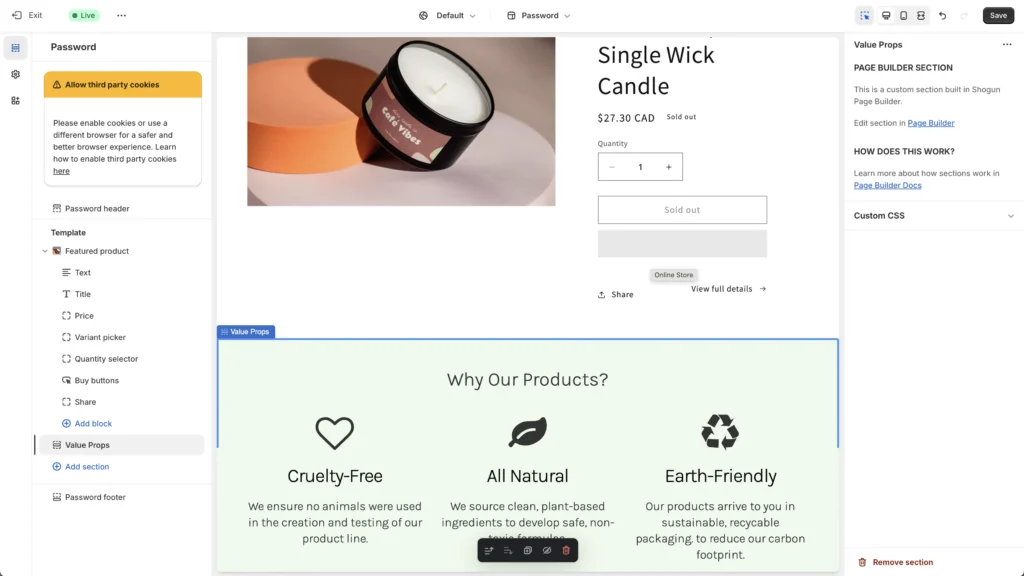
As you can see, Shogun bridges the gap between the default functionalities of Shopify’s dynamic sections and helps sellers create a conversion-focused e-commerce store.
Create reusable sections for your Shopify store with ShogunStart creating sections with a no-code visual editor Get started now

Phill Moorman
Phill, the VP of Marketing at Shogun, is a seasoned expert in ecommerce. With a keen focus on strategic marketing, Phill drives growth and cultivates brand success in the dynamic online marketplace.

