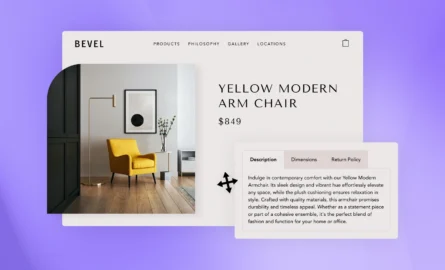
Using Shopify Metaobjects to make your store content dynamic (the easy way)
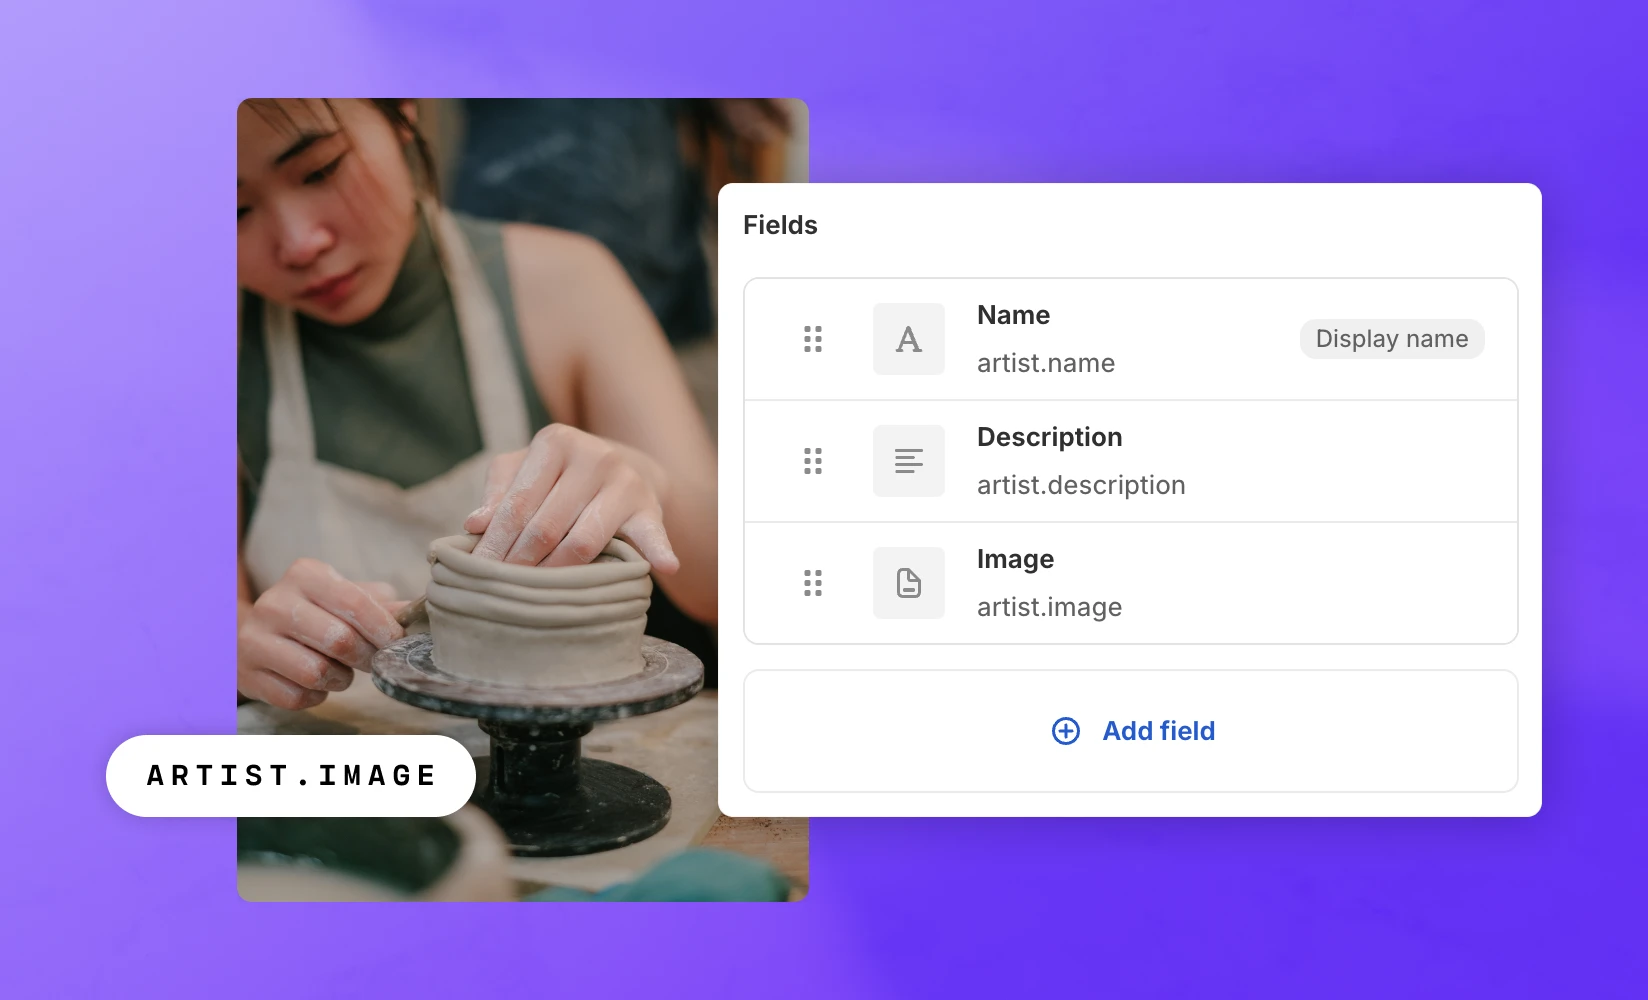
Shopify metaobjects allow you to create your own custom data models rather than relying on the pre-built options that come with Shopify.
This guide will walk you through all the steps involved in setting up and adding your first Metaobject to a product page. Be sure to stay tuned until the end, where we also show you some alternative methods to adding dynamic content to your storefront.
What Are Shopify Metaobjects?
Metaobjects are similar to another Shopify feature, metafields.
Metafields allow you to deal with data that isn’t typically addressed in the default Shopify settings. Every Shopify theme will provide you with tools for storing and displaying the most common types of ecommerce information, such as product pricing and quantity. But for more specialized information, such as color swatches or downloadable PDF manuals, you may need to create a custom metafield.
Released in Winter 2023, metaobjects are one of the newest Shopify features. Metaobjects allow you to combine multiple metafields into one chunk of reusable structured data. They’re ideal for when you have a fairly complex piece of content that you would like to feature on multiple pages.
How To Use Metaobjects To Create Dynamic Content on Product and Collection Pages
You can use metaobjects to improve the functionality of your Shopify storefront in a variety of ways, including:
- Build a system that makes it easy to create and manage size charts
- Add a blurb to product pages that includes a description and image of your designers
- Provide visitors with a tool that allows them to select fabric type, color, and other specialized options for your products
Adding metaobjects to Shopify pages is a five-part process: you’ll need to create the metaobject, create metaobject entries, create a metafield definition that references the metaobject, connect metaobject entries to specific products, and then publish the metaobject on your storefront.
To demonstrate how this all works, let’s imagine that you want to use a manufacturing facility metaobject on your product pages in order to highlight that you support good working conditions:
Step 1. After logging in to Shopify, select the “Settings” option in the left sidebar.
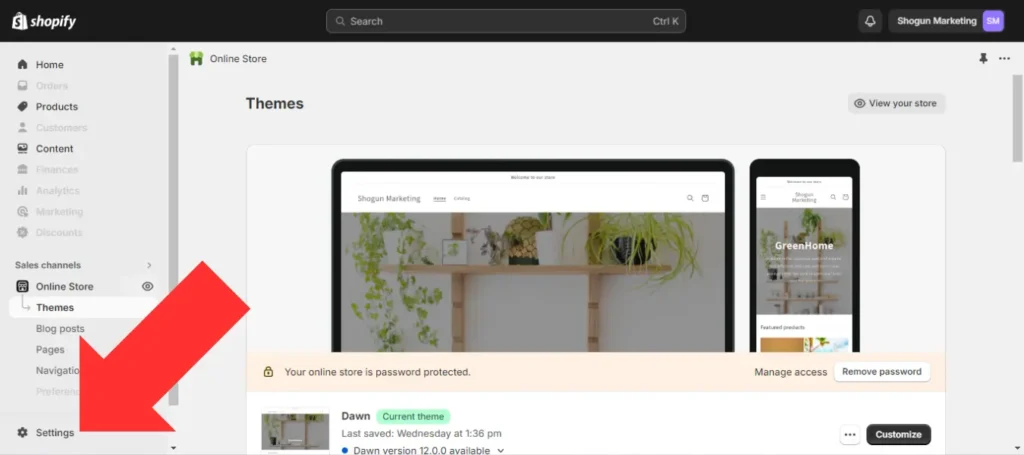
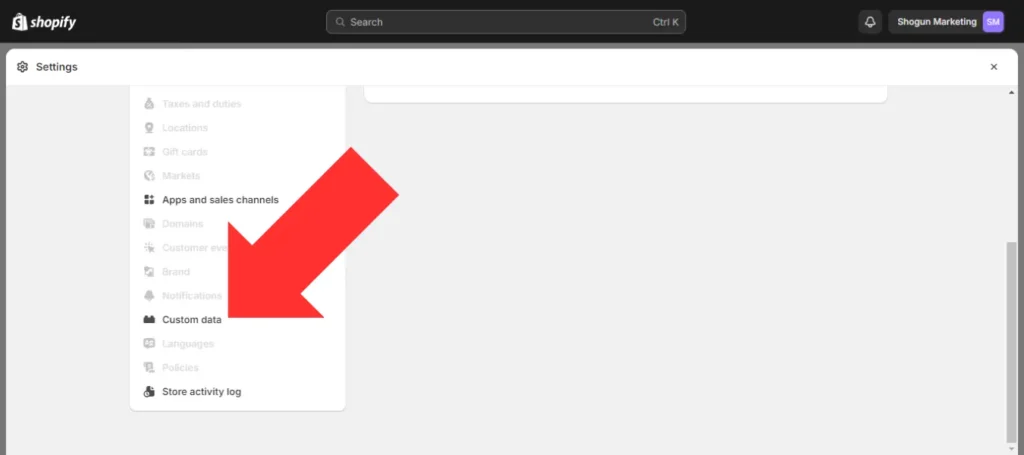
Step 2. Scroll down and select “Custom data”.
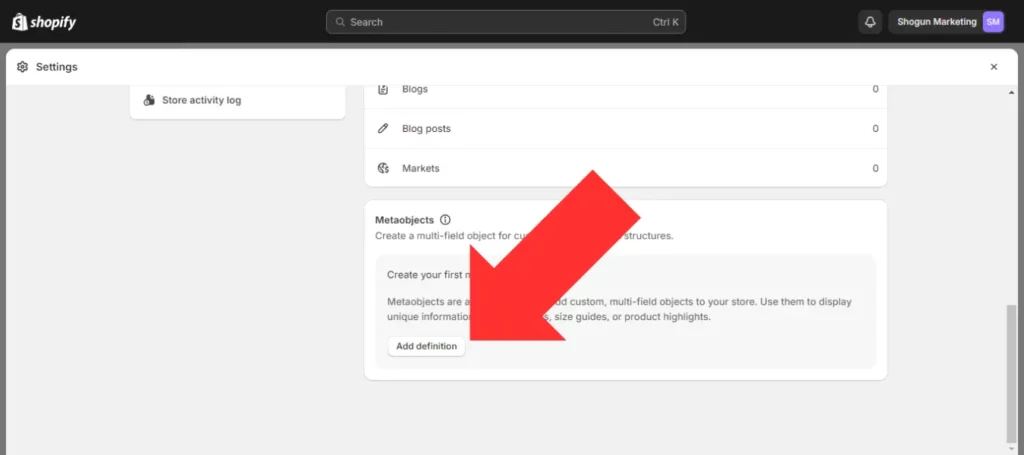
Step 3. Scroll down to the “Metaobjects” section and select “Add definition” to create a new metaobject.
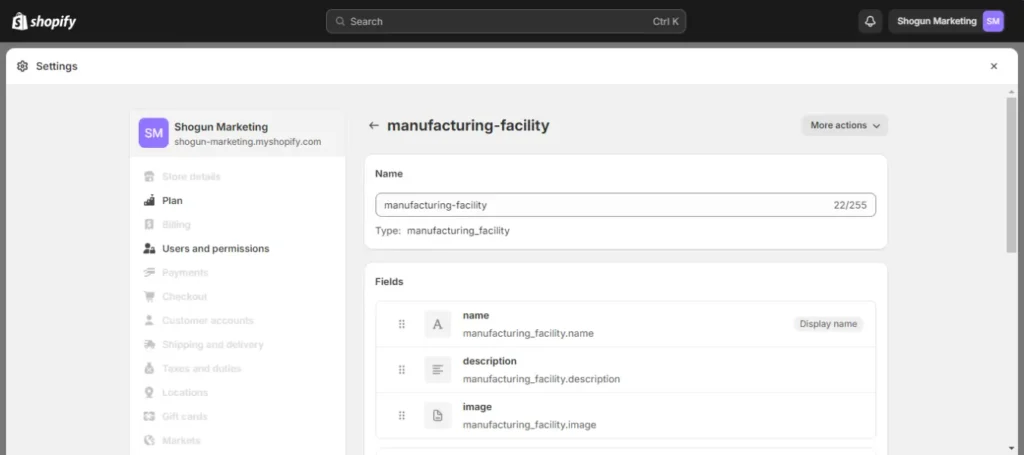
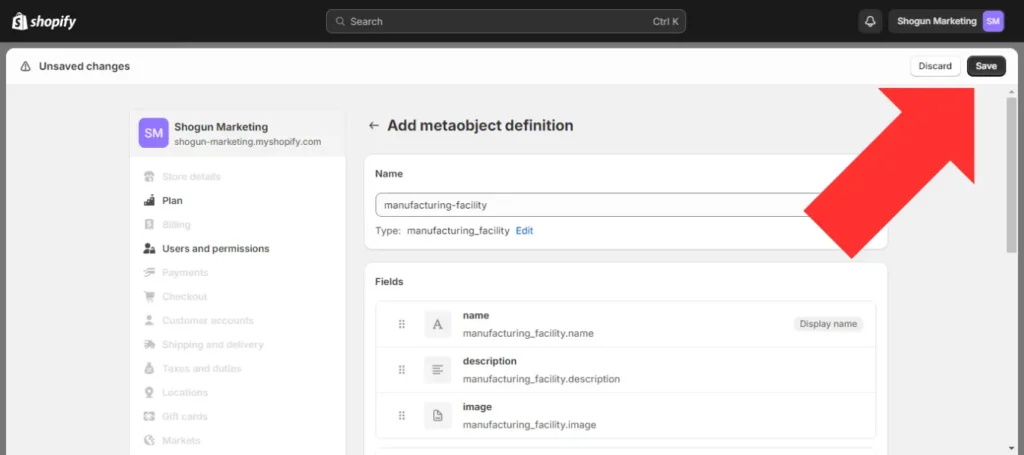
Step 4. You’ll find that there are three sections for creating your metaobject:
- Name: Choose a name for your metaobject. We recommend keeping it short and descriptive, as this will make it easier to work with your metaobjects in the future.
- Fields: This is where you’ll define the structure of your metaobject. Many different field options are available for text, numbers, measurements, and other types of data. Also, each field has multiple validation options (for example, when adding a text field, you can determine the minimum and maximum word count restrictions).
- Options: By default, the “Storefront” option is toggled on — this is necessary for displaying metaobjects on your live site. Also, enabling the “Web pages” option would allow you to use your metaobject to create landing pages with unique URLs.
For our manufacturing facility metaobject, let’s add name, description, and image file fields. When you’re ready, select “Save”.
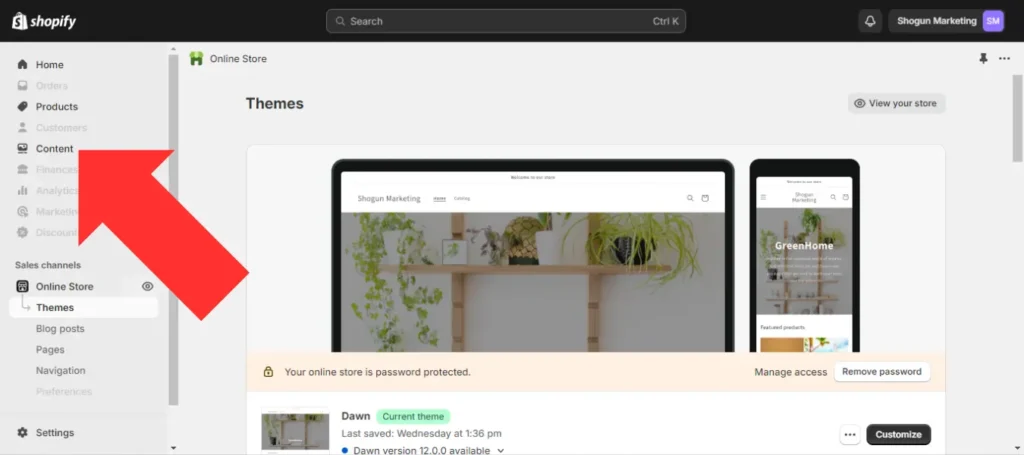
Step 5. Go back to the main Shopify dashboard and select the “Content” option in the left sidebar.
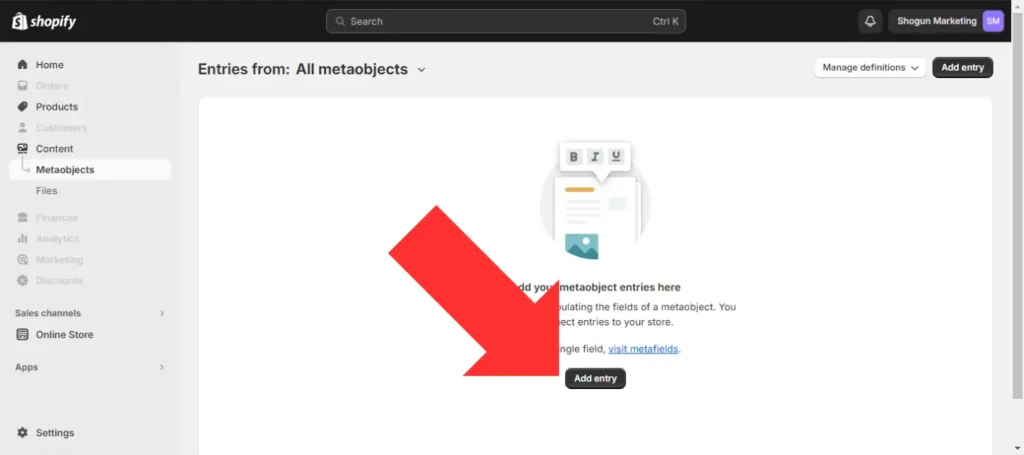
Step 6. Click on the “Add entry” button and select the metaobject that you want to add.
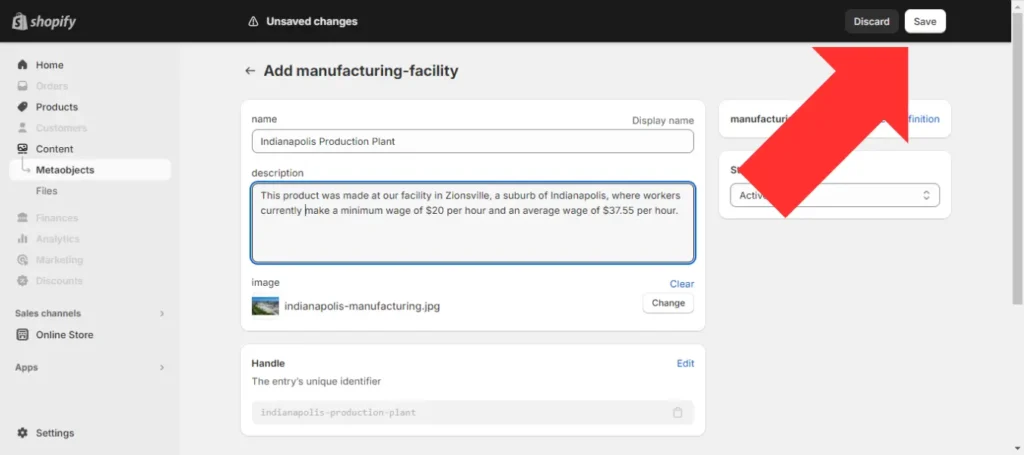
Step 7. This is where you can add an individual instance of your metaobject. You’ll see all the fields that you just created, making it easy to input the necessary information. We’ve added data for an “Indianapolis Production Plant” entry in this example. When you’re finished with your entry, select “Save”.
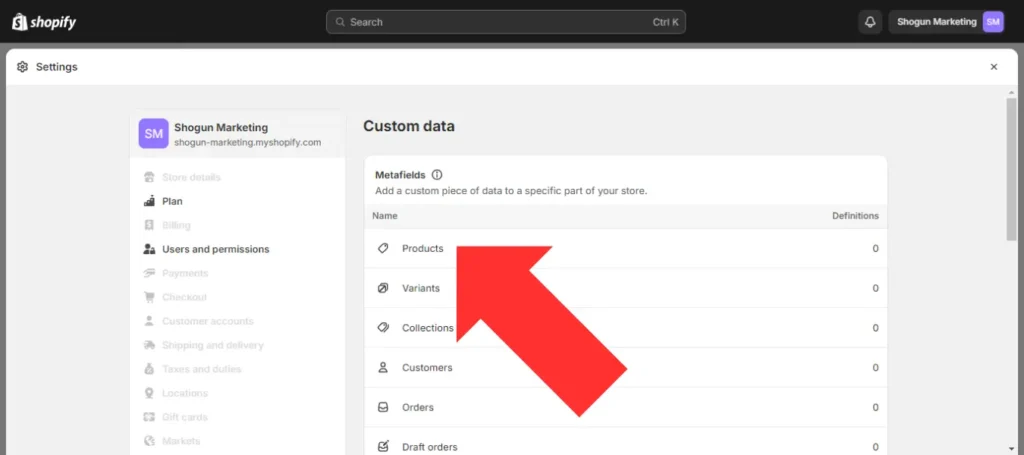
Step 8. You’ll now need to create a metafield description that references your metaobject. Return to the “Custom data” section of your settings and select “Products”.
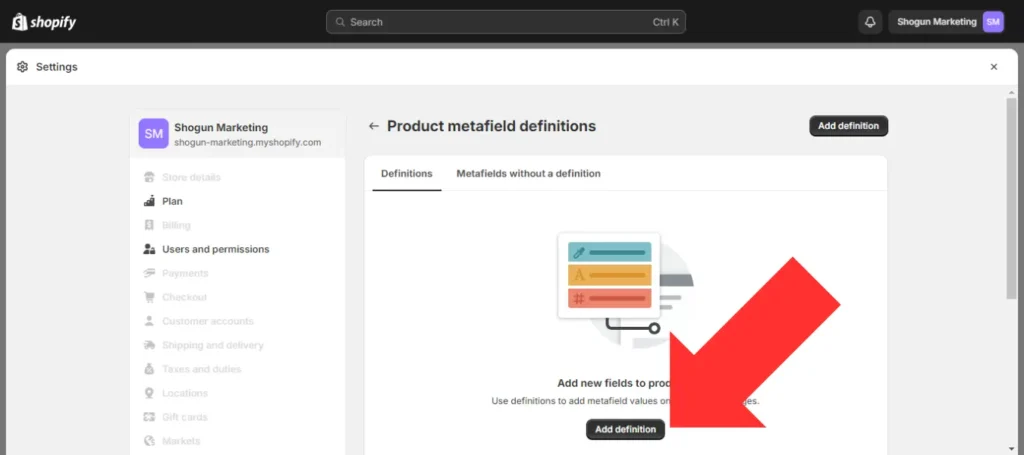
Step 9. Select “Add definition”.
Step 10. Open the “Select type” menu and select “Metaobject”.
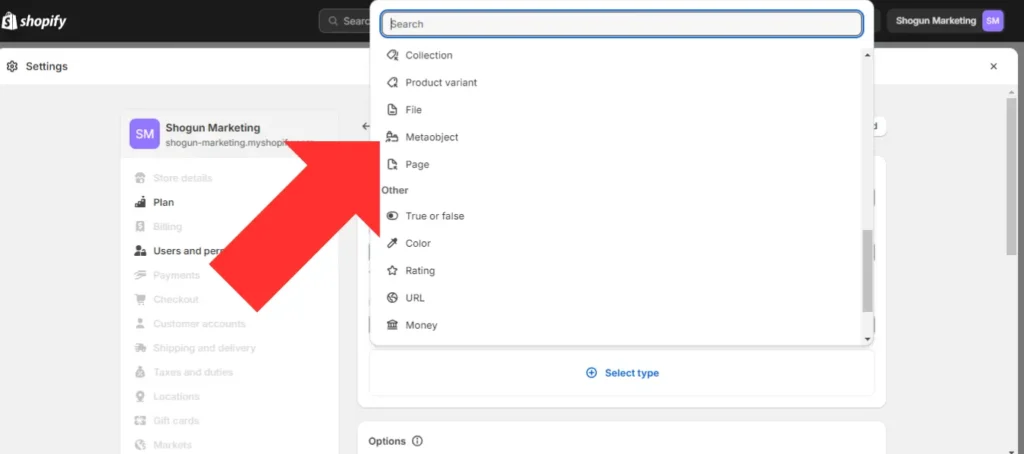
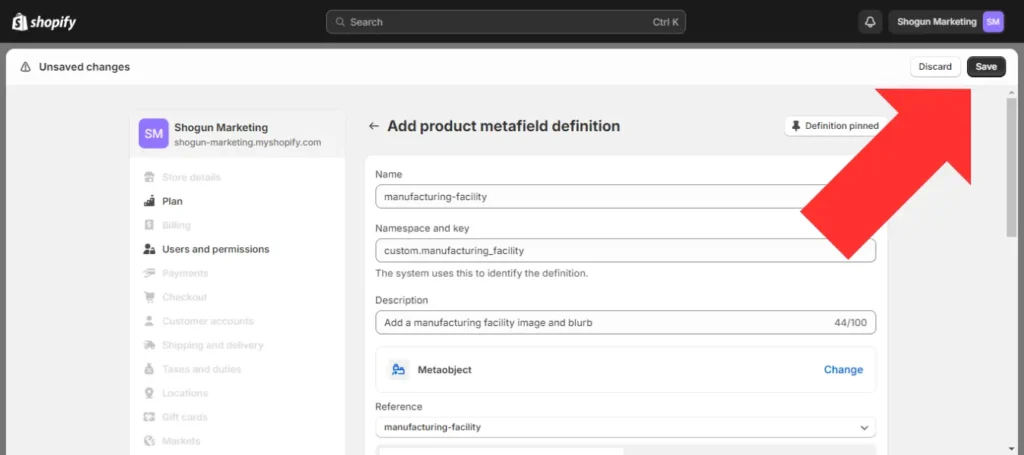
Step 11. Choose the metaobject you want to reference, add a unique name and description, and select “Save”.
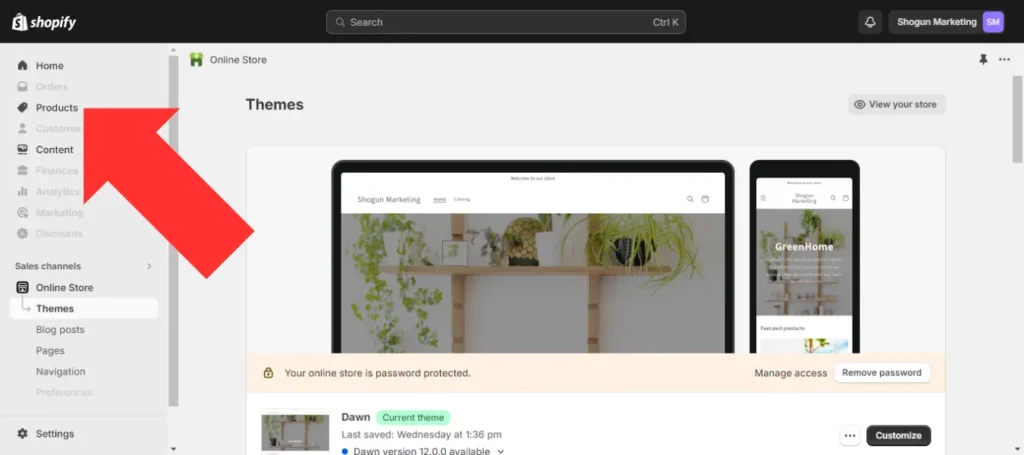
Step 12. To connect a metafield entry to one of your products, go back to the Shopify main dashboard and select “Products”.
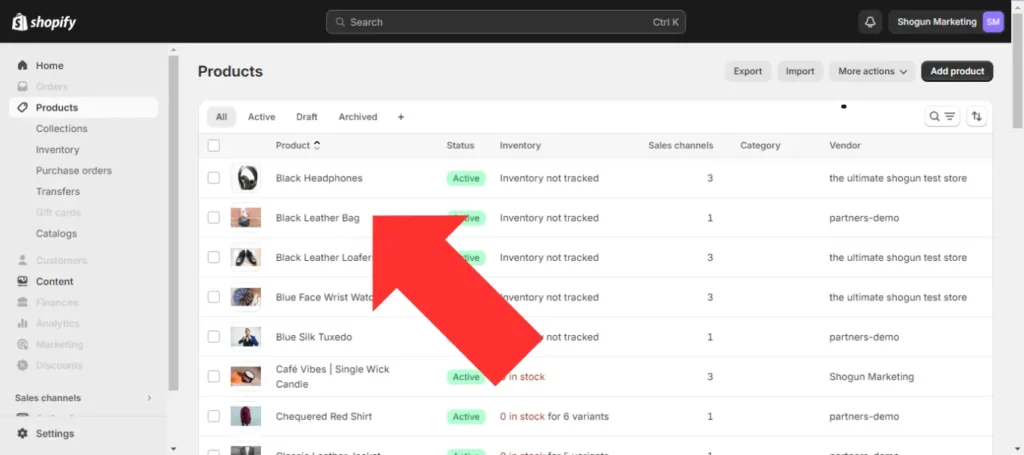
Step 13. Select the product that you want to add your metaobject to. In this example, we’ll add our manufacturing facility metaobject to our Black Leather Bag page.
Step 14. Scroll down to the “Metafields” section. Here, you’ll see the metafield referencing the metaobject we just created. Let’s click on the “Select entry” button and add our “Indianapolis Production Plant” entry.
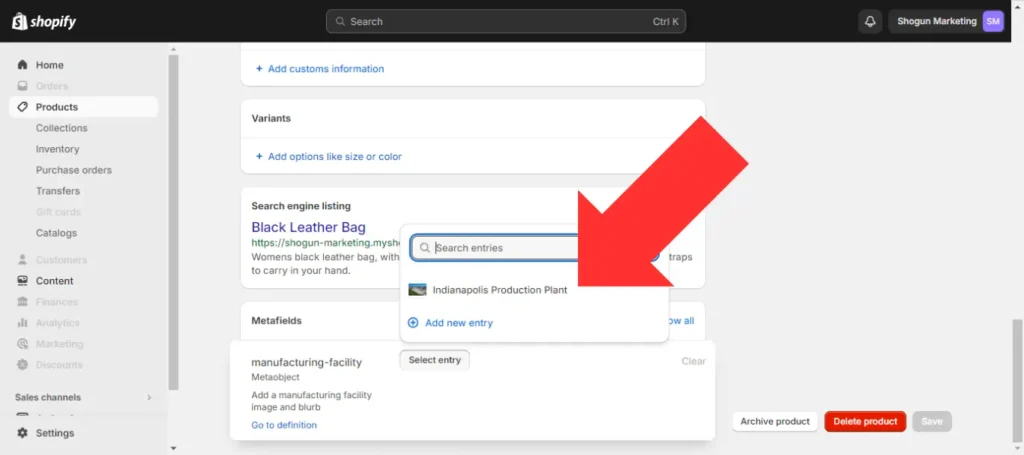
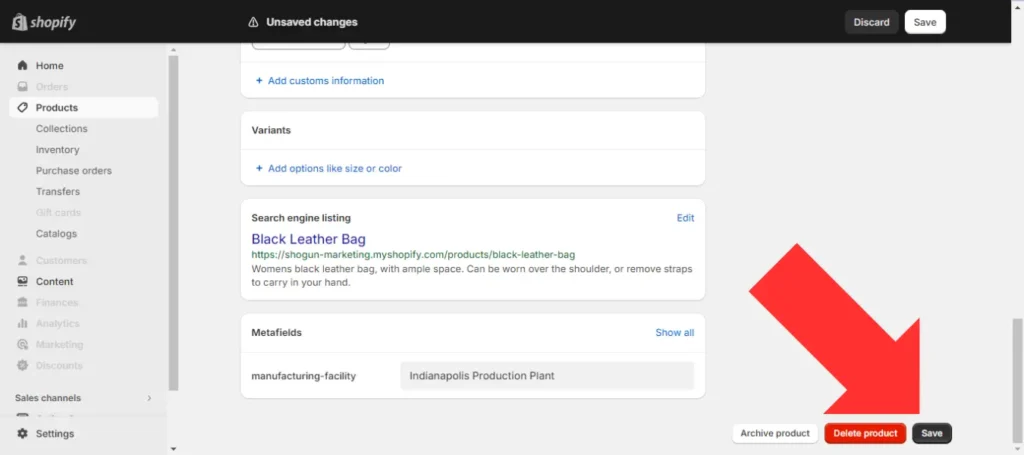
Step 15. Save your changes to the product page.
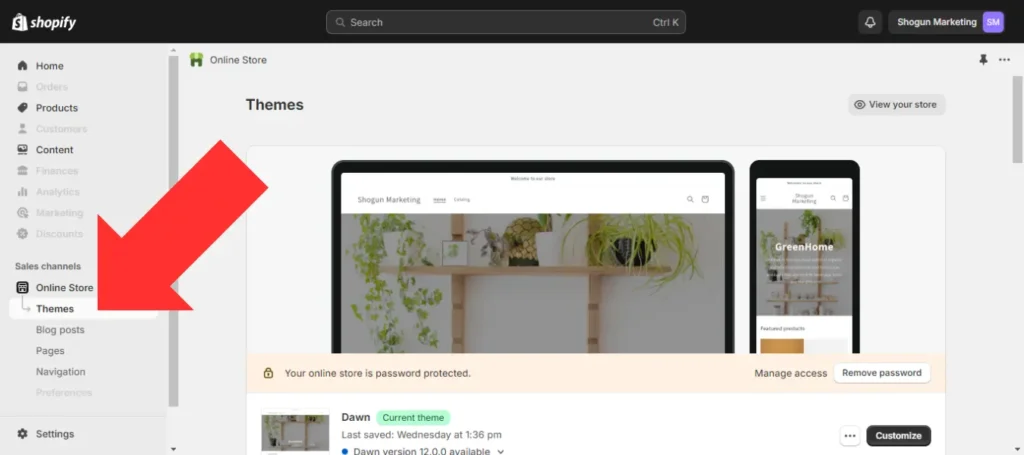
Step 16. Go back to the Shopify main dashboard and open the “Themes” section of your storefront.
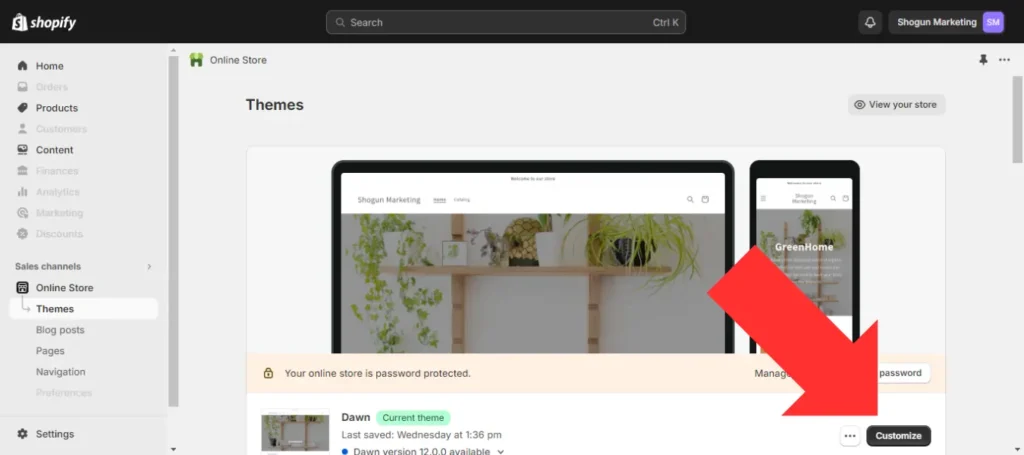
Step 17. Click on the “Customize” button next to your theme to open up Shopify’s built-in theme editor.
Step 18. Using the dropdown menu at the top of your screen, navigate to the “Default product” option.
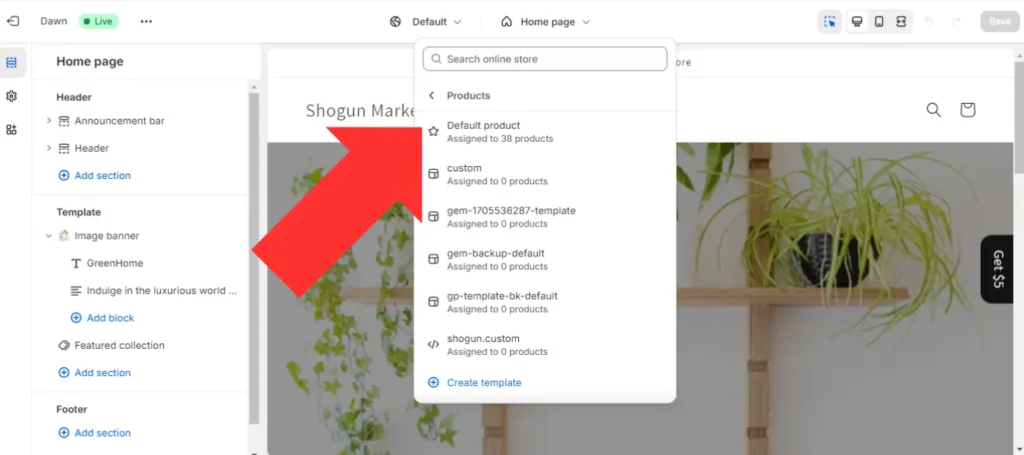
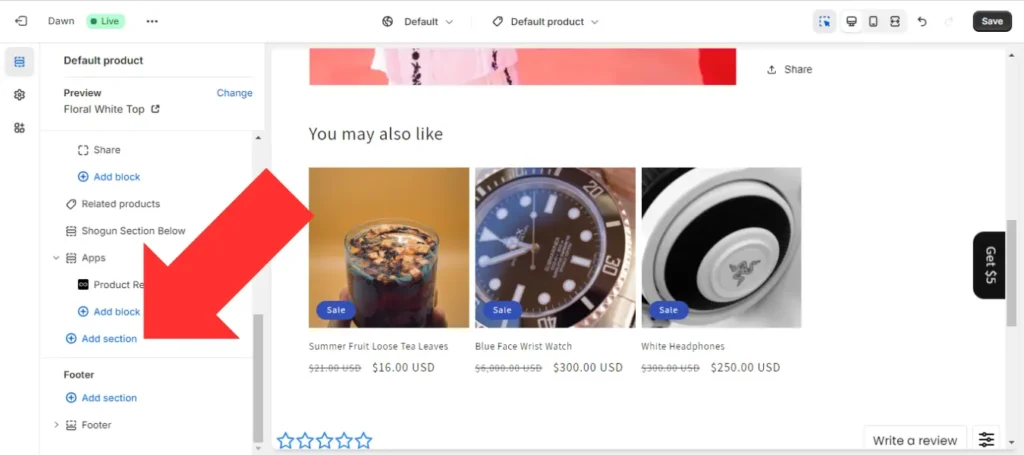
Step 19. Select “Add section” in the left sidebar of the theme editor.
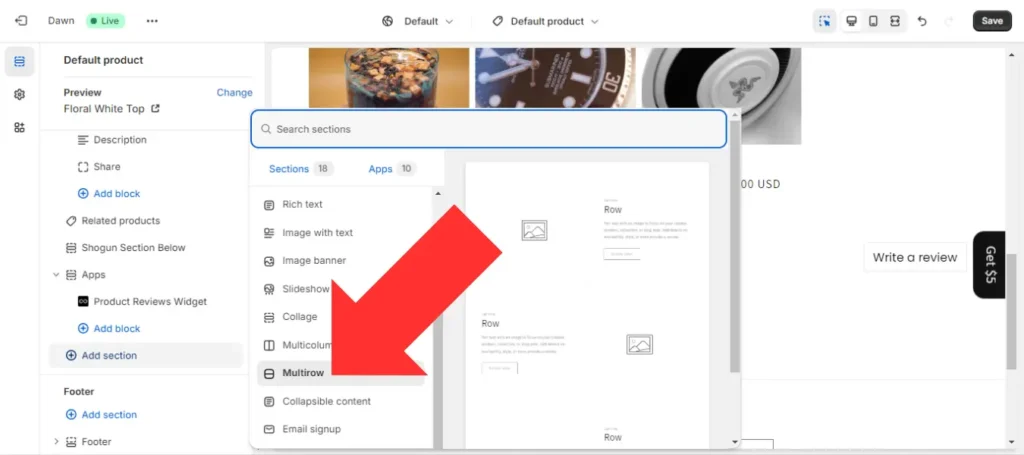
Step 20. Select the “Multirow” column.
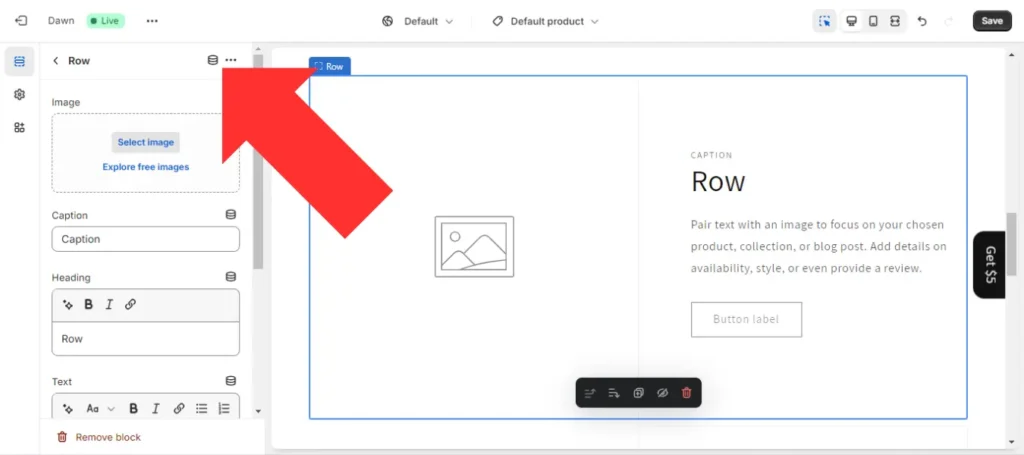
Step 21. Select one of the new row sections and click on the “Connect dynamic source” icon next to “Row” in the left sidebar.
Step 22. Connect the metaobject reference.
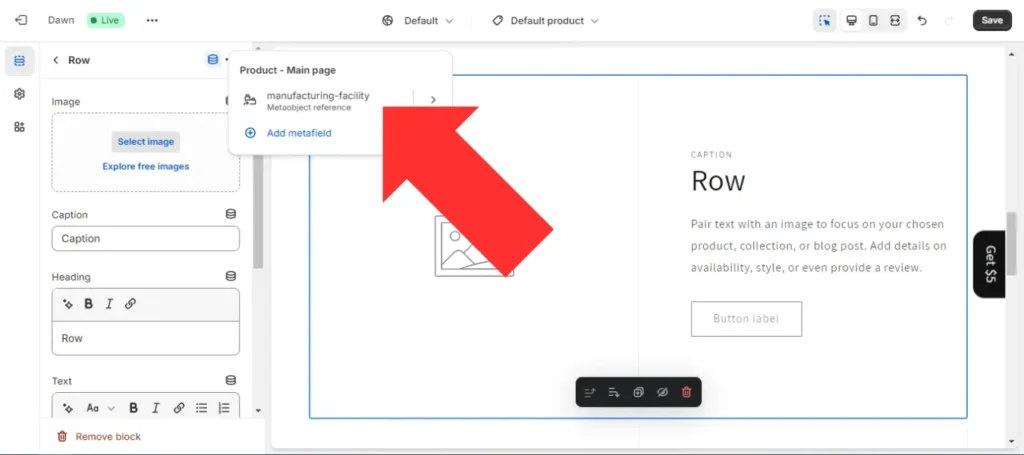
Step 23. Delete any unused rows, shift the section that’s connected to the metaobject wherever you want it on the page, and clean up the section so that your metaobject content is displayed properly (in this case, we had to delete the default row and button text, as we’re not using these elements in our metaobject). When you’re done, select “Save”.
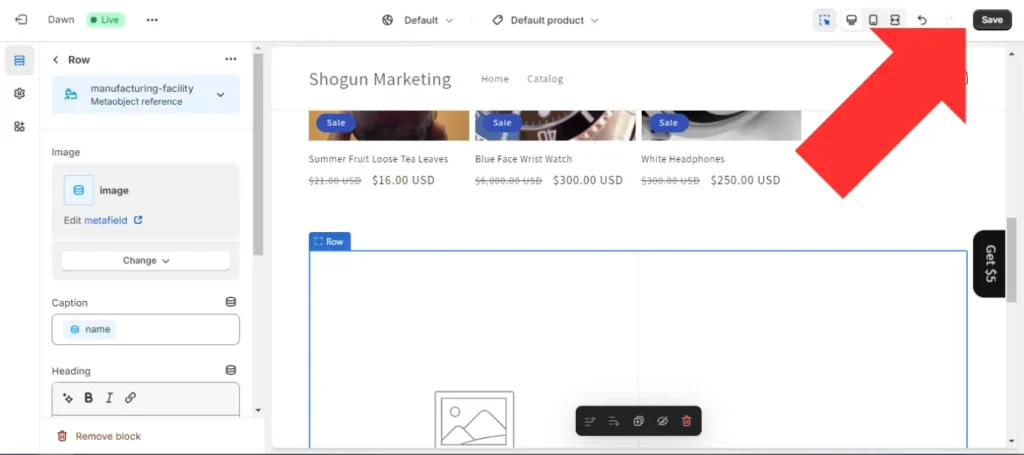
You’ll now be able to see your dynamic content on the live version of the pages that have been connected to one of your metaobject entries.

Add dynamic content to your product pages with ShogunCentralize content updates with the powerful CMS Collections and Global Snippets feature. Get started now
Using Shogun To Add Dynamic Content To Your Pages (Metaobjects Alternative)
While Shopify’s native metaobject feature can be helpful, Shogun is a powerful alternative for adding dynamic content to your store.
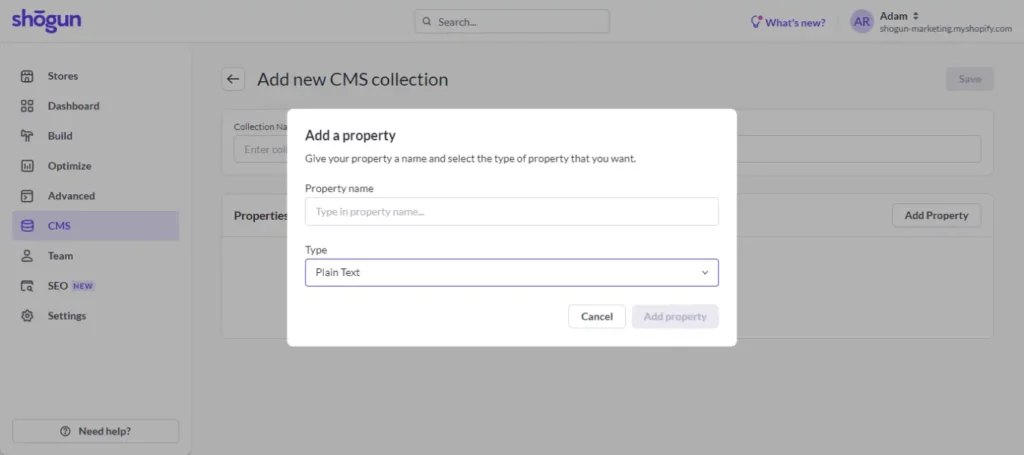
Shogun’s CMS Collections feature is similar to metaobjects in that it allows you to build custom data models using properties such as text, images, and integers. The customization options with CMS Collections are nearly endless, giving you complete control over your storefront and allowing you to design truly unique customer experiences.
Another Shogun feature that’s useful for dynamic content is Global Snippets.
Shogun provides you with a wide variety of elements for creating custom ecommerce content. These elements include basic options such as headings and buttons as well as advanced features like scrolling banners, countdown clocks, and interactive maps. You can add elements visually to a page, then rearrange and customize the elements however you want. Shogun is intuitive enough for anyone to use and powerful enough to create just about any kind of page you can imagine.
When you’ve created a block of content on Shogun that you would like to reuse on other pages, you can turn it into a Global Snippet with just a couple clicks.
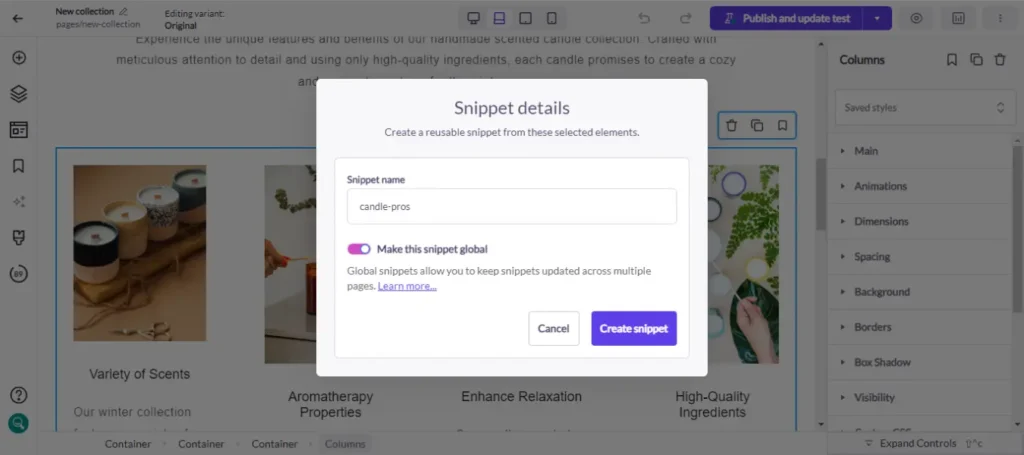
Global Snippets can be deployed anywhere on your store and are managed from one central location, making updates a breeze. Whenever you edit a Global Snippet, those changes will automatically be reflected on every other page where it is included.
It’s also worth noting that you can add metafields you created in Shopify to any page you’re working on within Shogun. Indeed, using Shogun doesn’t prevent you from accessing everything that Shopify has to offer — you’ll get the best of both worlds.
Add dynamic content to your Shopify storefront with ShogunCentralize content updates with the powerful CMS Collections and Global Snippets features. Get started now

Phill Moorman
Phill, the VP of Marketing at Shogun, is a seasoned expert in ecommerce. With a keen focus on strategic marketing, Phill drives growth and cultivates brand success in the dynamic online marketplace.

