Create, Edit or Change Product Templates in Shopify
Managing an online store with tens, hundreds, or even thousands of products can certainly be intimidating. When every item could have multiple variants – different sizes, colors, materials, and more, even the thought of changing a single detail can be extremely stressful.
But don’t let that deter you from potentially boosting your store’s experience and efficiency. After all, even the smallest changes can be seriously transformative for your business.
Luckily for all Shopify store owners out there, Shopify product templates exist to turn hours of strenuous editing into a few simple clicks. That’s right – you can effortlessly refine the details across your whole product range without any coding or complex tech knowledge.
How Templates Work in Shopify Themes
When we talk about Shopify, there’s no doubt we need to mention themes. Themes are pre-made designs that create the look and feel of your online store. Rather than having to spend time going over each element of the ecommerce site and making sure it’s in line with your branding, themes help ensure that for you.
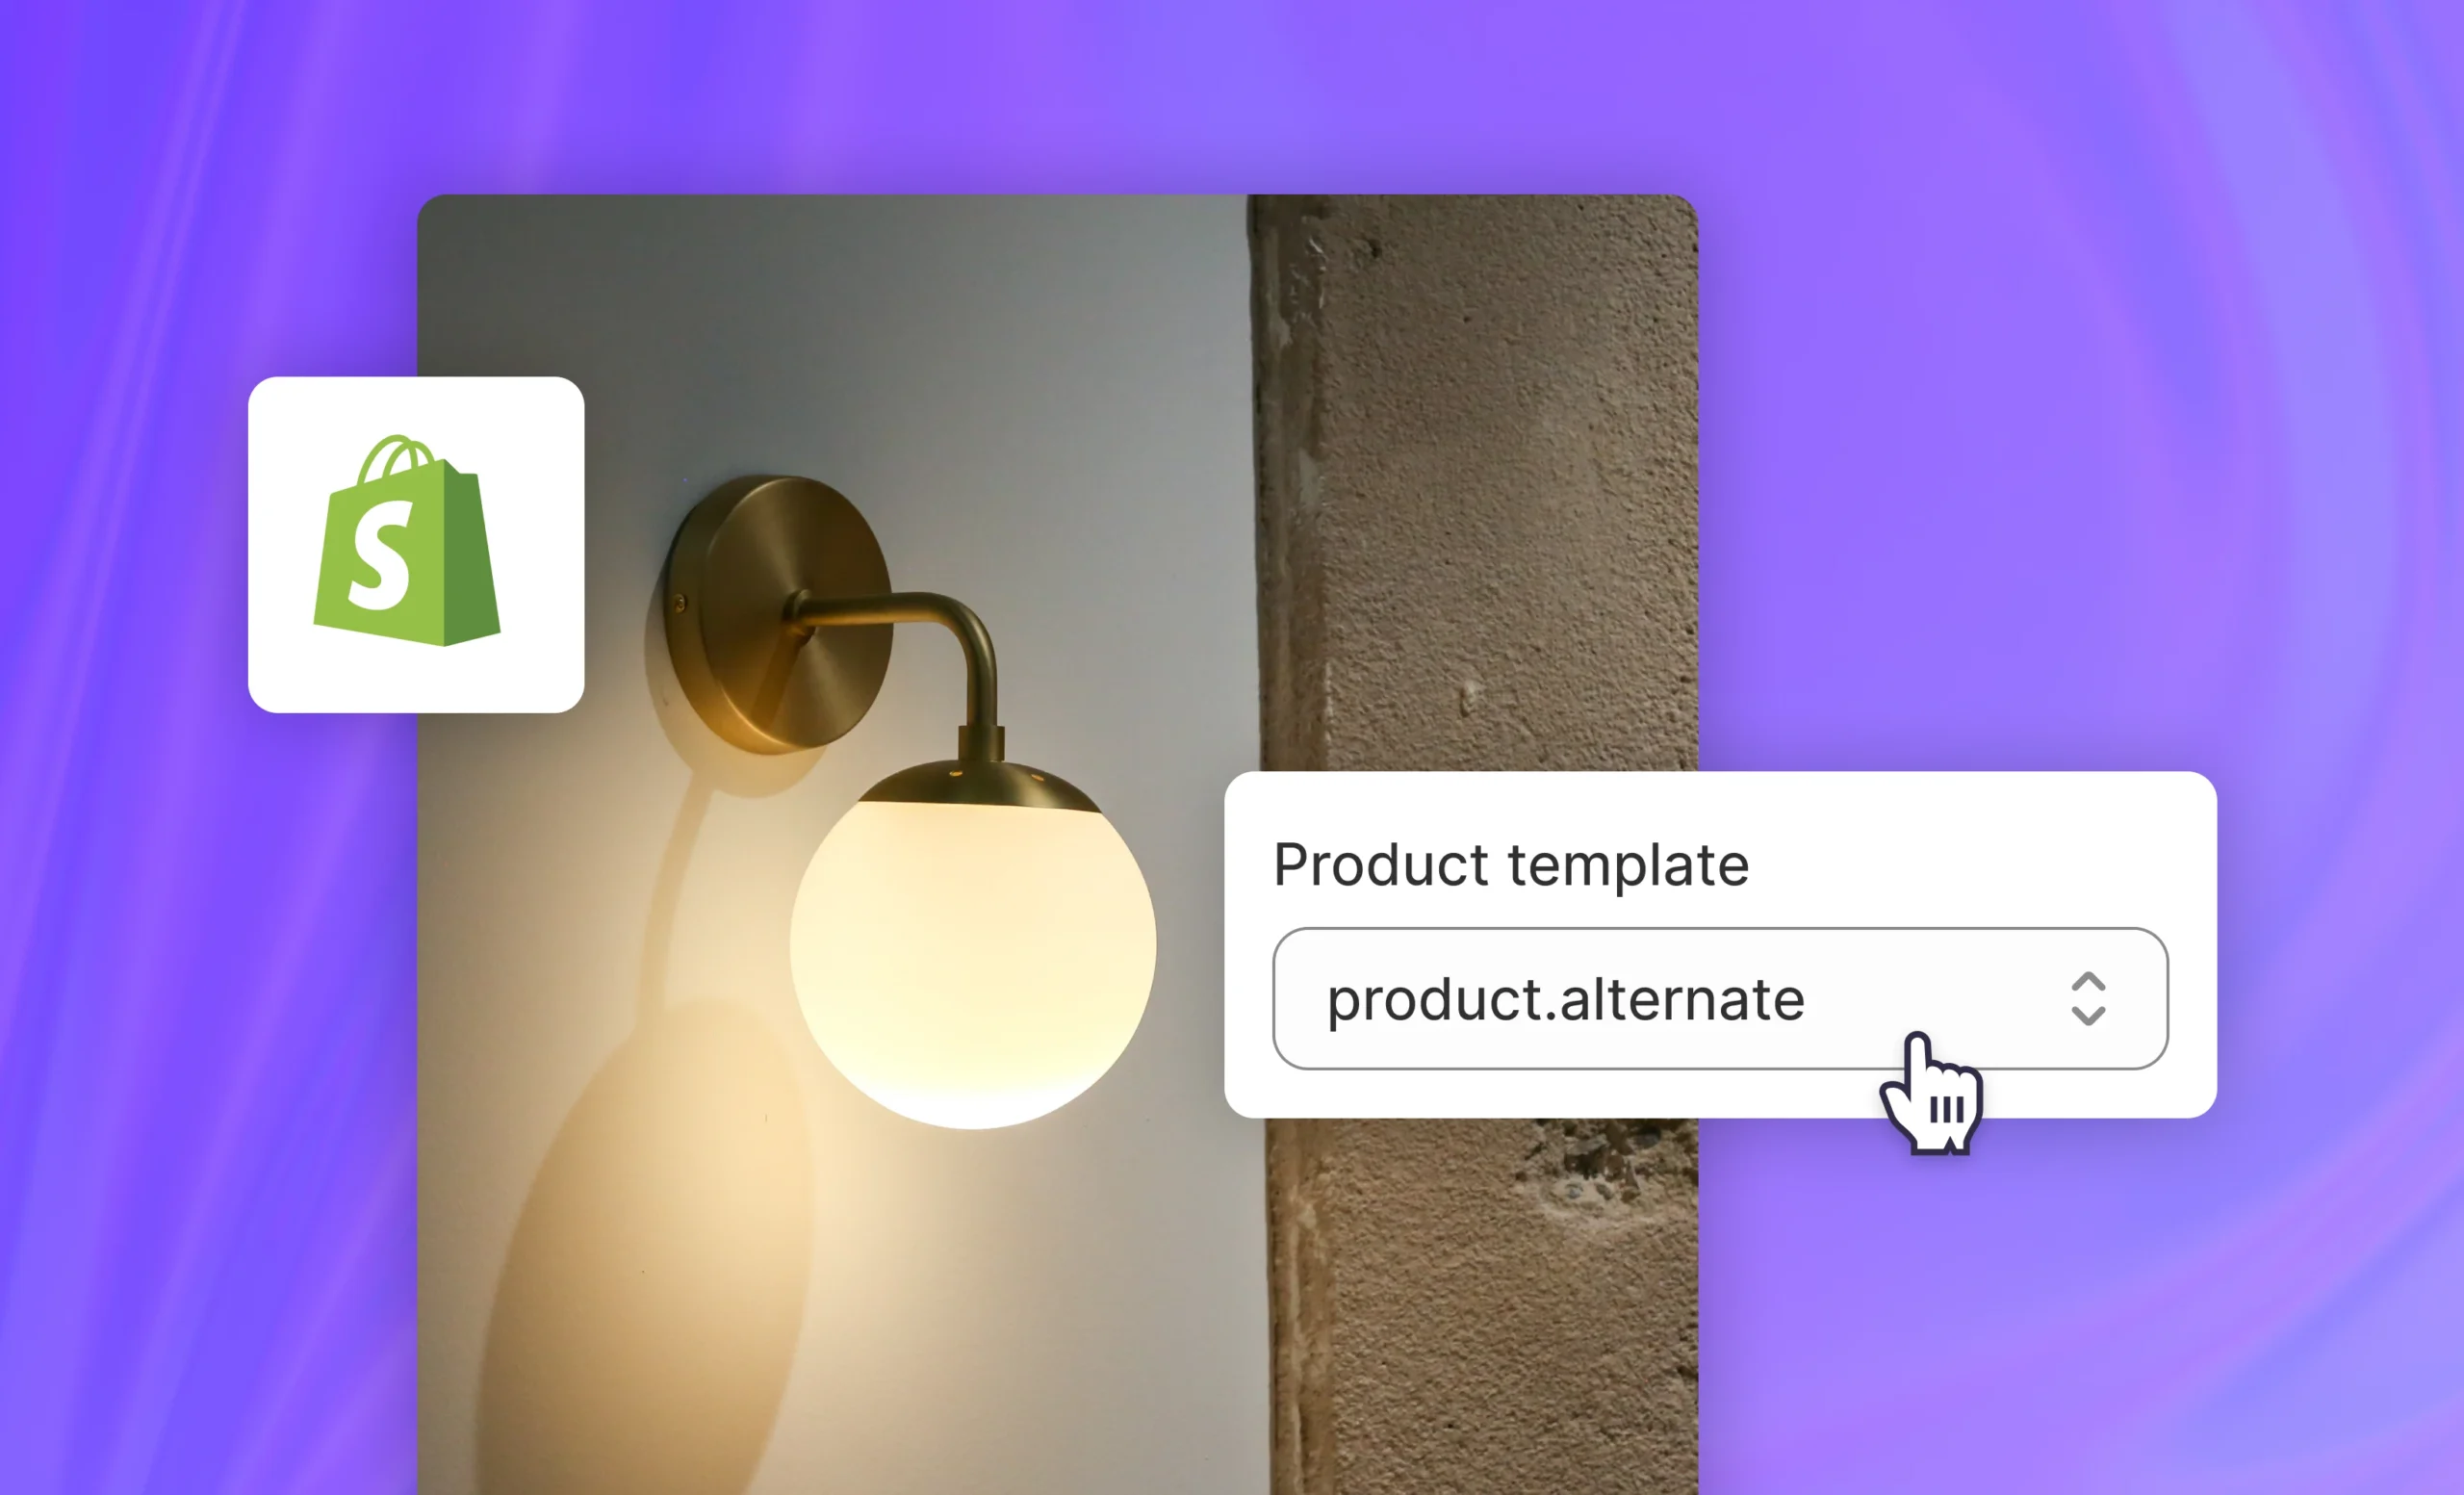
Within these dynamic themes are Shopify product templates, which are the individual parts that determine the layout and structure for certain page types in your store.
For example, product pages will have a dedicated Product template, while blog posts and pages use different templates. The main draw to these templates is how they can be reused like molds – essentially, using the same structure for similar pages rather than starting from scratch every time.
But you might be wondering, “Why would I need multiple templates when I could just reuse the same one?” Using multiple templates lets you enhance your store’s functionality and customer experience. Each product you sell tends to serve a different need and might require a slightly different presentation – in look, feel, and structure.
Let’s look at an example. If your store sells clothing, you might have a template specific for tops and bottoms, designed with options to choose size, color, or fabric type, as well as a size guide. On the other hand, you could use a different template for accessories like scarves or earrings, where size options aren’t relevant.
Create Shopify product page templates with ShogunDiscover the power of the Visual Editor.Start building now
The same idea applies to blog and collections pages. Blog pages typically separate themselves from the ‘sales’ content of an ecommerce site and look like a hub of articles with headings and a hero image – something you wouldn’t use for products. Similarly, using a variety of templates for your collections can give each one a distinct, curated feel to guide customers to the products they’re most interested in.
If we continue on with the clothing store example we mentioned previously, your store might have seasonal collections you want to organize together. A summer collection might have a vibrant, full-page layout featuring models in colorful summer wear, while a winter collection might suit more of a minimalistic grid layout showcasing cozy sweaters and jackets.
How do these templates work within the theme, you might ask? Each template is essentially just a chunk of code that determines how things are displayed on a given page. With the drag-and-drop theme editor, though, there’s no need to worry about the back-end coding.
Editing Your Product Template Files in Shopify using Liquid
One way you can edit your product template files in Shopify is by using Shopify’s very own template language – Liquid.
This method is only recommended if you’re confident with coding.
All product detail pages, by default use a product.liquid template as a starting point for a theme.
When you first start out – either by creating your own theme or downloading a theme – there won’t be much Liquid code. This is your chance to add and edit your own code to transform your templates.
Accessing the files page
Step 1: From Your Shopify Dashboard, Navigate to Your Online Store
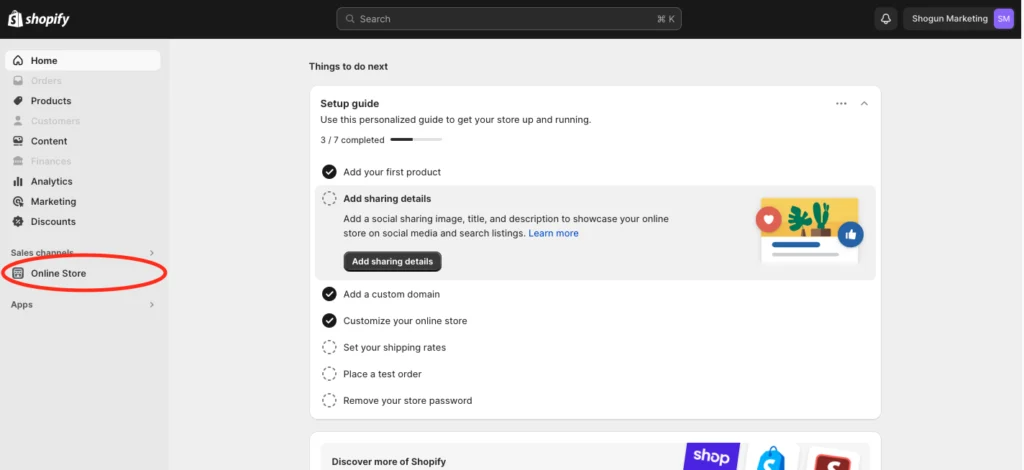
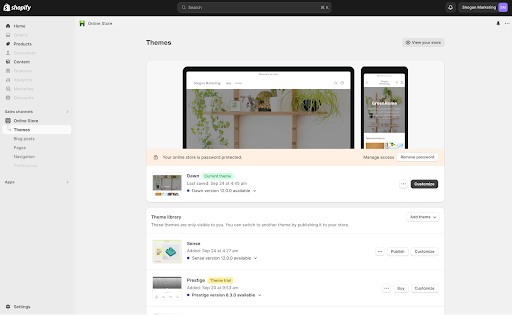
Access your Shopify dashboard and click on your Online Store on the left-hand navigation menu. You’ll be instantly directed to the ‘Themes’ subsection.
Here, you’ll find your current active theme and a range of themes under ‘Theme library.’
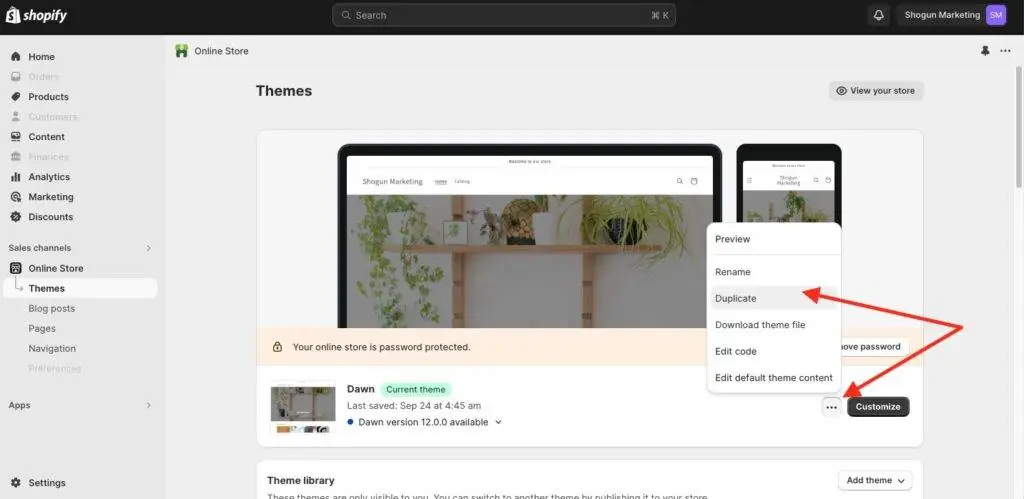
Before editing any code, click on the three dots icon and ‘Duplicate’ your theme. This will act as a safety net in case you make any mistakes and want to reverse your changes.
Step 2: Navigate to the code editor
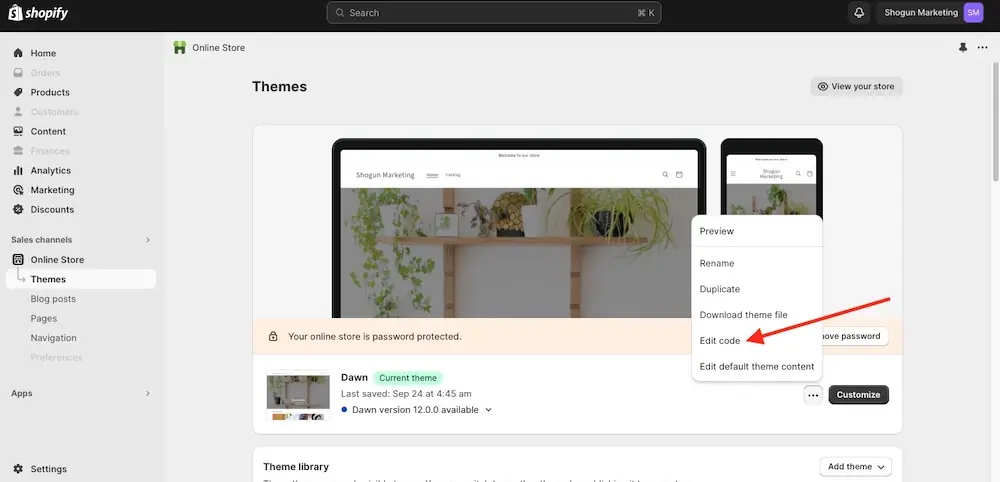
Click on the three dots to open up the menu and select ‘Edit Code’ to open the Shopify code editor.
This is where you’ll have access to all the templates associated with your theme.
Useful Snippets of Liquid Code for Product Templates
While there’s countless code that you can implement, we’ll show you a couple of particularly handy snippets that might come in handy.
Add a call-to-action button
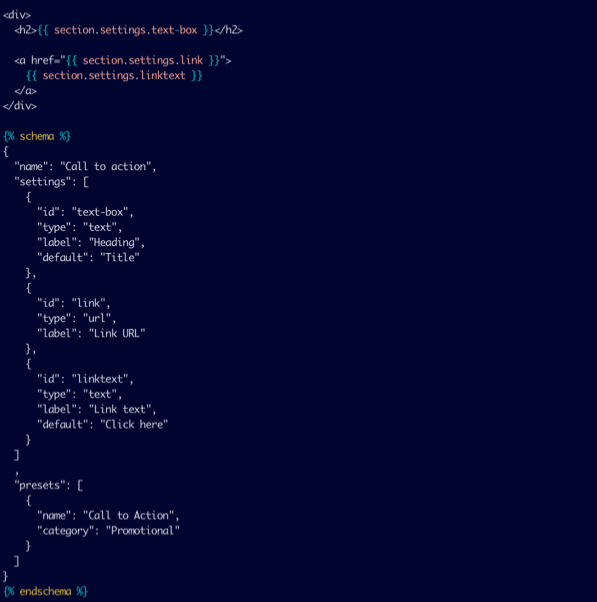
CTA buttons encourage visitors to carry out a specific action, such as navigating to checkout or creating an account.
Show a unique product SKU

Displaying the SKU for a product and its variants can help identify products and track inventory.
Payment icons
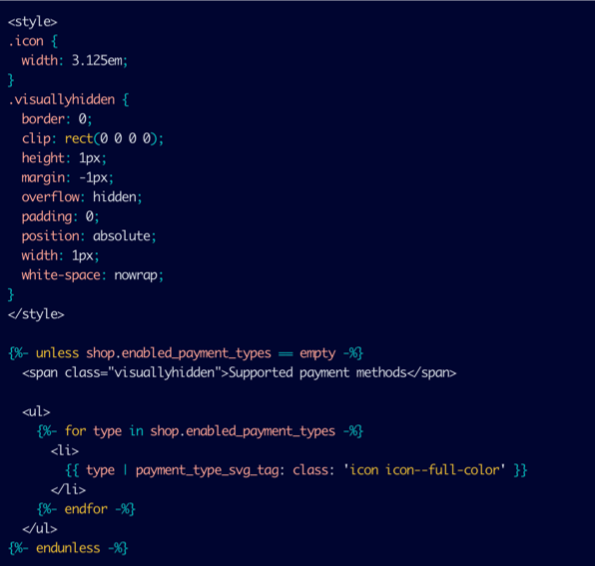
Often placed in the footer, payment icons show customers the different payment methods accepted on your site.
Create product page templates on Shopify with ShogunDiscover the power of the Visual Editor.Start building now
Creating a New Template For Your Products in Shopify
Ready to start customizing your Shopify store and transform your customer shopping experience? This section will guide you through how to create a new template for your products with Online Store 2.0 Themes. Whether you’re launching your first-ever product or changing the template of a product in Shopify, this step-by-step will help you enhance your product presentations.
Applying a new template to a page
- Head onto your Shopify admin page and go to Online Store -> Pages.
- Click on your store page.
- In the ‘Online store’ section, choose a new theme template through the drop-down menu.
- Click ‘Save’.
For products
- Navigate to ‘Products’ from your Shopify admin page.
- Find the product that you want to change using the search filter or from the list of existing products.
- In the ‘Online store’ section, choose a new theme template through the drop-down menu.
- Click ‘Save’.
The Steps for Creating a New Template in Older Themes
If your store uses an older theme, but you’re interested in creating new templates, it’s unfortunately impossible unless you upgrade to Shopify’s Online Store 2.0. There are a couple of ways you can upgrade, which we’ll go over in this section.
Download an Online Store 2.0 theme from the Shopify Theme Store
The most obvious way to upgrade your theme is to download a brand-new one from the Shopify Theme Store. Whether you want a distinct, dynamic theme or one tailored for stores with a small catalog or artisan goods, Shopify has themes to accommodate these needs. Once you download your new chosen theme, it will automatically replace your old one.
Download a new version of your theme
In some cases, theme developers will upgrade their theme to Online Store 2.0. While other theme updates will be applied automatically, you’ll need to manually update your theme if there’s a new version number. If your theme is upgraded to the latest available version, you’ll see a green checkmark icon under the theme in your Shopify Admin. Otherwise, you can click ‘Add to theme library’ to add the updated version to your library.
Note that while any customizations made to your theme using the Theme Editor are copied over and applied to the updated theme, this won’t apply to any code changes to the theme. So be sure to copy your code!
After you’ve added the updated theme to your library, ‘Publish’ the theme when you’re ready.
Migrate your current theme
If you really want to keep your current theme, you have the option of migrating your current theme to Online Store 2.0. However, this isn’t recommended if you aren’t comfortable with editing code (including HTML, CSS, and Liquid), so it’s advised to hire a Shopify Partner to help you do this instead. If you happen to be skilled at coding, you can follow the migration guide on Shopify.dev.
Applying bulk changes to products in Shopify (for stores with thousands of products)
One of Shopify’s most standout features is its ability to apply changes in bulk. This feature takes out a lot of the heavy lifting, so you don’t have to manually make the same changes on several products one by one. While you can’t edit blog posts or pages in bulk, you can edit products and collections and even bulk import products on Shopify.
Bulk edit products
- Go to ‘Products’ from your Shopify admin.
- Use the search filter to find the products you want to change.
- Select the products you want to change by clicking the checkboxes of the items you want to edit.
- Click ‘Bulk edit.’
- Click the ‘Columns’ drop-down menu, then click the ‘Template’ checkbox in the ‘General’ section.
- Click the template field of the first line, hold the shift key, and click the template field of the last line. You’ll see a blue shading around the selected items.
- Using the drop-down menu, pick a new template for the selected items.
- Click ‘Save.’
Bulk edit collections
- Go to ‘Products’ from your Shopify admin and click through to ‘Collections.’
- Use the search filter to find the products you want to change.
- Select the products you want to change by clicking the checkboxes of the items you want to edit.
- Click ‘Bulk edit.’
- Click the ‘Columns’ drop-down menu, then click the ‘Template’ checkbox in the ‘General’ section.
- Click the template field of the first line, hold the shift key, and click the template field of the last line. You’ll see a blue shading around the selected items.
- Using the drop-down menu, pick a new template for the selected items.
- Click ‘Save.’
Design Shopify product page templates visually with ShogunDiscover the power of the Visual Editor.Start building now
Using a Third Party App to Make Bulk Edits to Products
In some cases, the Shopify Bulk Editor may not load all your products, especially if you’re a store that carries thousands of products. In this case, this method might not be the best for you. There are other simple tools you can use that we’ll explore below.
Hextom Bulk Editor
The Hextom Bulk Editor is a third-party application that takes a bit of a different route to bulk editing. It stands out particularly for larger stores or for more complex operations, giving you a higher degree of control over aspects that the built-in tool doesn’t fully cover. Instead of looking at a list when selecting products, you can use product filter conditions to narrow your selection down.
Pricing
Free demo plan
Basic: $9.99/month
Professional Plan: $19.99/month
Advanced Plan: $49.99/month
Ablestar Bulk Product Editor
If you’re more interested in bulk editing your products with your own spreadsheets, the Ablestar Bulk Product Editor allows you to do so without any reformatting. You can update prices, product descriptions, and titles in one go, associate useful tags with each of your products, and set your own product rules so things stay consistent.
Pricing
7-day free trial
Basic: $30/month
Advanced: $60/month
Professional: $120/month
Managing Product layouts with Shogun
Creating a uniform and unique product layout across your online store could be exactly what sets you apart from the competition. But how can you effectively bundle countless different products under one captivating layout? The answer lies in Shogun’s impressive Product Page Templates.
Shogun is a no-code, visual editor integrated with Shopify that allows you to create high-converting, unique, and visually appealing product pages for your online store. With Shogun, the design and layout of your product pages no longer have to be confined by your store’s default theme settings.
Here’s how it works:
Step 1: Create a new product page template
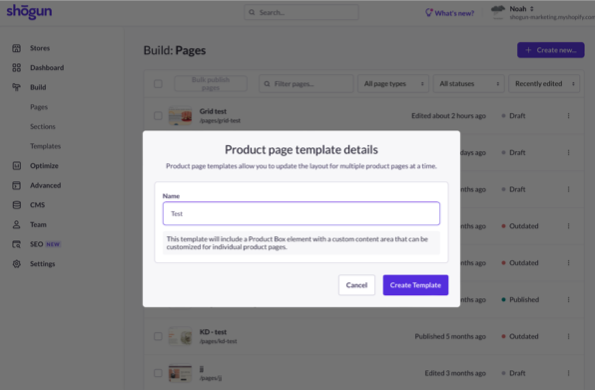
From the Shogun dashboard, click ‘Build’ in the left-hand navigation menu and click ‘Templates.’ Name your new product page template and click ‘Create Template.’
Step 2: Create your template with Shogun
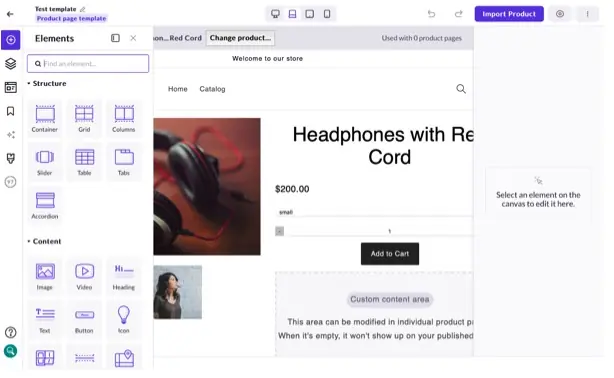
The real magic begins once you get to the drag-and-drop editor. You can use the advanced visual editor to create a compelling, uniform layout for a specific range of products – all without needing to write a single line of code.
You can add images, text, video, and more to your product page templates and even leverage elements like trust badges, image galleries, and Shopify-related products to further enhance your product pages. Shogun allows you to instantly revamp multiple product pages with a single, unique layout and full command over your store’s user experience.
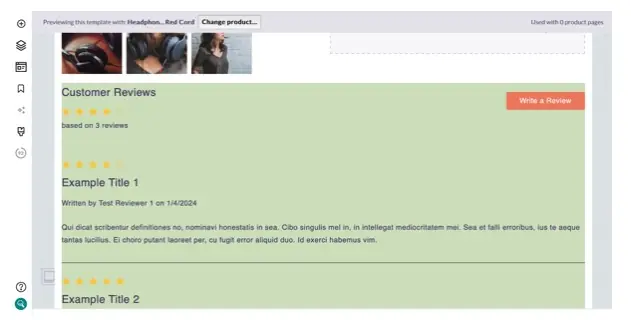
For example, your product page could feature a customer reviews section to boost trust and product reputation.
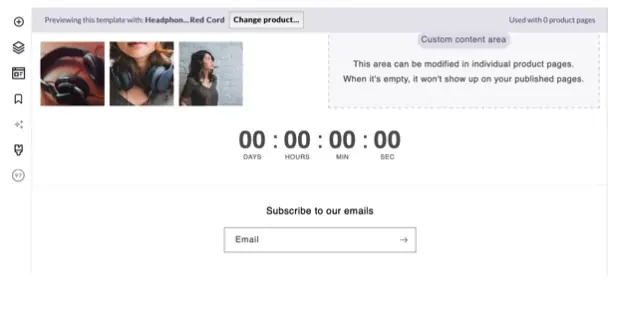
Or, a countdown timer to instill a sense of urgency or foster anticipation for a new release.
With Shogun, there are endless possibilities for creating unique shopping experiences for your store. Store owners can enjoy the freedom of designing in a framework that supports their creativity as well as values their time. If you’re ready to build product detail pages that boost sales, start your free trial at Shogun today.
Create Shopify product page templates that scale with ShogunDiscover the power of the Visual Editor.Start building now

Phill Moorman
Phill, the VP of Marketing at Shogun, is a seasoned expert in ecommerce. With a keen focus on strategic marketing, Phill drives growth and cultivates brand success in the dynamic online marketplace.

