Optimizing Shopify Collection Pages for Max Conversions
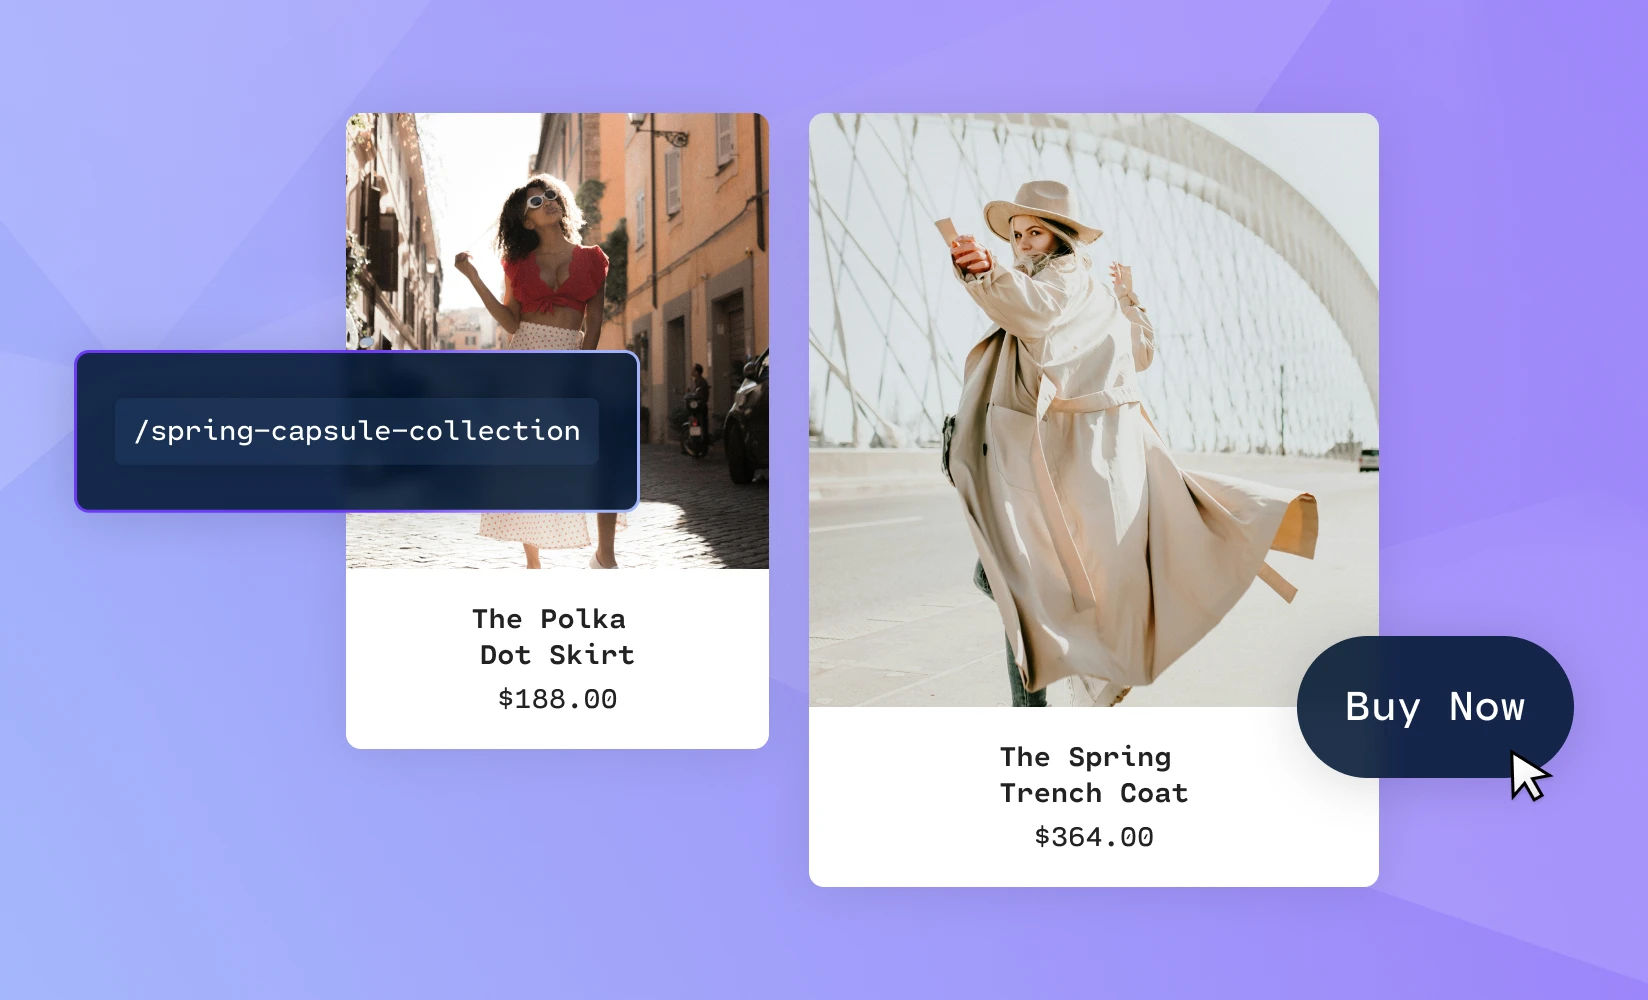
Collection pages are an often neglected area of Shopify storefronts. Many merchants just group similar products together without giving it much thought and then leave the default options alone.
By putting a little effort into customizing your collection pages, you can gain a significant edge over the competition and make a lot of sales you otherwise wouldn’t have made.
In this guide, we’ll show you exactly what you need to do to optimize the collection pages on your Shopify store.
In this post, you will learn the following
- The importance of the collection title and URLs
- How to choose what products to feature within the collection and the order they are displayed
- How to implement an A/B testing program and best practices for testing collection pages
Optimizing Collection Title and URL
The title of a collection page in a Shopify theme is likely to default to “Collection”. This generic placeholder should be updated to reflect the products that are contained within that collection.
You may be wondering: why does the title of a collection page even matter?
The answer is SEO.
Search engine optimization (SEO) is the practice of increasing how pages rank on search engine results pages (SERPs).
SEO should be a top priority, as the majority of web traffic these days is generated by organic search, meaning search results that aren’t paid advertisements. Specifically, 53% of traffic comes from organic search, compared to 15% from paid ads and only 5% from organic social media links.
In ecommerce, traffic is just another word for potential customers. If you’re not paying attention to how your Shopify store ranks on SERPs, then you’re leaving a lot of money on the table.
It’s not enough to rank anywhere on a SERP, though — you’ll need to get one of the top rankings to really see the benefits of SEO.
In fact, here’s how much traffic goes to the first four results of the average SERP:
- First result: 39.8%
- Second result: 18.7%
- Third result: 10.2%
- Fourth result: 7.4%
Keep in mind that the number of results for a single SERP is often in the millions. So, most of the traffic goes to a small fraction of the top 1% of results.
To break into the top results, you’ll need to have an understanding of how SEO works. Google and other search engines use highly complex algorithms for the rankings on their SERPs, taking hundreds of factors into account in order to determine which pages rank where.
The key here is relevancy. Search engine companies need the results on their SERPs, especially the top results, to be consistently relevant to what their users are searching for — otherwise, users might become dissatisfied to the point where they start using another service instead.
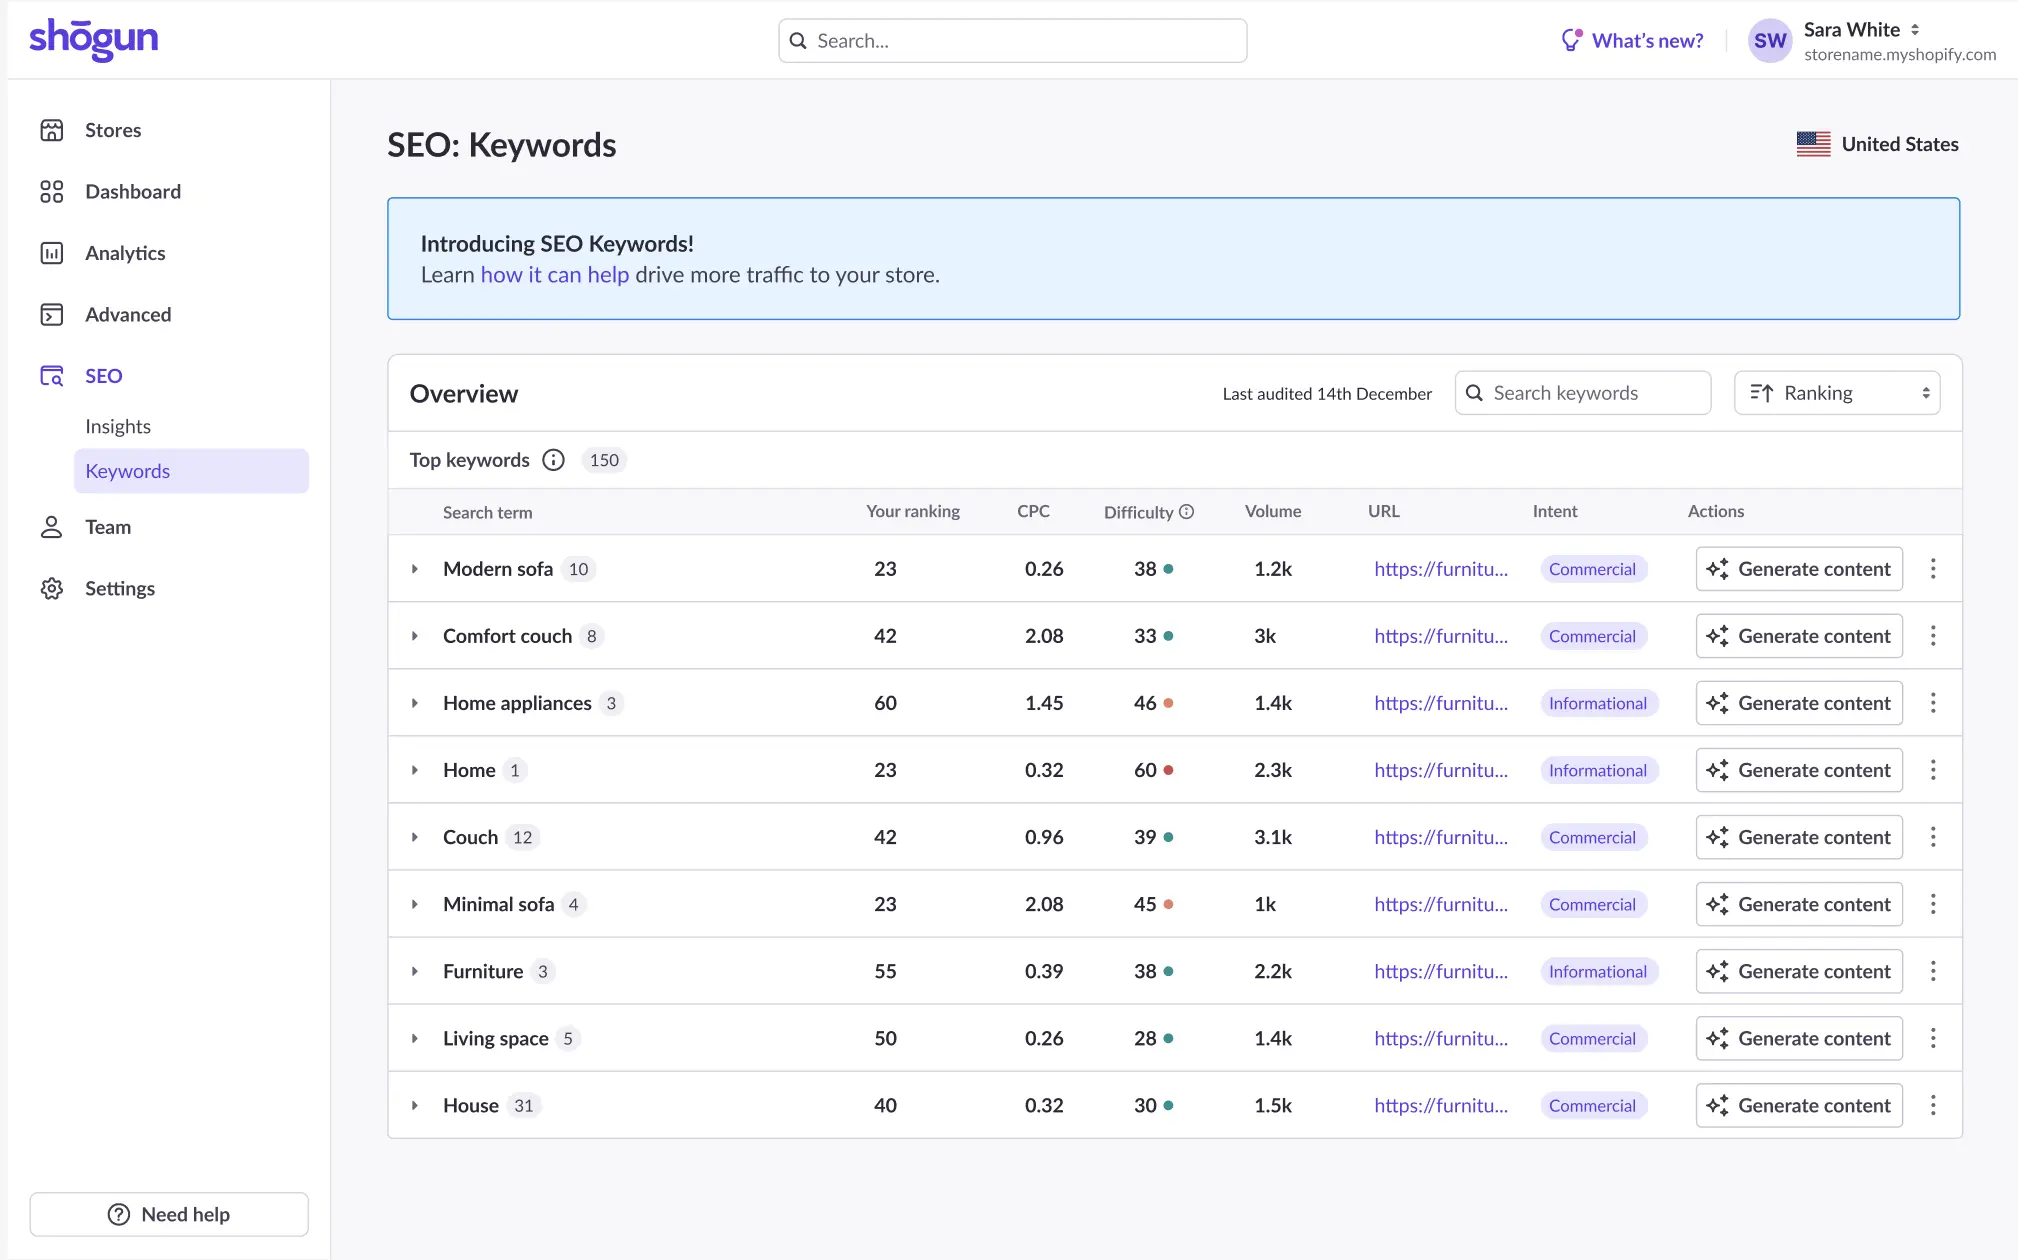
In order to make your collection page more relevant to search queries, you must know which keywords are driving visitors to your collection page in the first place.
Shogun provides a tool for exactly this purpose. With the SEO Keyword Analyzer, you’ll be able to see the top keywords for each of your collection pages.
Search engine algorithms look at the most important parts of the page to decide if it is relevant to a given search query, so this is where you need to insert any keywords you’re targeting. And the page title, of course, is one of the most important parts of the page.
Matching your collection page title to the page’s top keywords will also help increase the average amount of time that visitors spend on your site, which is good for SEO as well.
If visitors tend to quickly back out after landing on your page, search engines will take this as a sign that the result isn’t accurate and then lower your ranking accordingly. On the other hand, if visitors tend to hang around a while, search engines will likely reward you with a higher ranking.
In addition to the title of your collection page, the URL should be optimized for SEO as well — this is another key area where your targeted keyword should be included for the sake of relevancy and accuracy.
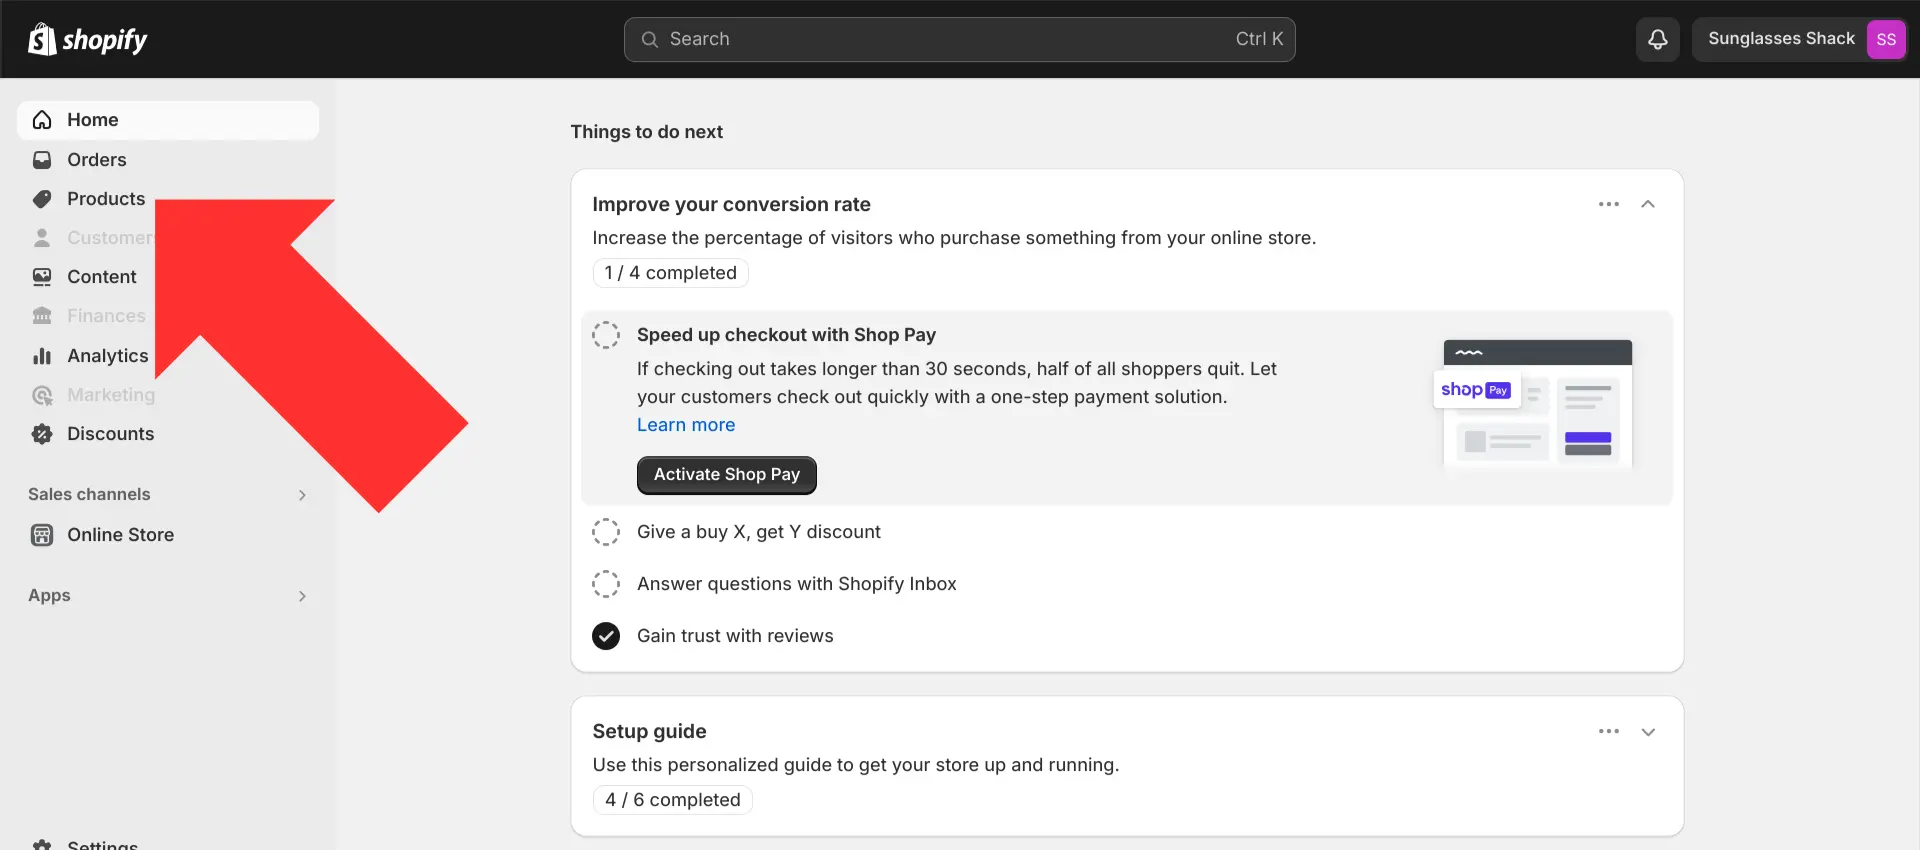
To edit the URL for a collection page, first select the “Products” option in the left sidebar of the main Shopify dashboard.
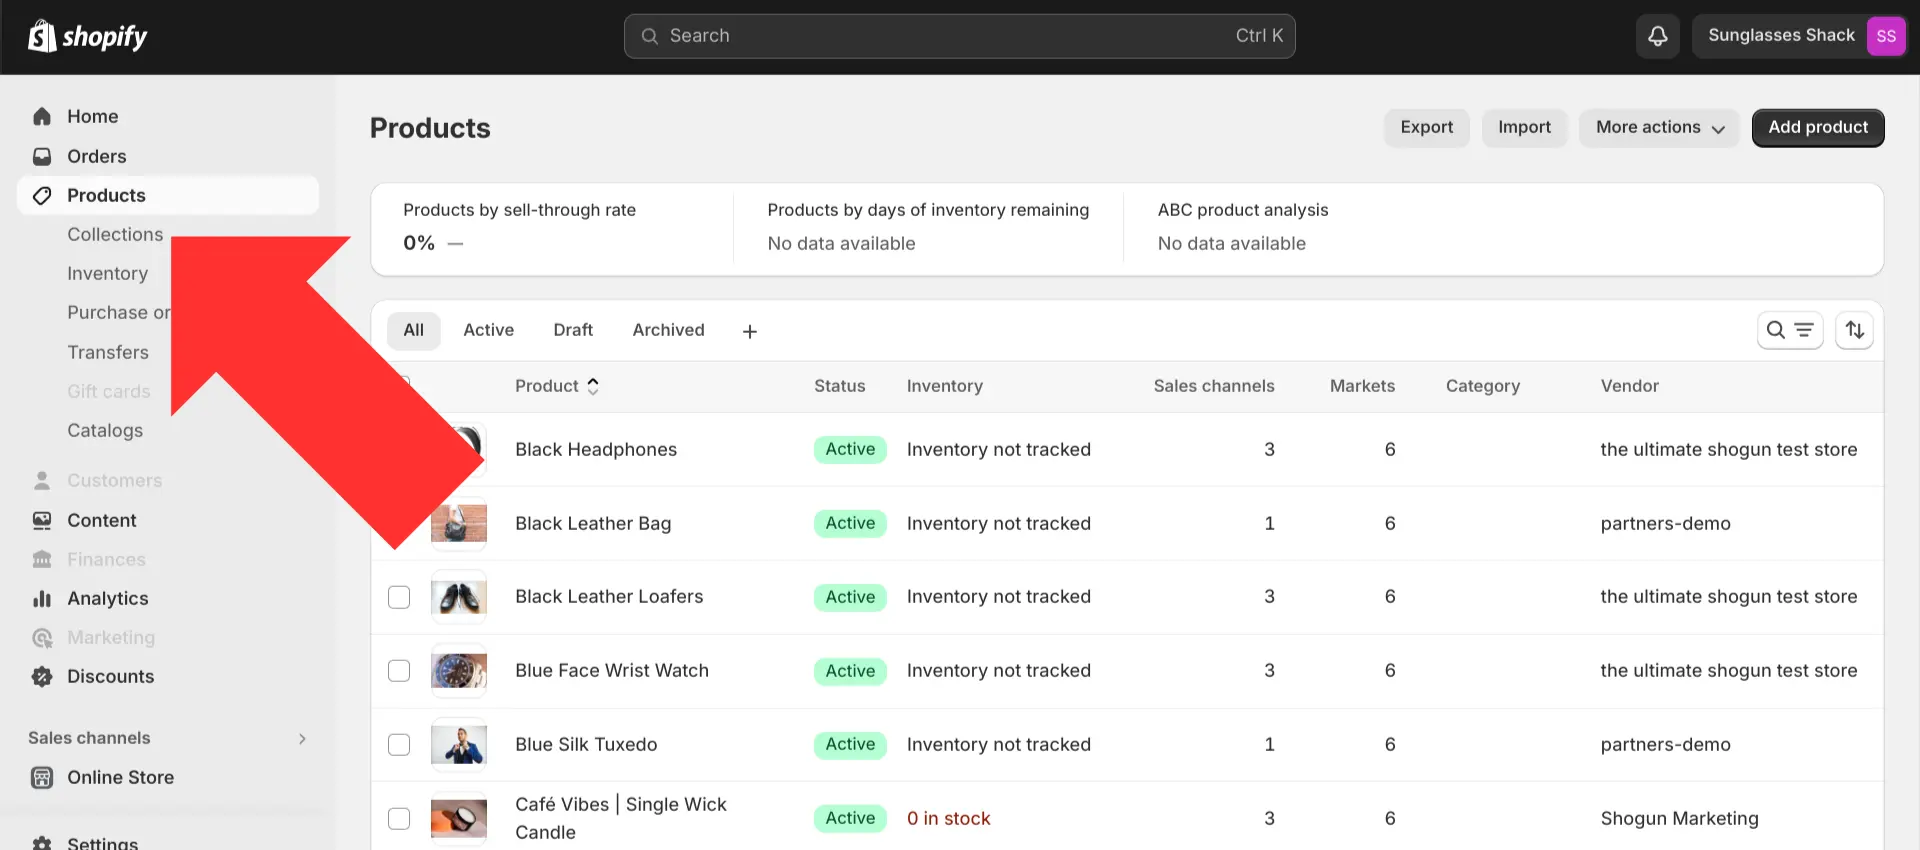
Select “Collections”.
Click on the collection page that you would like to edit.
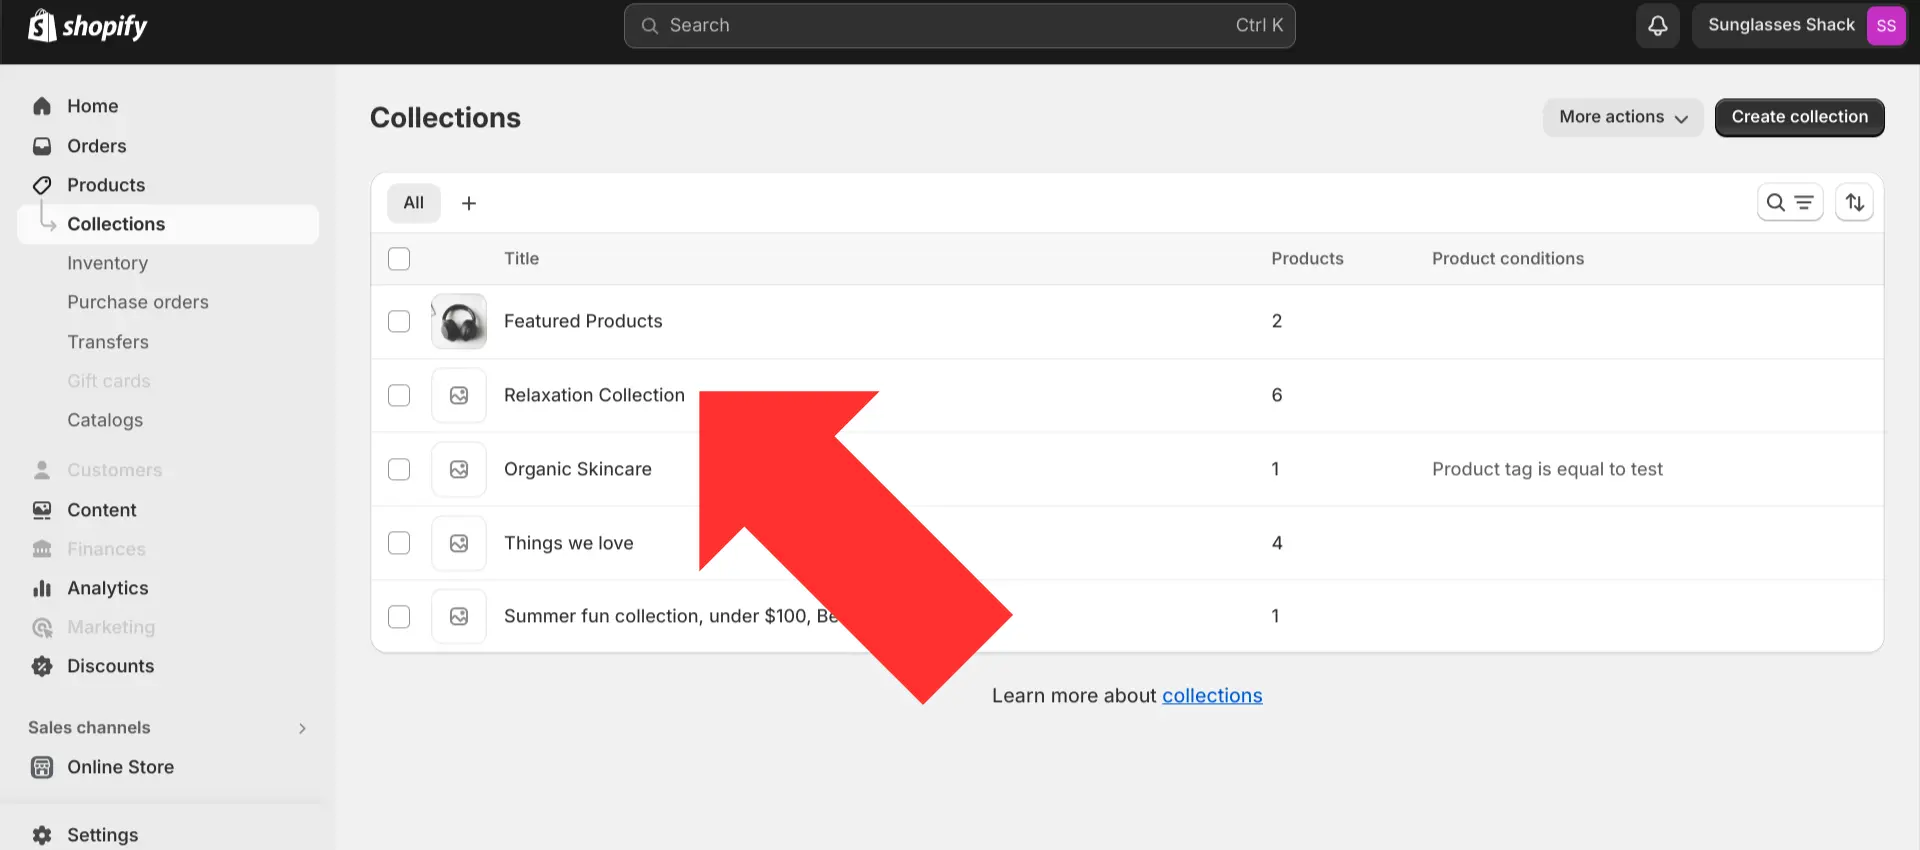
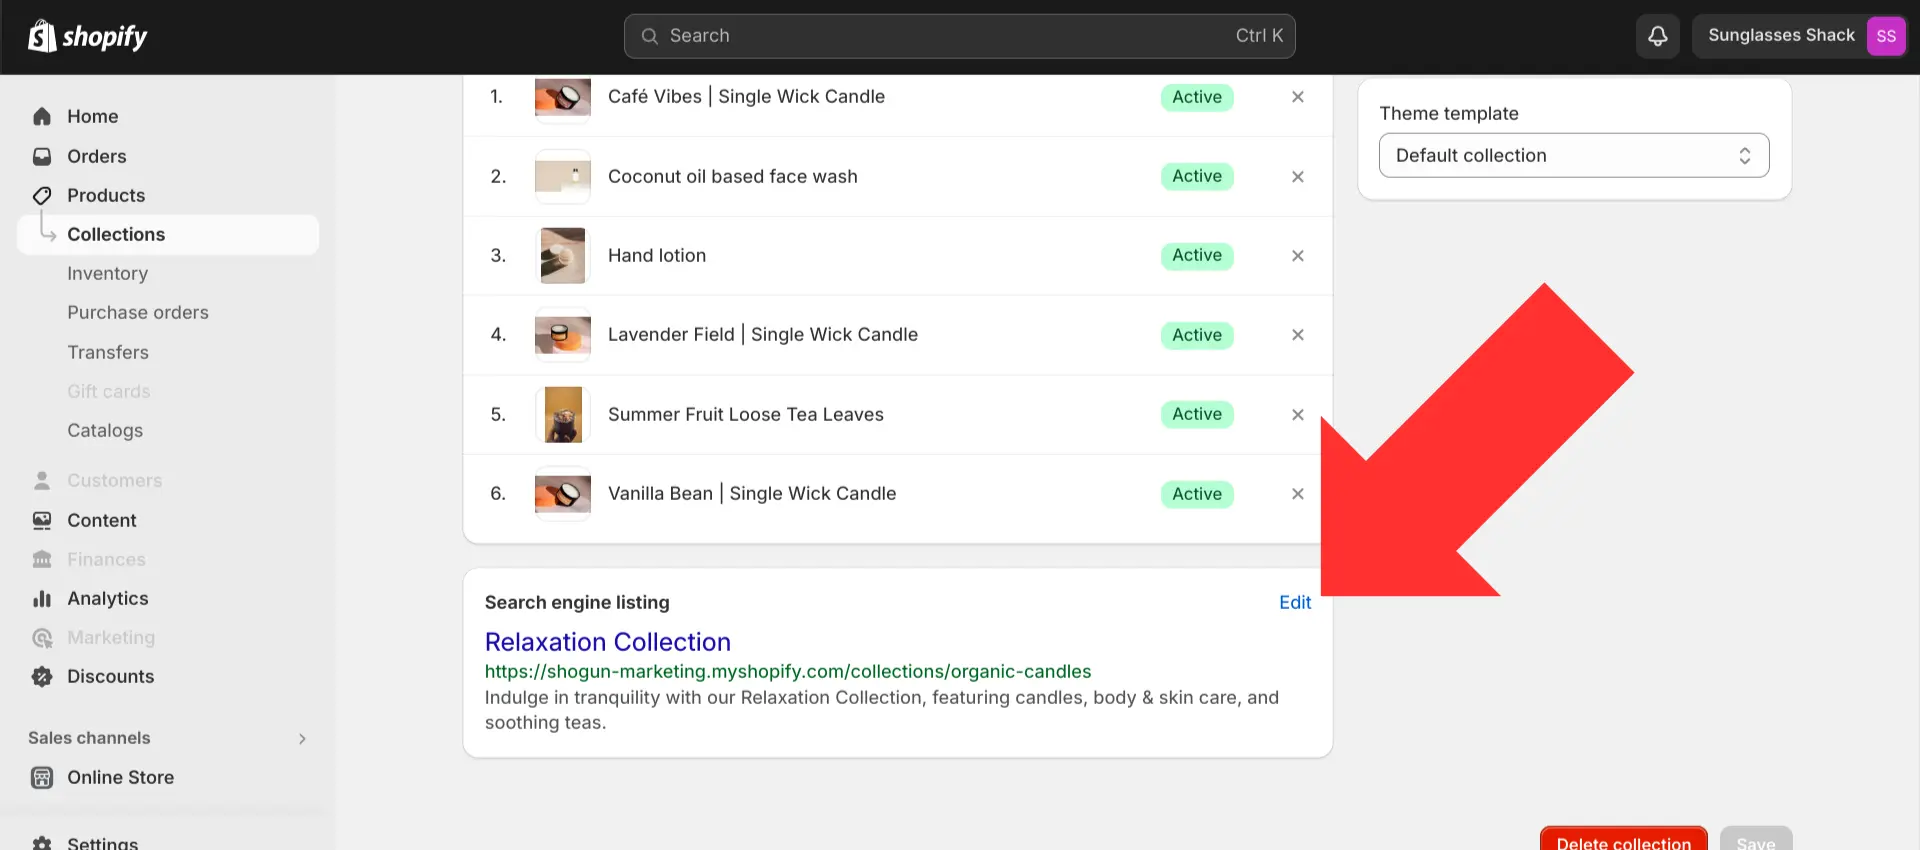
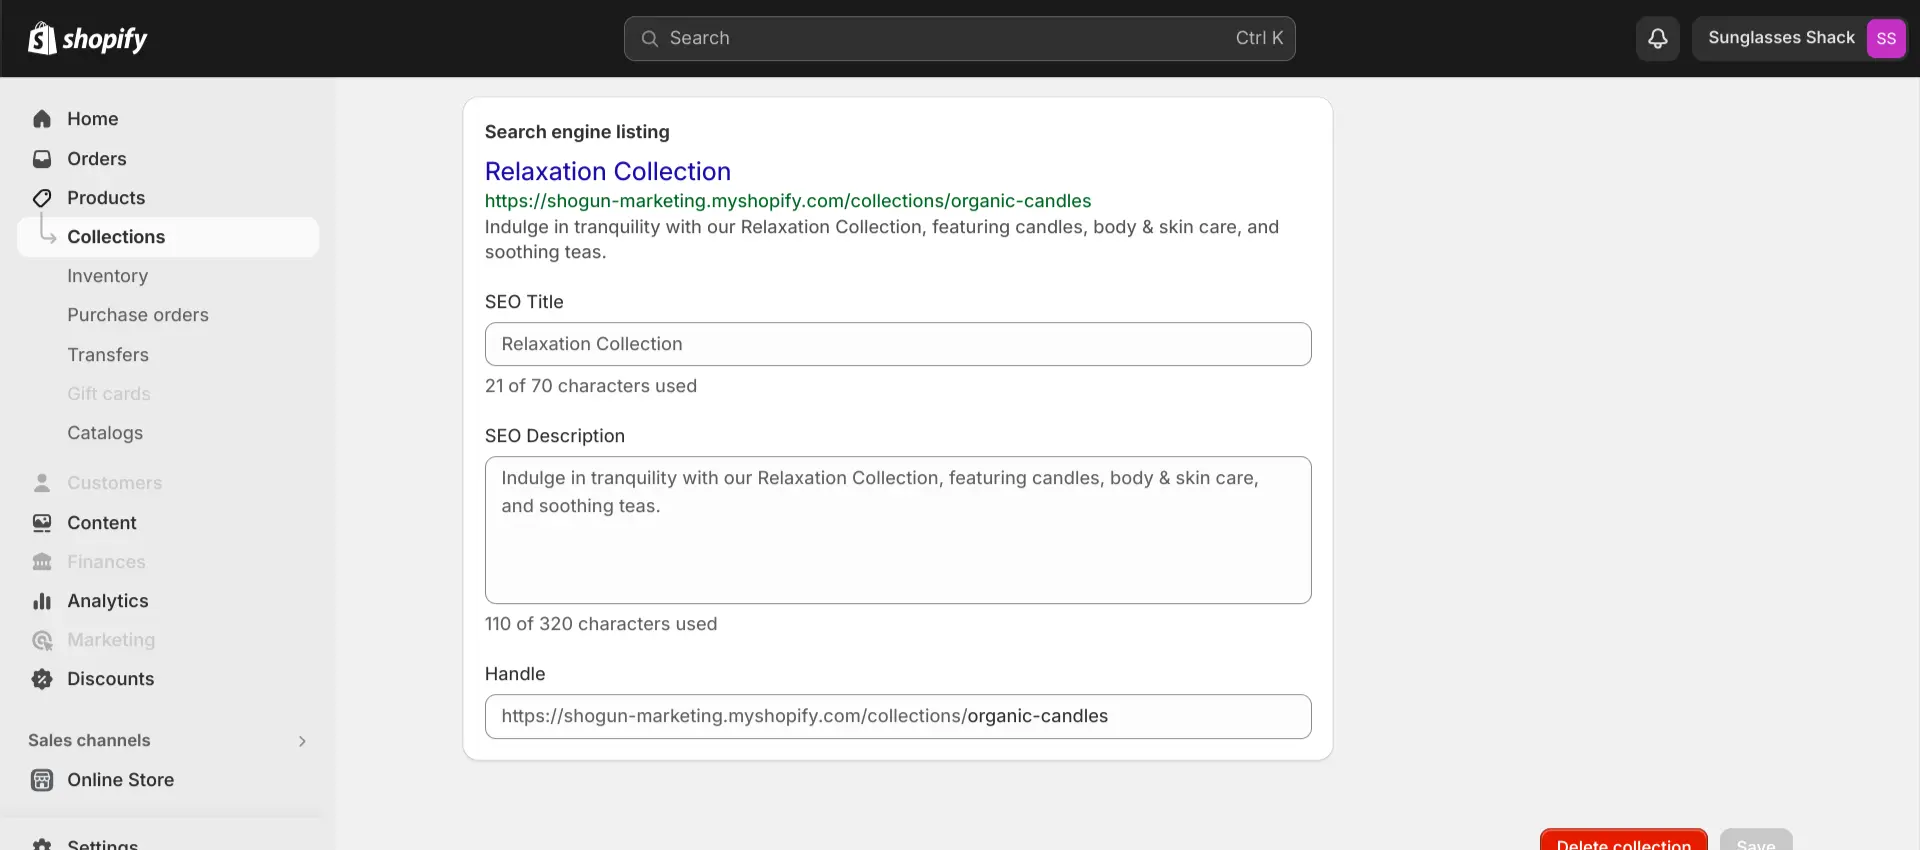
Scroll down and select the “Edit” option in the “Search engine listing” section.
This is where you can edit the SEO title, SEO description, and handle (URL suffix) for the collection page.
Optimizing the Products within the Collection
Every collection page is only as good as the products displayed on that page.
There are two factors worth paying attention to here: the order of the products listed in the collection as well as which products are selected to be included in the collection at all.
Optimizing the order products are displayed
Just as with the results on a SERP, the products listed toward the top of your collection page are going to get more clickthrough traffic than the ones listed near the bottom (few people are going to take the time to scroll down and look at every option on the page).
And your best-selling products have proven that they have what it takes to convert visitors into customers.
So, to increase the total sales of your collection page, you should consider prioritizing the order of your products by their sales volume.
To see which of your products are performing the best, select the “Analytics” option in the left sidebar of the main Shopify dashboard.
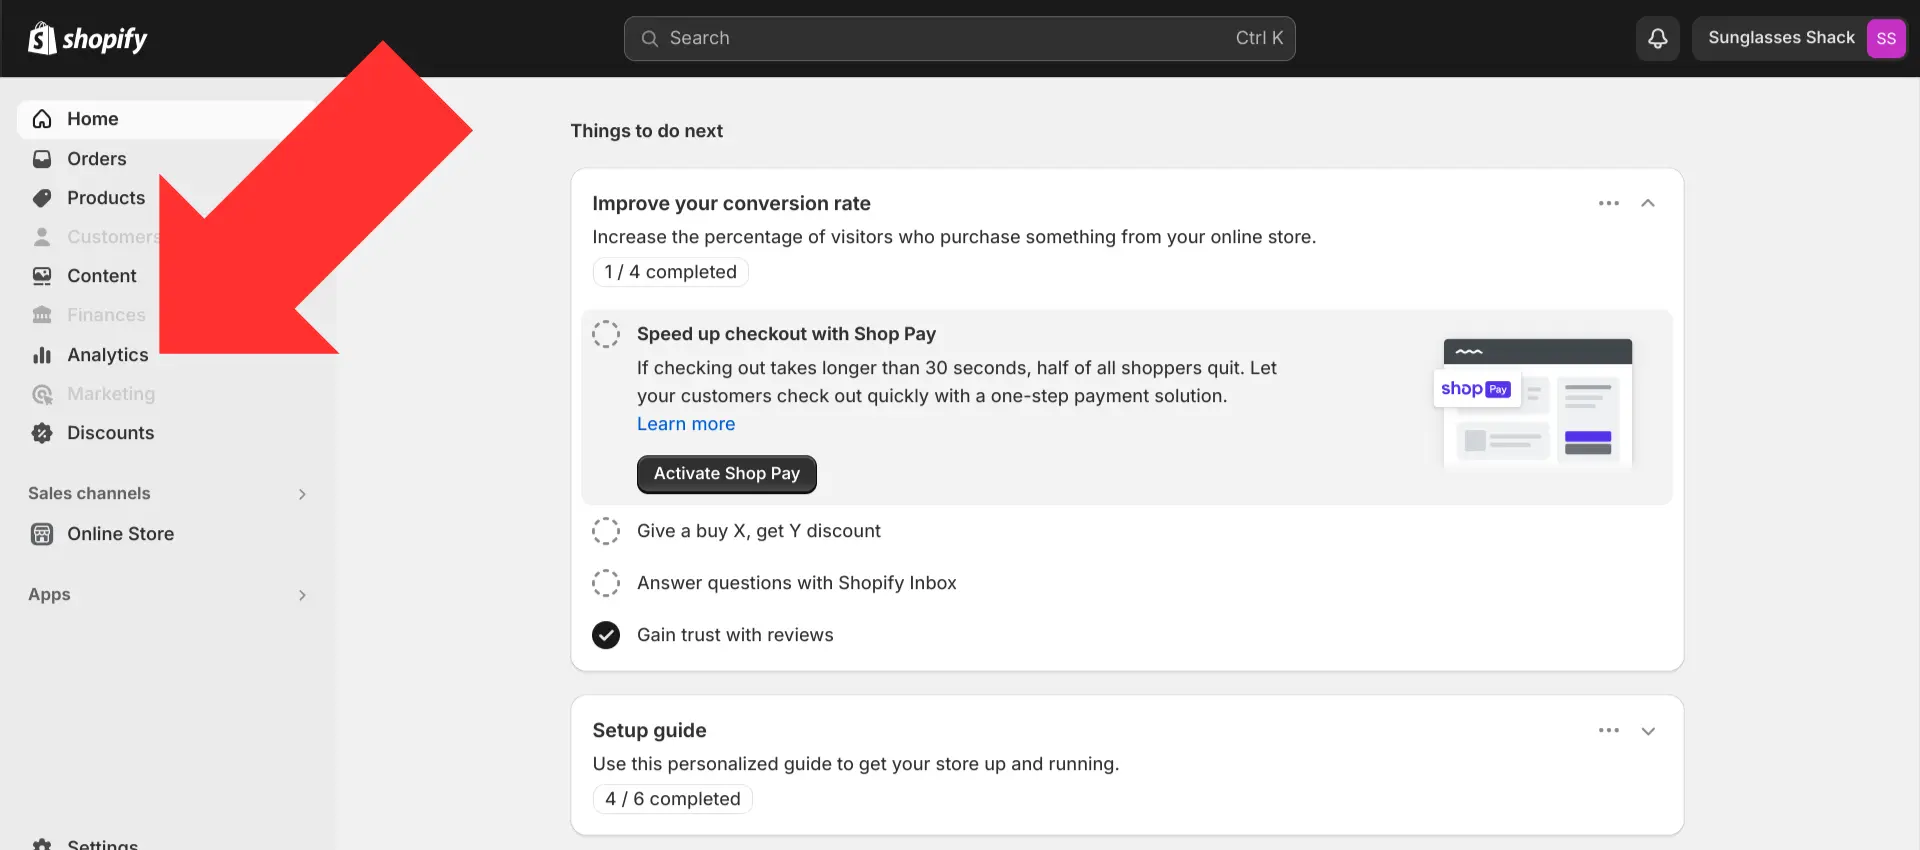
Select “Reports”.
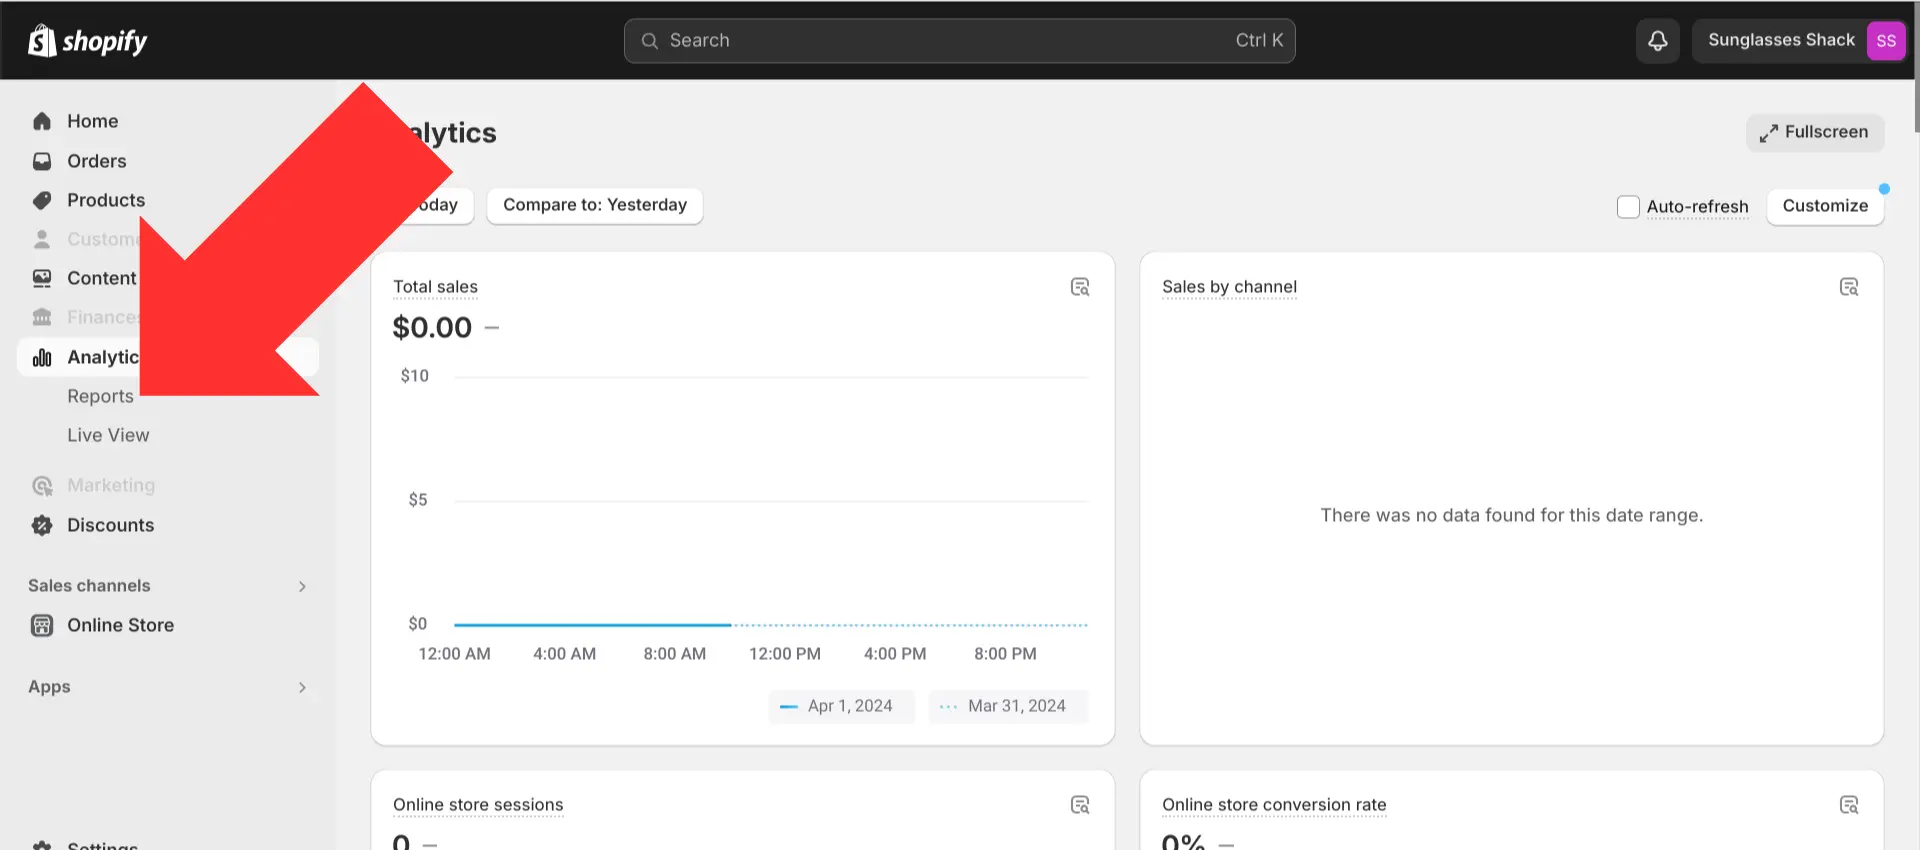
Search for and select “Sales by product”.
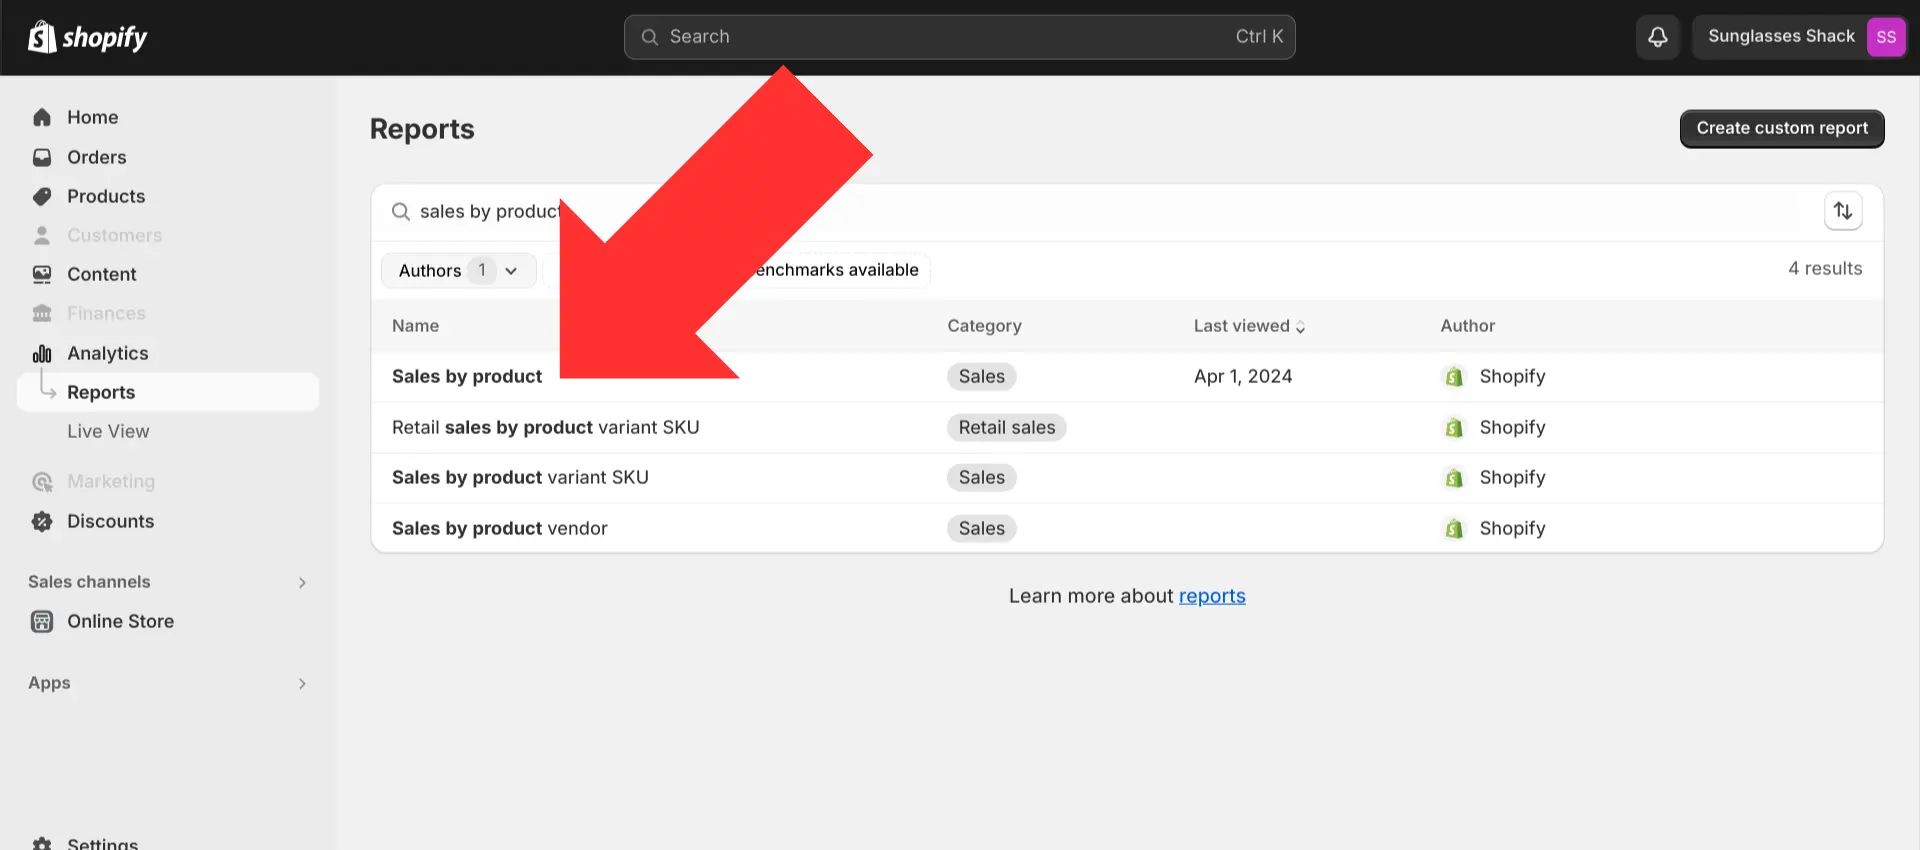
In this report, you’ll be able to sort your products by gross sales in order to determine your best-sellers. You can then use this information to change the order of products on your collection page as needed.
Grouping together complementary or related products
It’s also important to group products into a collection that would naturally pair well together.
For example, an electronics retailer might assume that they should put all of their laptop chargers into a collection. They are the same type of product, after all. But that’s not the way people really shop for this product — a charger that works for one laptop often won’t work for another.
In this case, it would make more sense to group accessories for a certain brand of laptop (charging cords, carrying cases, wireless keyboards, etc.) together on the same collection page. A customer could conceivably buy all these products on the same shopping trip, boosting your average order value.
Take some time to think about how customers behave on your store when setting up your collections.
Another method to find product grouping opportunities: Look at your store’s order history to see how people are actually pairing items together when they make a purchase. With this information, you’ll be able to objectively determine the most logical ways to group your products together.
Customizing collections page based on previous shopper history
To really increase your conversion rate, you can customize which items are displayed on a collection page according to the visitor’s purchase history.
Shogun’s Targeted Experiences feature makes this possible.
Targeted Experiences allow you to show different versions of the same page to different segments of visitors. There are several conditions that you can use to set up these segments, including:
- The referring domain of the visitor
- UTM parameters or fragments of a URL
- Site visitor’s location
- Klaviyo customer data (using the Klaviyo CDP)
Once your Klaviyo account is connected to Shogun (and access to the Klaviyo CDP is turned on), you can use a Klaviyo “previous purchasers” segment to show a different set of products to users who have already purchased an item in your collection.
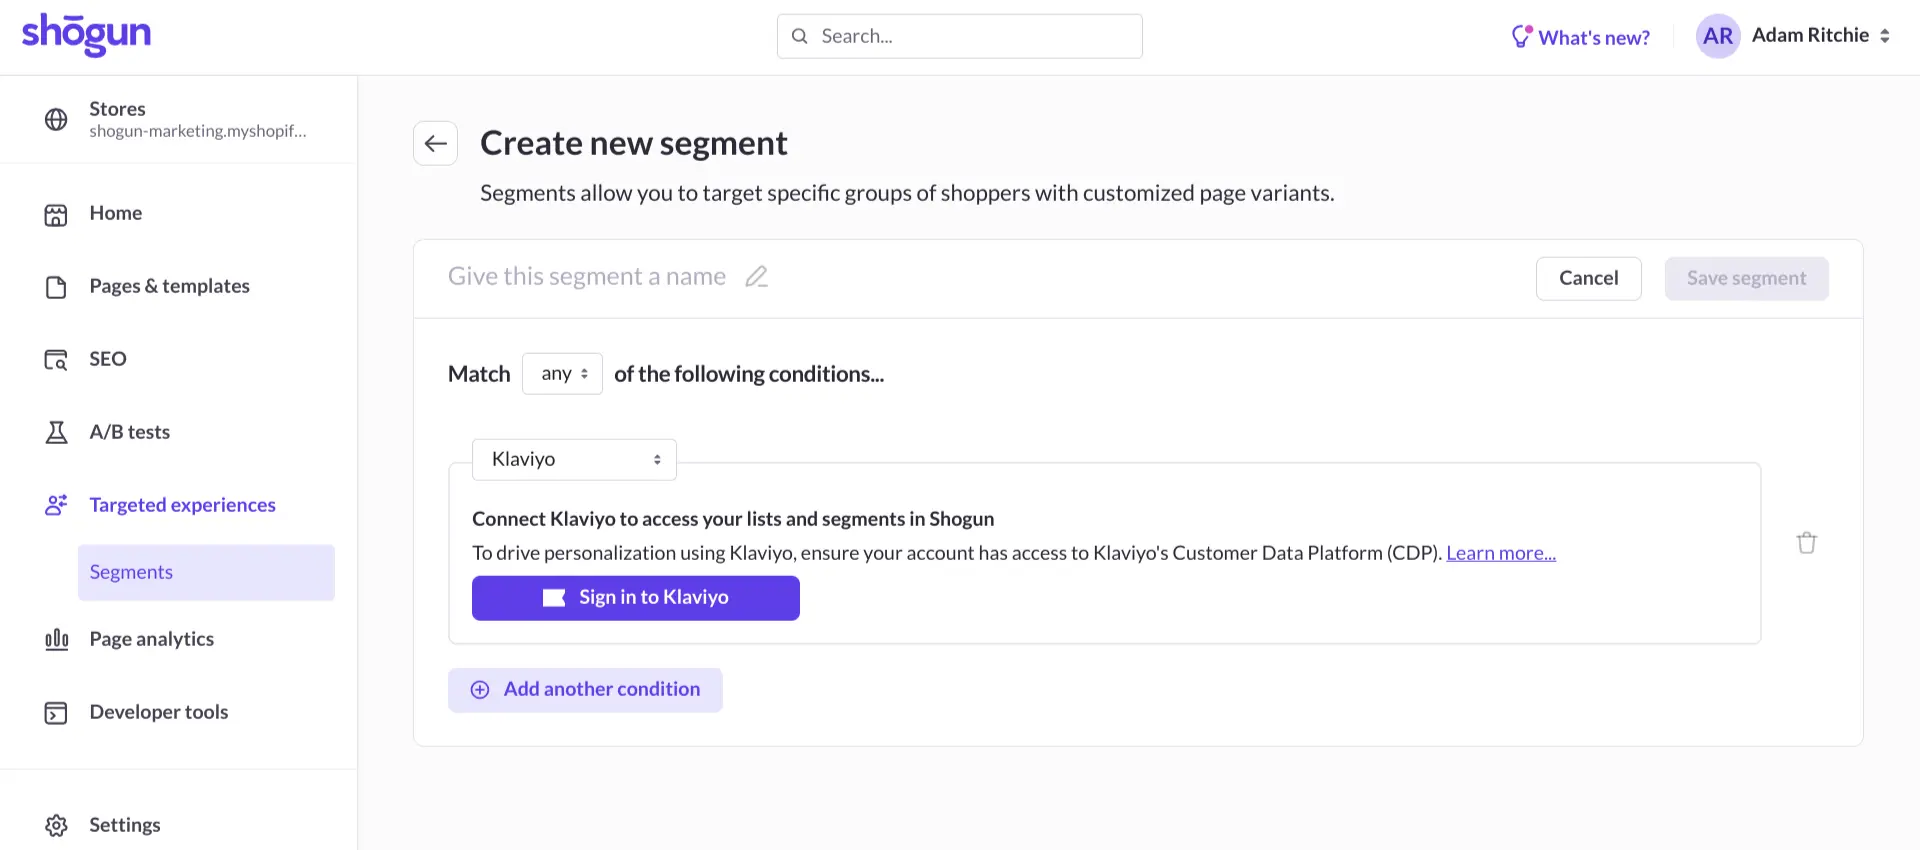
Example: How a brand would customize their “Winter” collection page based on shopper purchase history
Let’s say you run an online clothing store and a certain customer has already purchased a jacket that’s included on your “Winter” collection page, which mostly features jackets.
If this customer then stumbled onto your “Winter” collection in the future, showing them the default version of the page that prominently displays jackets probably wouldn’t lead to a sale — they already have a jacket.
But a Targeted Experiences segment could be used to show customers like this a different version of the collection page, removing jackets from their view in order to display products that they still may need to complete their winter wardrobe, such as hats, gloves, and scarves.
In short, the order of events would go:
- Shopper buys jacket from the “Winter” collection page
- Shopper enters the post-purchase email sequence after the sale
- Shopper returns to the brand’s website and clicks back on the “Winter” collection page
- This time, the shopper sees a customized version of the collection page that hides jackets and displays gloves, hats and other items that pair well with the jacket they’ve recently purchased.
You’ll be able to generate more lifetime revenue from customers through the use of smart, customized collection pages based on previous buying history.
Note: This can be done by creating segments using URL targeting (by including unique URLs within the post-purchase email sequence) or by importing the post-purchase segment data from Klaviyo.
Personalize your Shopify collection pagesWith Targeted Experiences, you can show different versions of the same Shopify collection page to different segments of visitors.Get started now
Implementing an A/B Testing Program for Your Shopify Collection Pages
At this point, you should have plenty of ideas on how to optimize your Shopify collection pages.
No matter which ideas you choose to implement, you need to make sure every change is measured properly so you can see the impact you are having.
This is where A/B testing comes in.
A/B testing involves randomly directing some of your visitors to the original version of a page while also randomly directing other visitors to a version of the page that has been updated. You can then compare how each version performs over the same period of time to see if your changes are actually having their intended effect.
Here are a few tips for making the most of your A/B tests:
- Isolate changes one at a time: If you test multiple updates at the same time, you won’t be able to tell what exactly is driving any change in performance.
- Focus on the most important elements of the page: It takes time to set up and run an A/B test, so it’s just wasteful to test elements that don’t mean much. Changes to the title, order of products, visual cues like banners or pop-ups that draw attention, and call-to-action buttons (add to cart and buy now) are all worth testing on collection pages.
- Send more traffic to the original version and less to new variants: There’s always a chance that any change you make could end up having a negative effect on user experience. Instead of splitting traffic evenly, you should send a lower share of your visitors to the newer versions — that way, fewer people will be affected if your test goes wrong.
To set up an A/B test in Shogun, simply follow these steps:
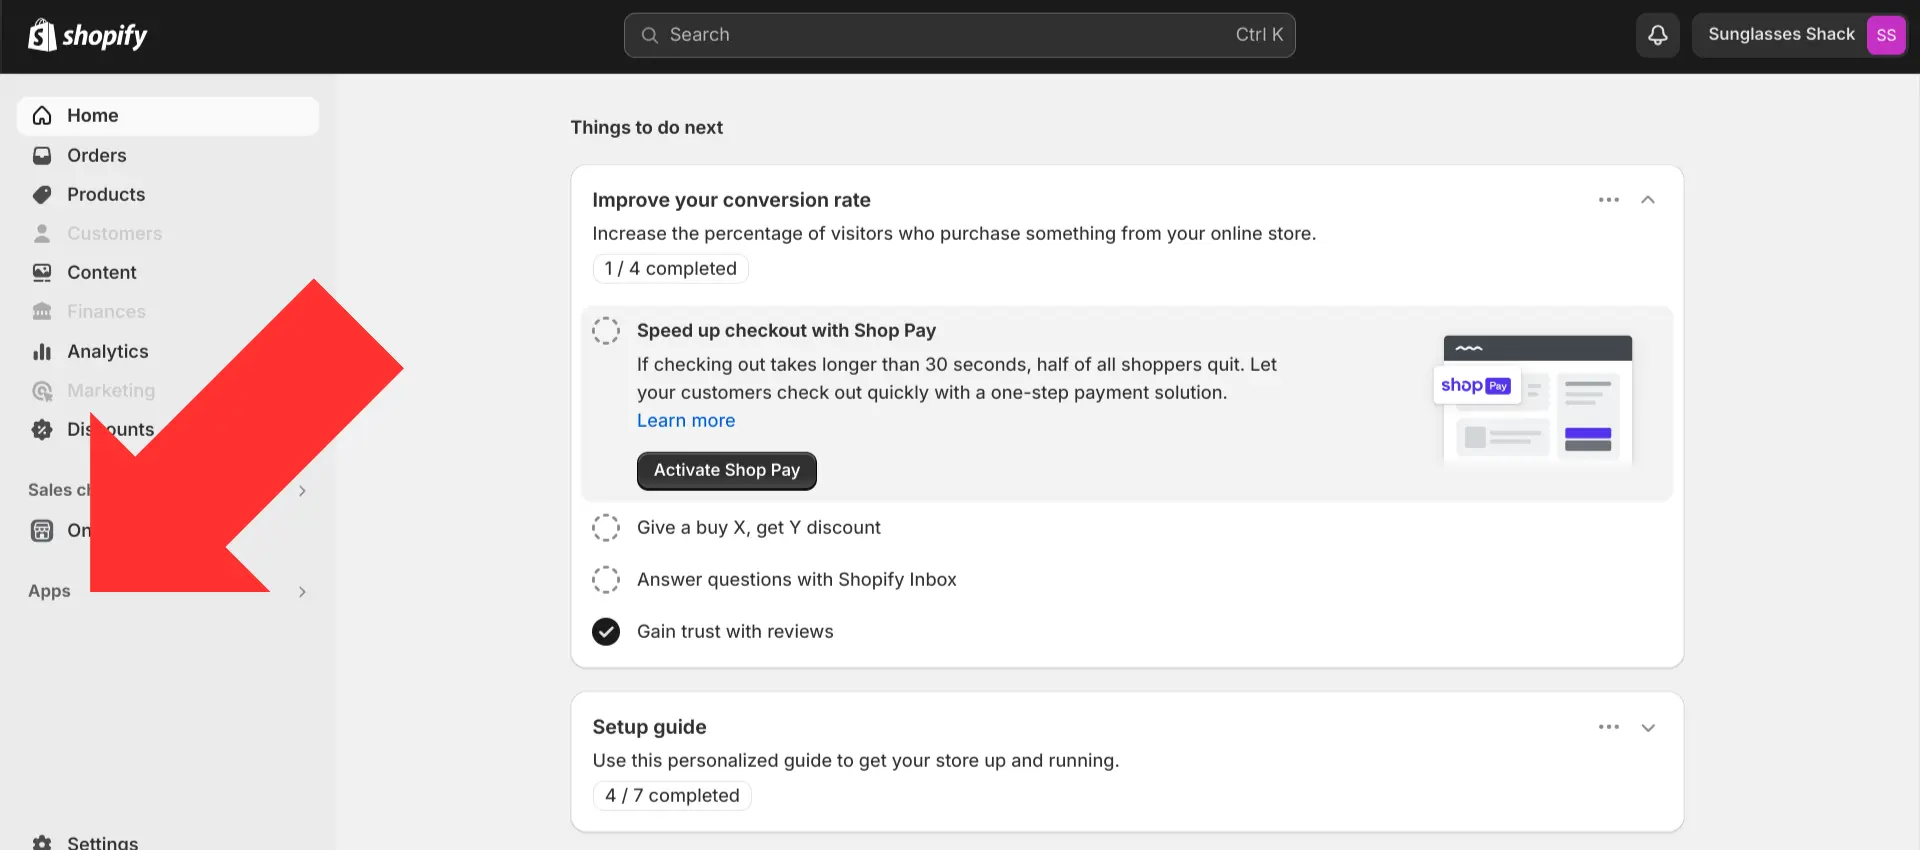
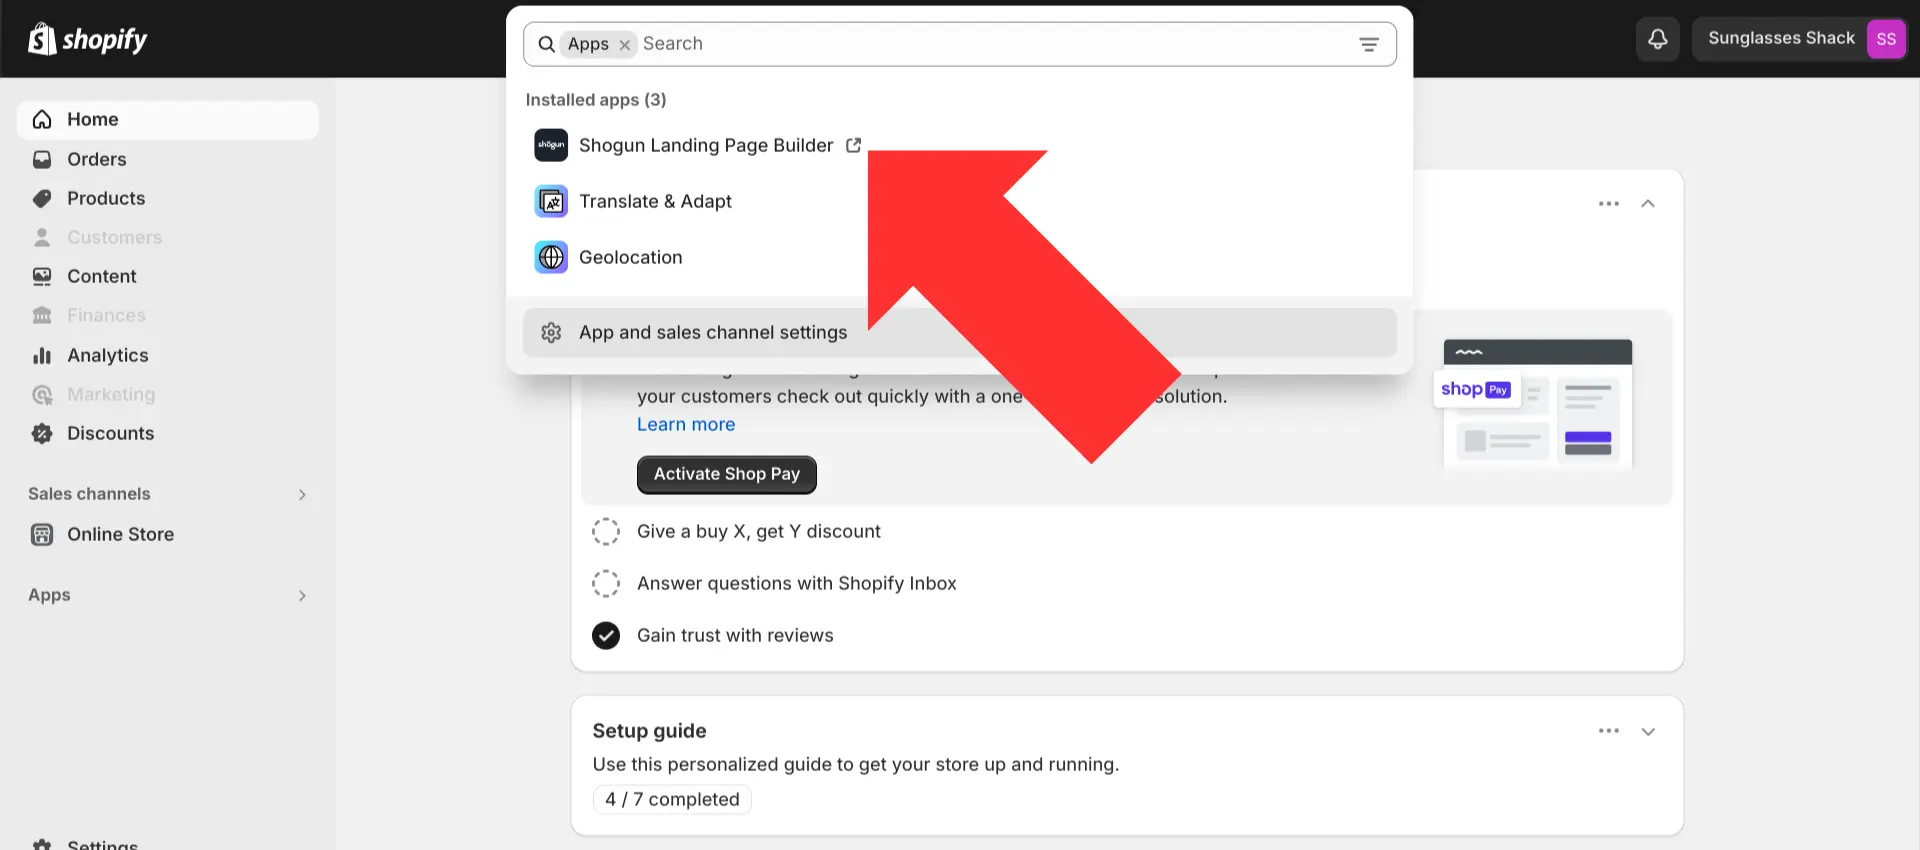
Step 1. After installing Shogun, select the “Apps” option in the left sidebar of the main Shopify dashboard.
Step 2. Open the Shogun app.
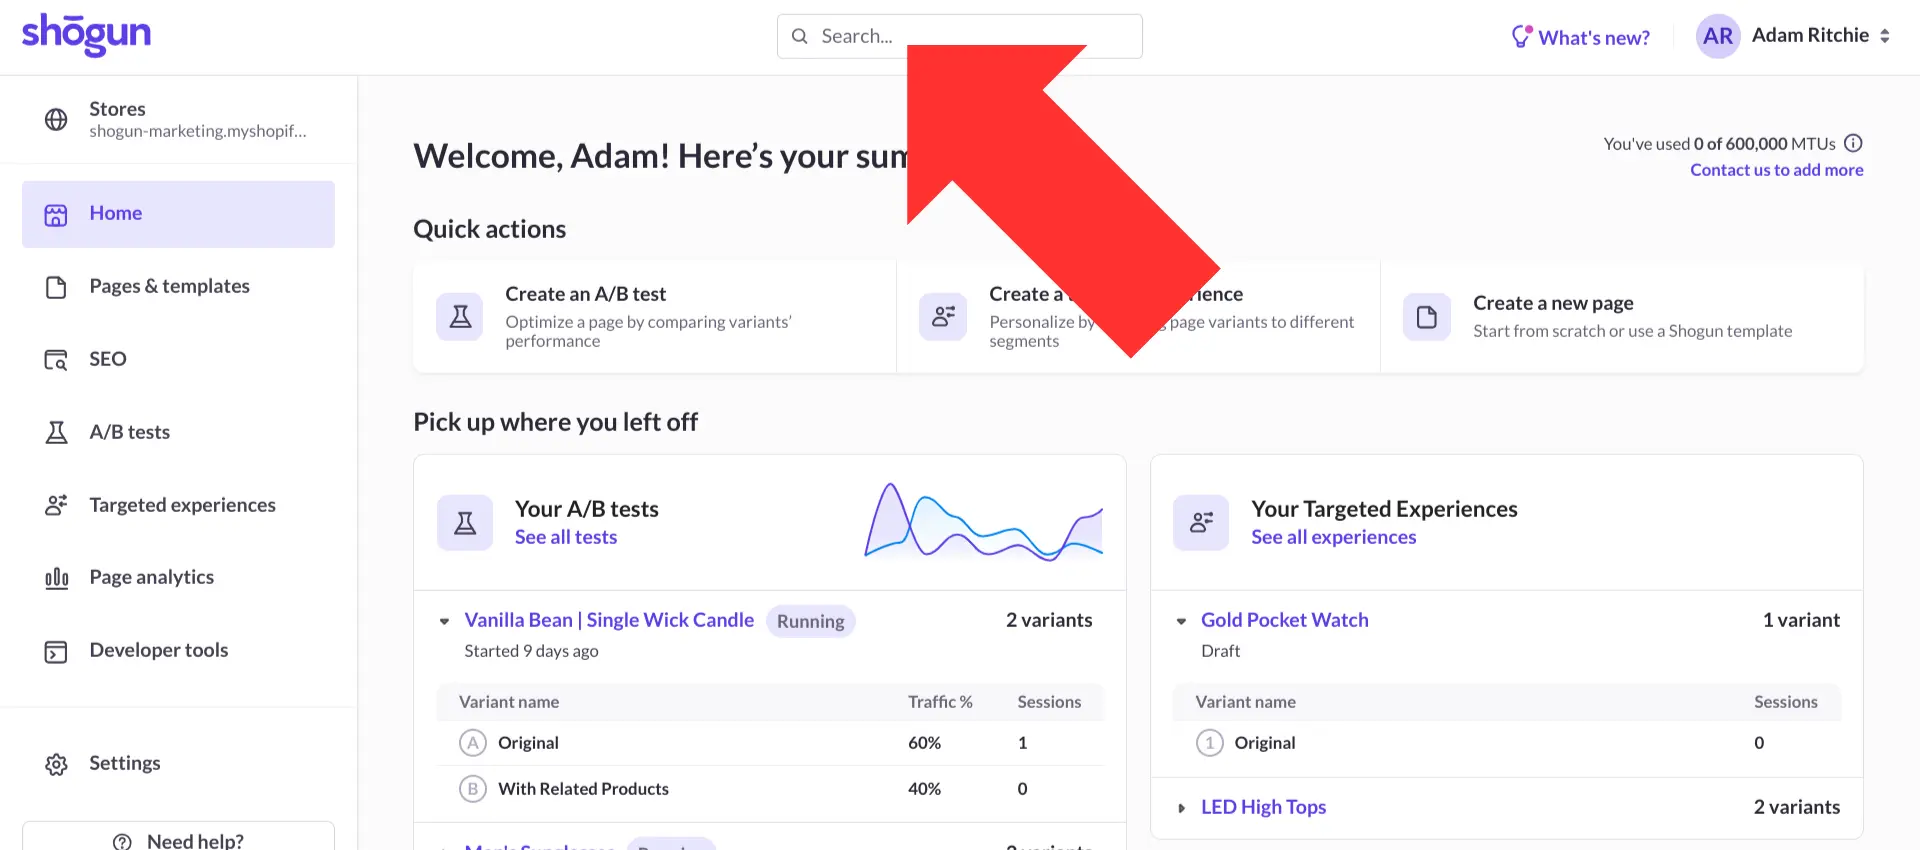
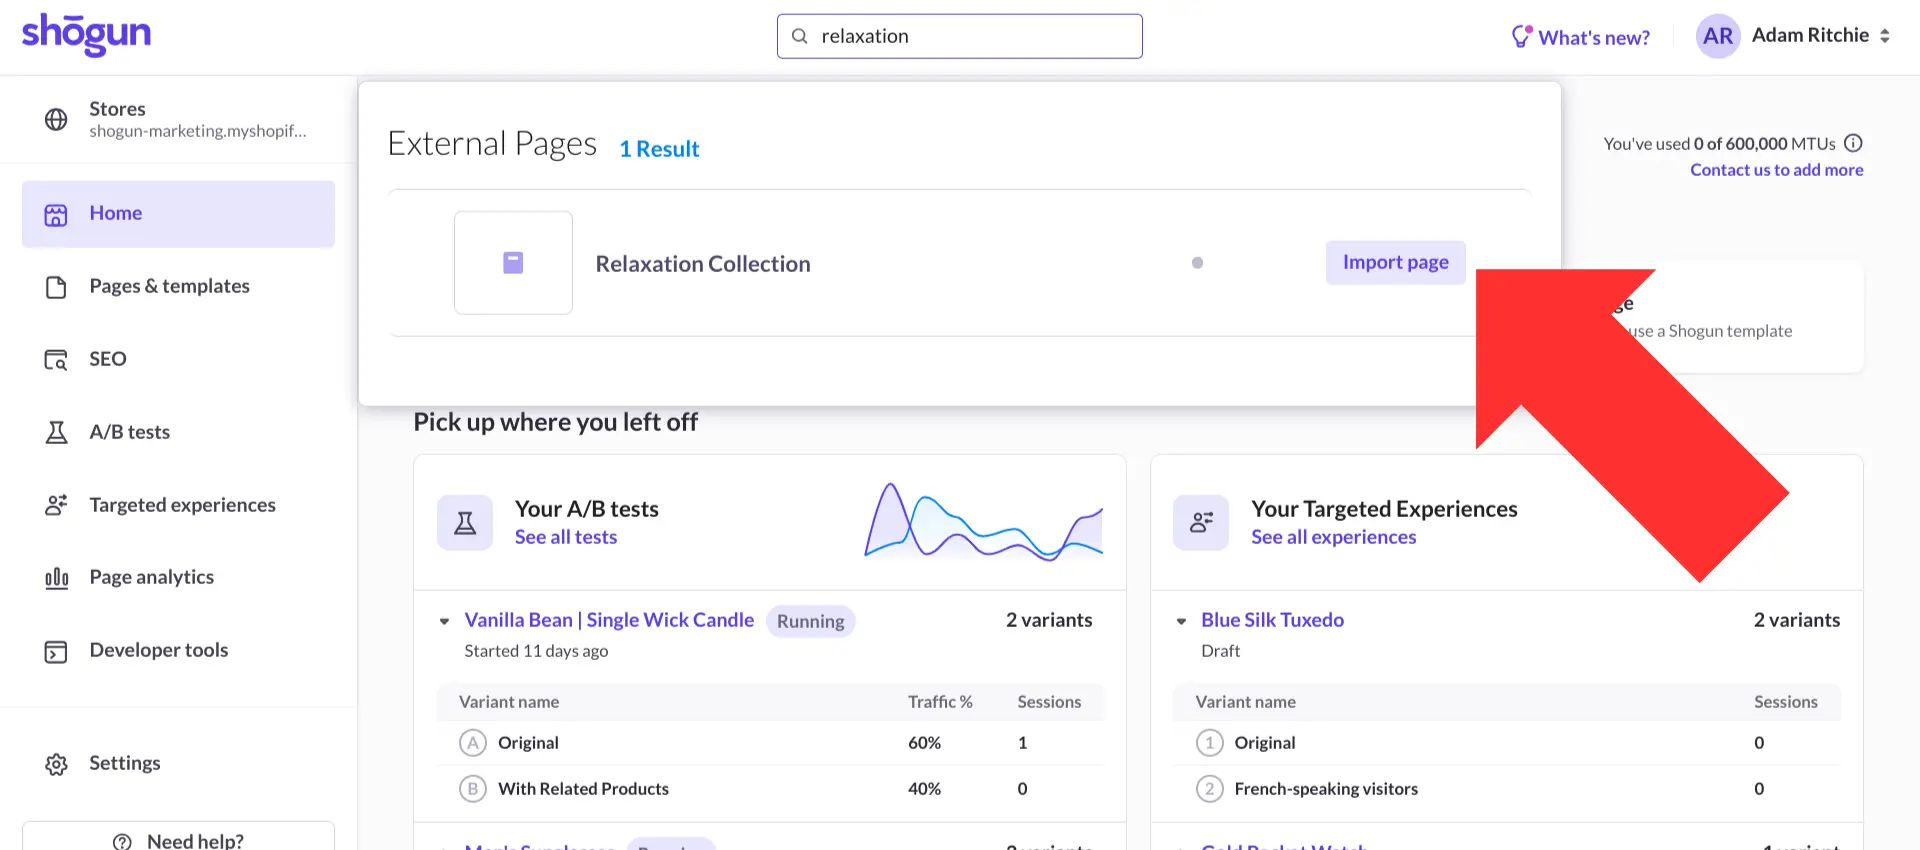
Step 3. To edit a page in Shogun, you’ll first need to import it from your Shopify catalog. Use the search bar located near the top of your screen to find the collection page that you’d like to customize.
Step 4. Select “Import page”.
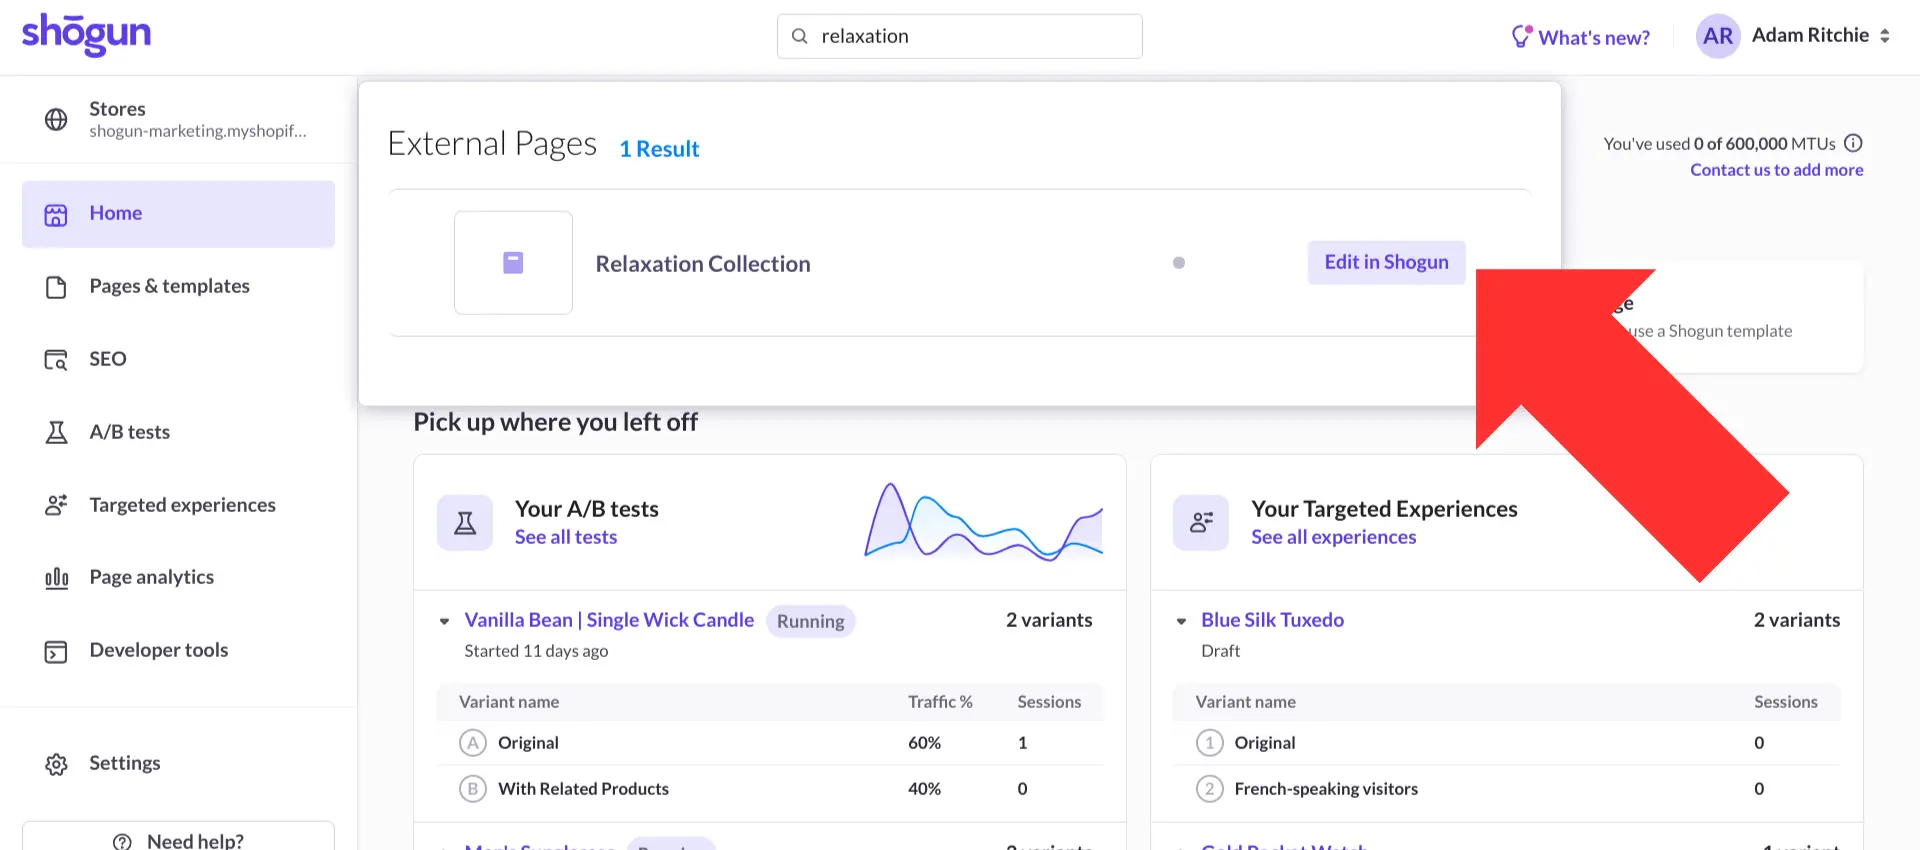
Step 5. Select “Edit in Shogun” to open the collection page in Shogun’s visual editor.
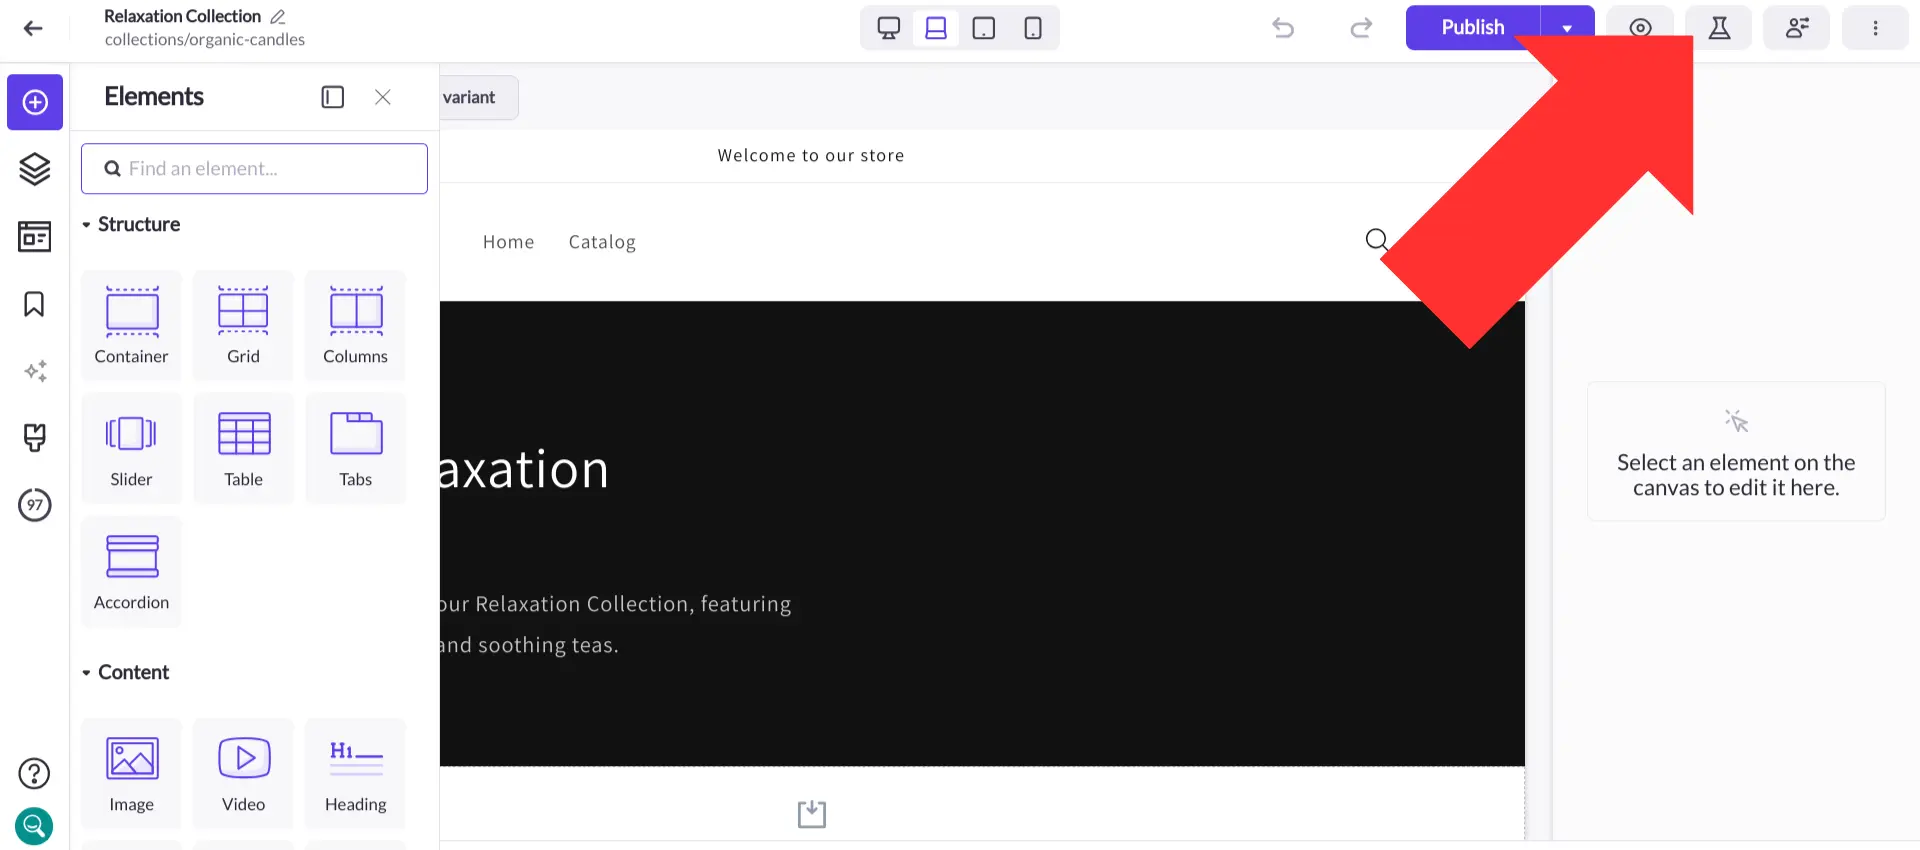
Step 6. Click the lab beaker icon in the top-right corner of your screen.
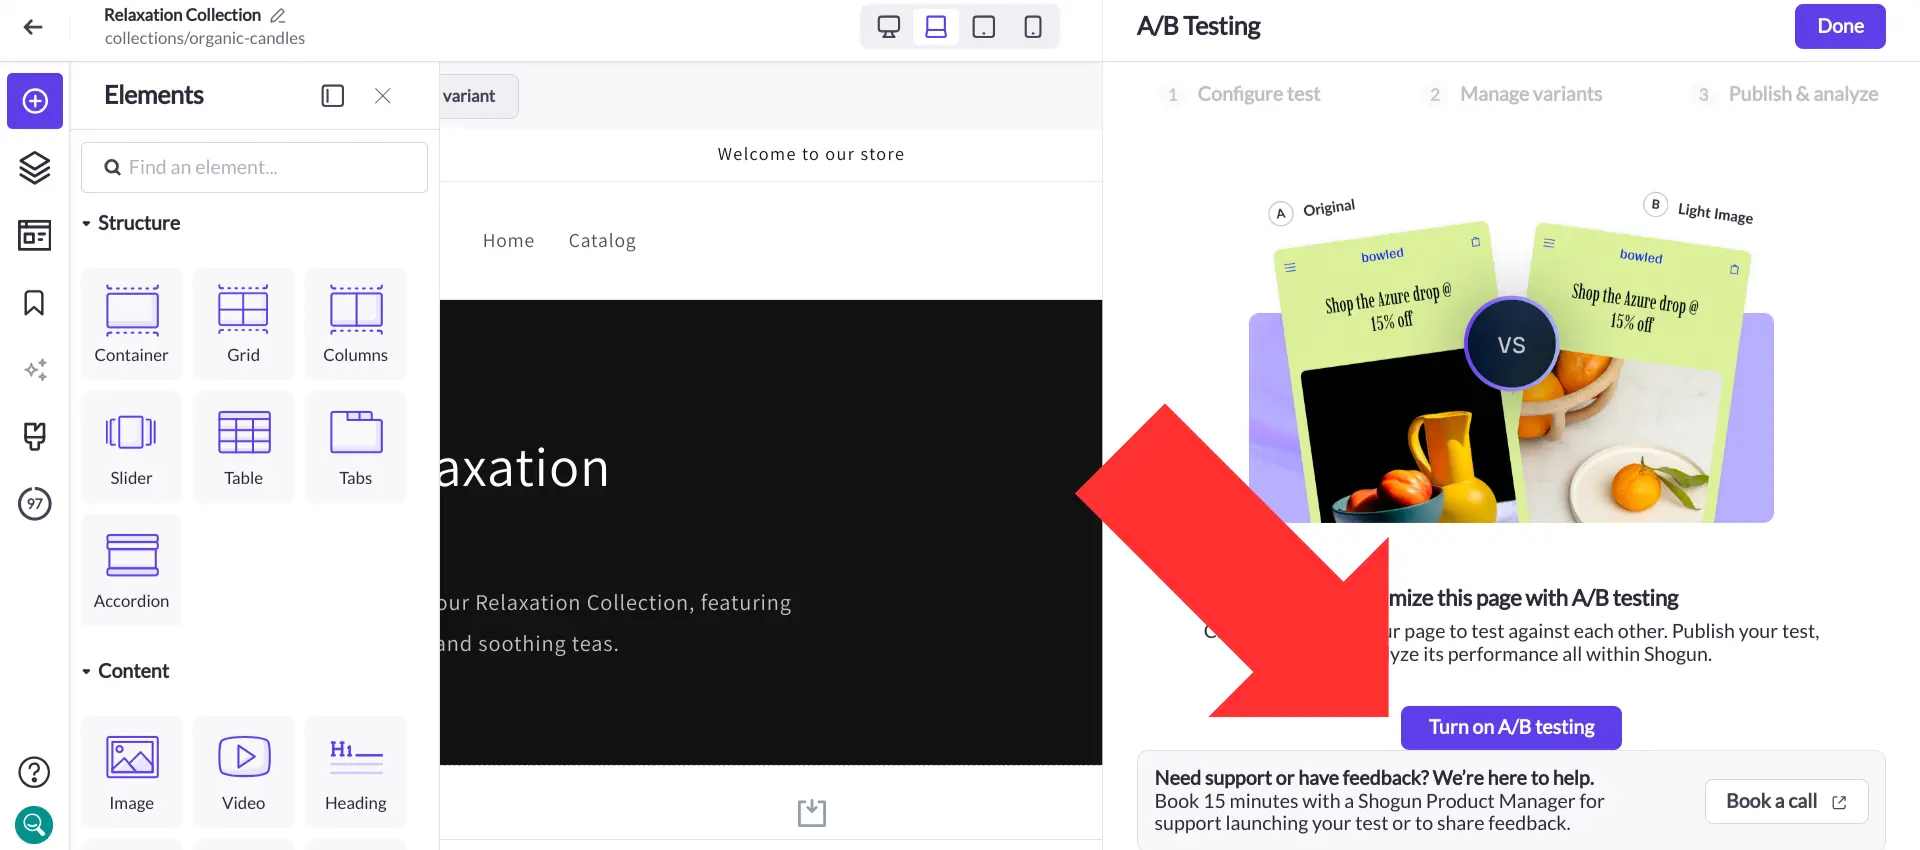
Step 7. Select “Turn on A/B testing”.
Step 8. Choose a name and goal for your test, then select “Next: Manage variants”.
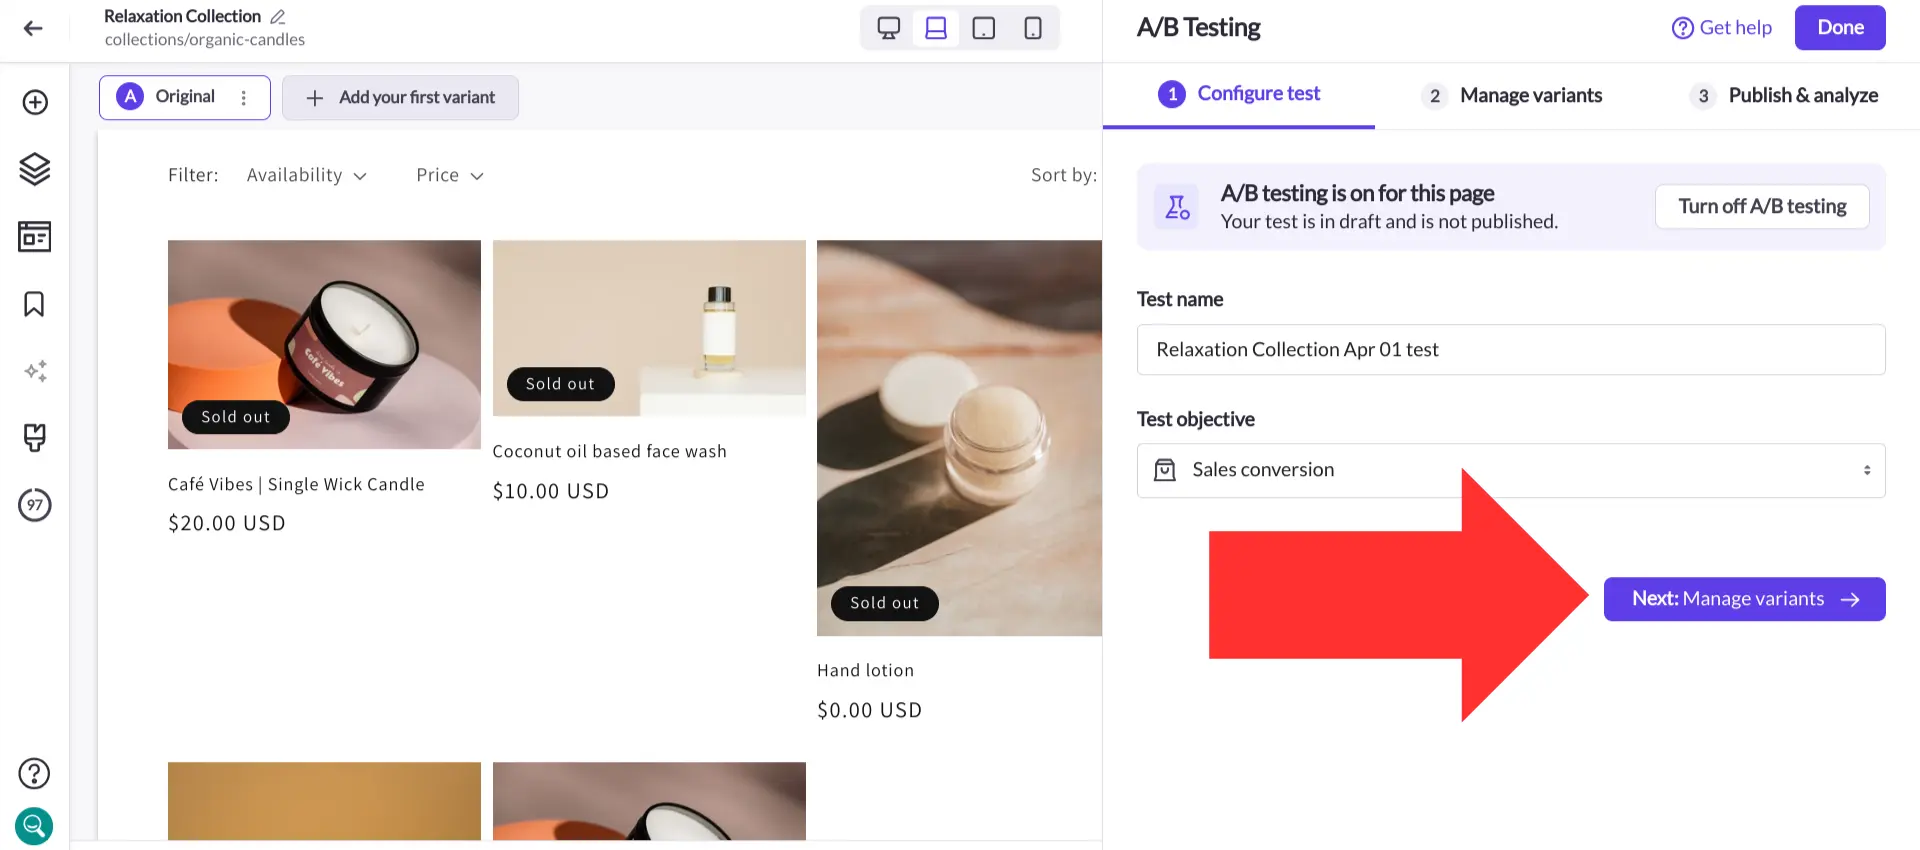
Step 9. Choose a name for your new variant (this is also where you can decide how much traffic goes to each variant). Then, select “Next: Edit variant designs”.
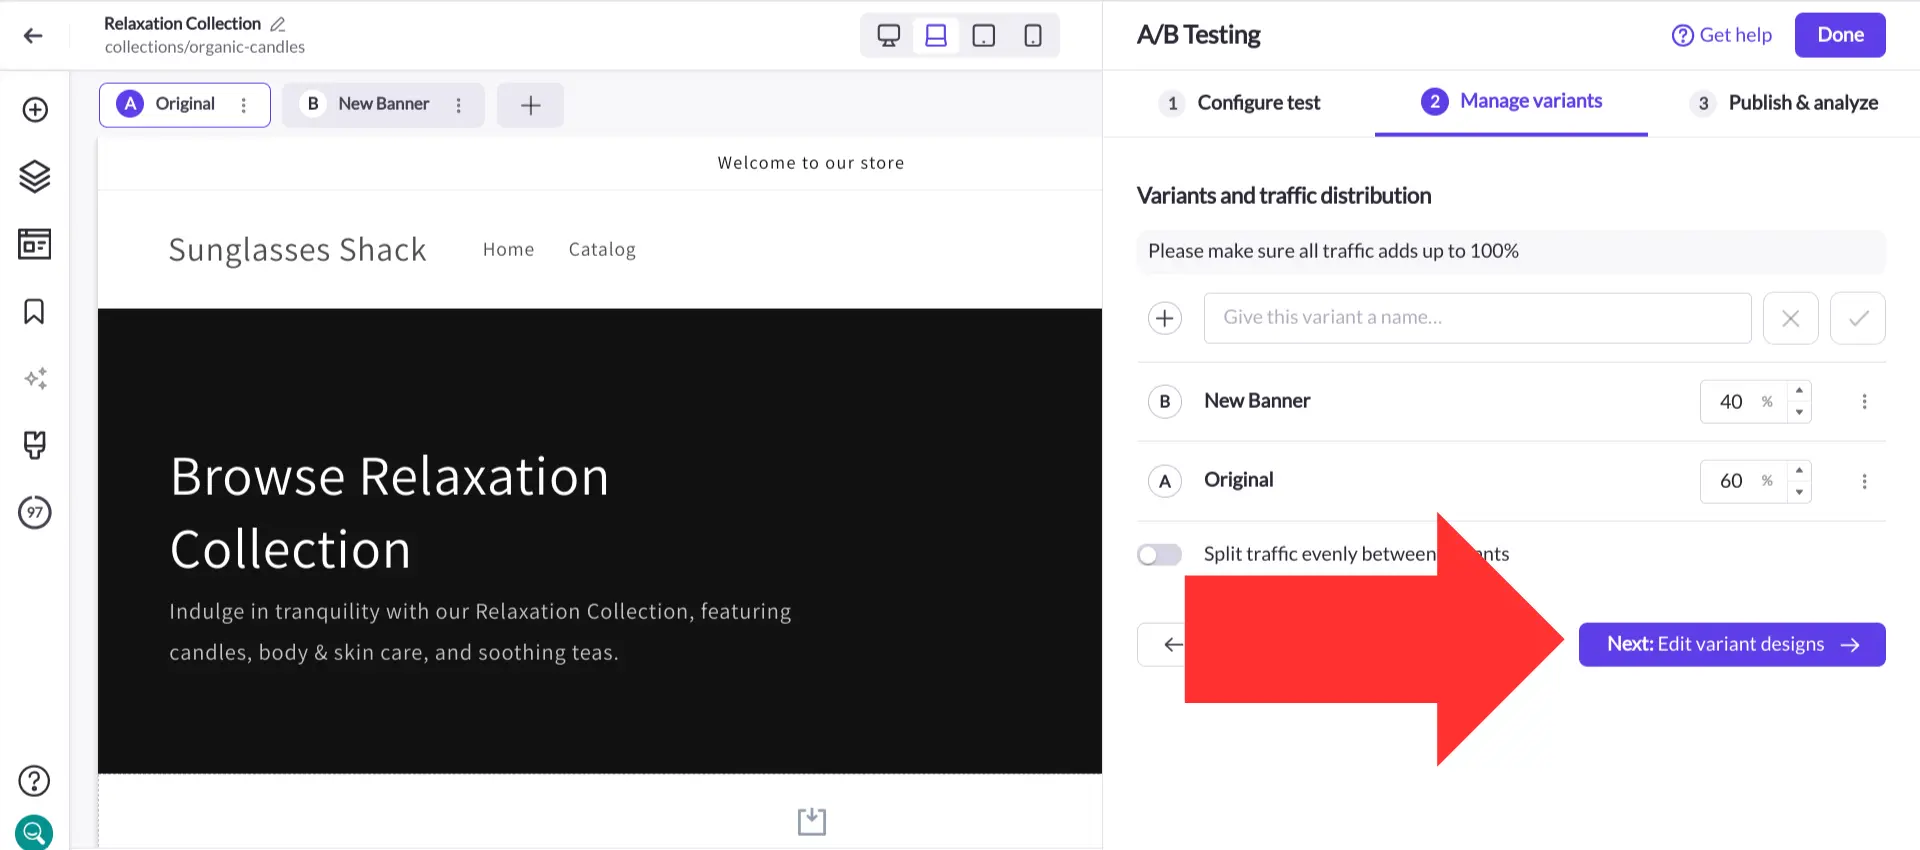
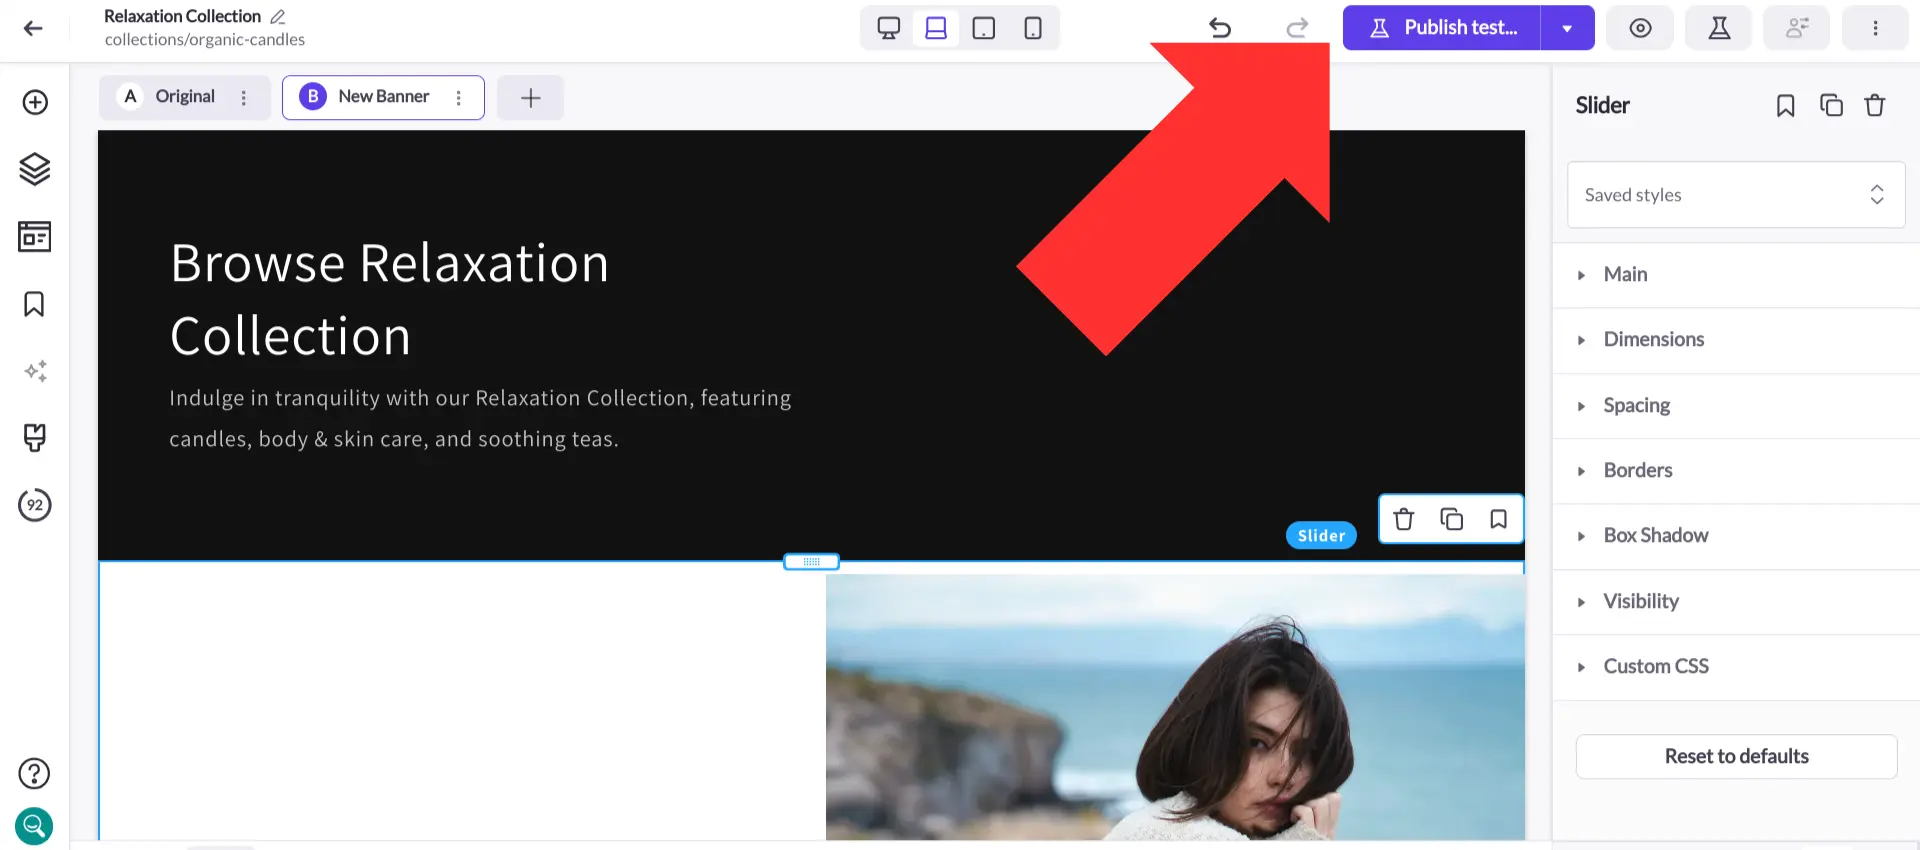
Step 10. The visual editor provides you with a vast library of elements for creating Shopify pages. When you create your variants, you’ll find all the editing tools you need to create a totally customized look and feel.
Once you’ve finished editing your collection page variant, save your changes and select “Publish test…”.
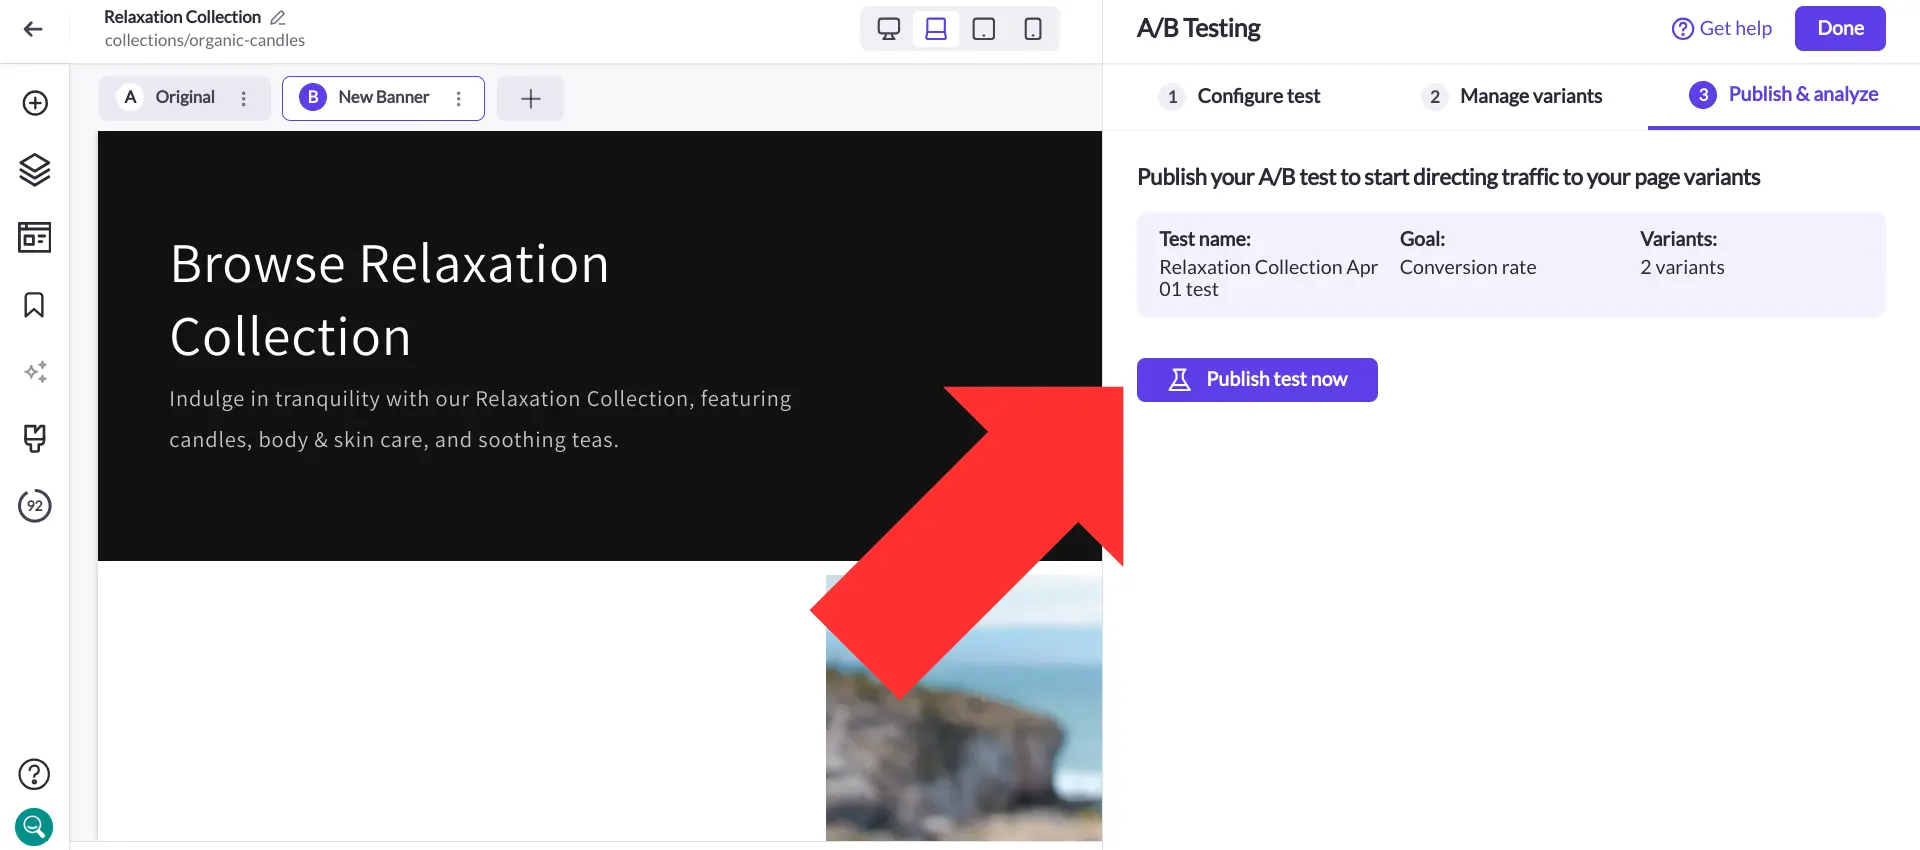
Step 11. Review your test details, then select “Publish test now”.
Step 12. During your test, Shogun will keep track of a variety of metrics for each variant, including:
- Total sales
- Total sessions
- Conversion rate
- Bounce rate
- Add-to-cart rate
- Top outside referrers
- Top clickthrough destinations
- Traffic by device
Whenever you’re ready to end your test, select “End test now”.
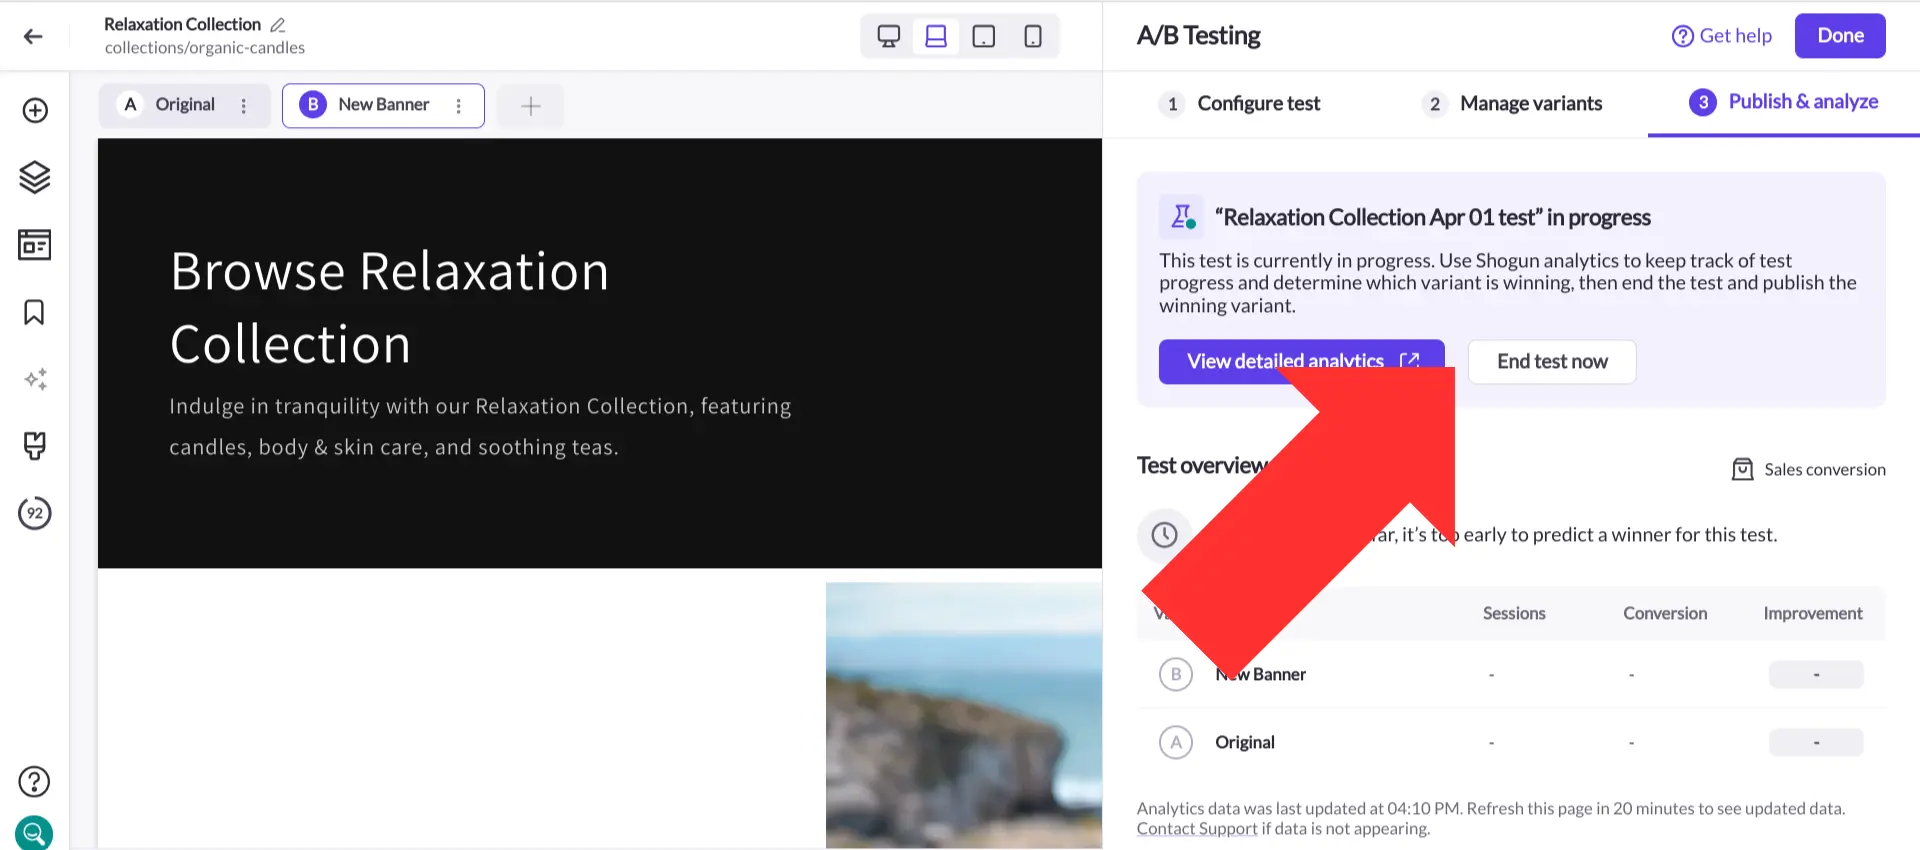
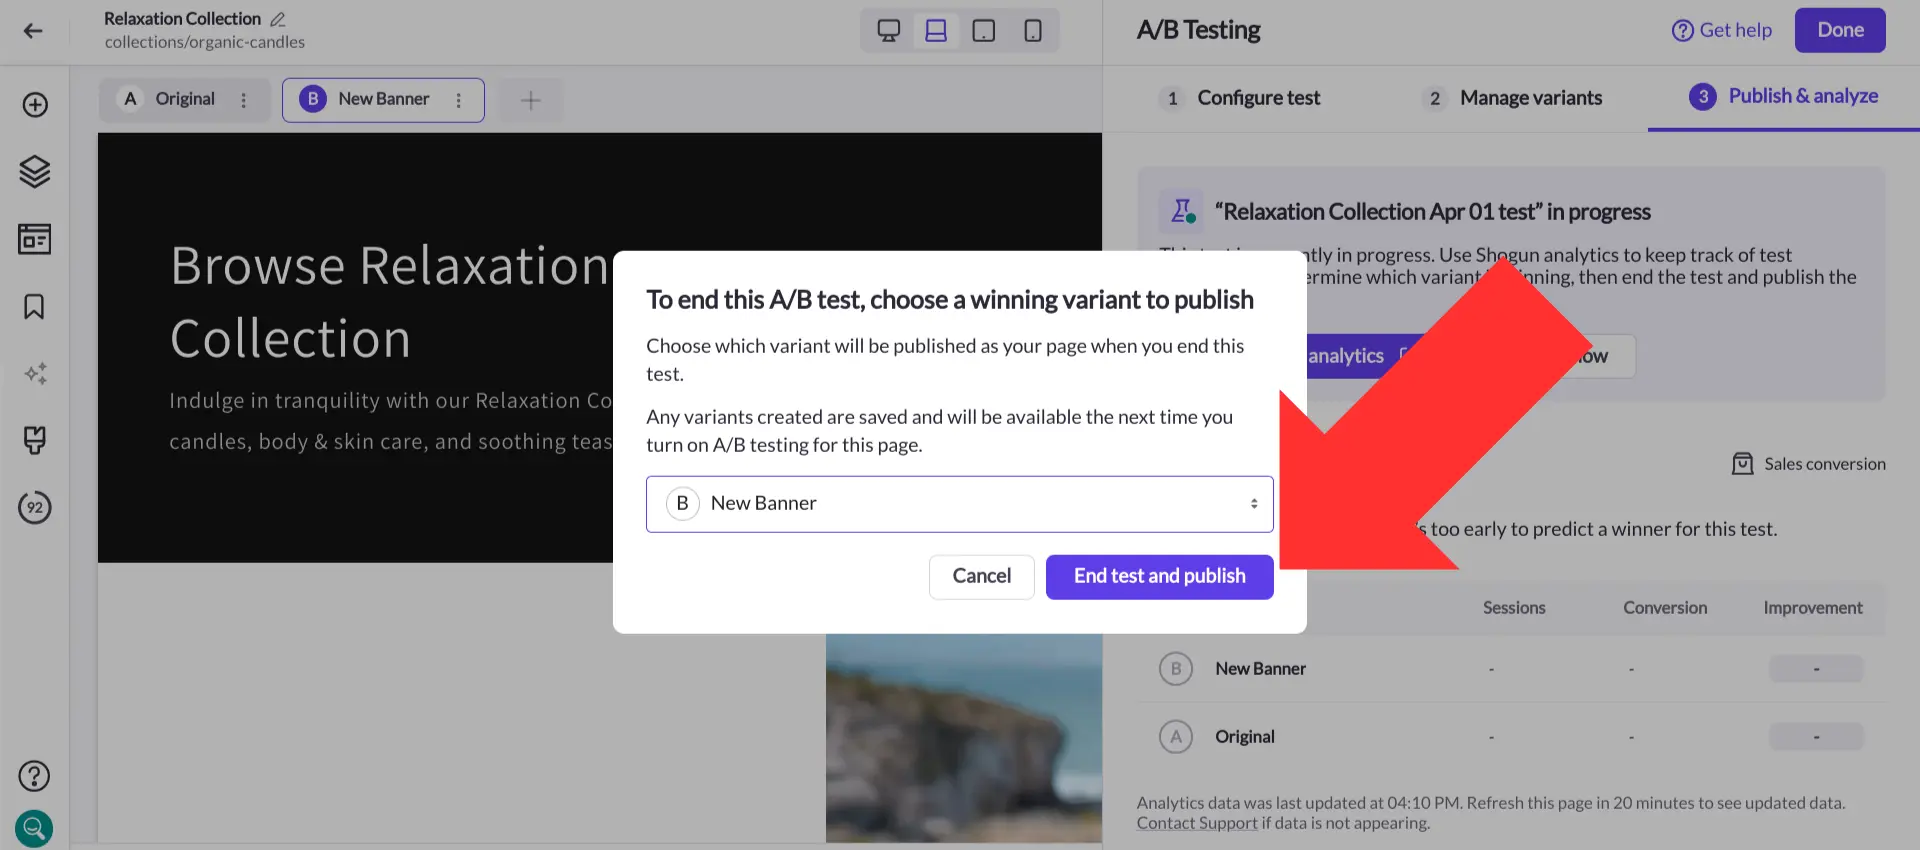
Step 13. Pick the “winner” of the test. 100% of traffic will then be diverted to the winning variant, though the other variants will still be saved in case you want to use them later. Finally, select “End test and publish”.
With Shogun’s suite of optimization and personalization tools, you have everything you need to build the perfect Shopify collection page.
Personalize your Shopify collection pagesWith Targeted Experiences, you can show different versions of the same Shopify collection page to different segments of visitors.Get started now

Phill Moorman
Phill, the VP of Marketing at Shogun, is a seasoned expert in ecommerce. With a keen focus on strategic marketing, Phill drives growth and cultivates brand success in the dynamic online marketplace.

