The dead simple way to add products to a page in Shopify

In this post, we’ll show you two ways to add products to any page on Shopify and how you can tap into the power of Shogun for a new level of customization and flexibility. Shogun’s revolutionary product boxes feature and other innovative tools go beyond Shopify’s native functionalities, so you can create vivid and engaging product page experiences.
Add products to a page using the Online Store Editor
The first and most common way you can stock your store’s virtual shelves is by using Shopify’s Online Store Editor. It’s the standard tool used to manage your pages, blog posts, themes, navigation, and more. However, before you start adding products to a page, you’ll need to add products on Shopify.
Add your products to a Shopify page in minutes with ShogunAdd products to blogs, landing pages, the home page and more. Get started now
To do so, you want to go over to the ‘Products’ tab on the left-hand navigation and either click ‘Import’ or ‘Add product.’ For a more detailed guide on how to add products, check out our article on How to Add Products on Shopify.
Step 1: Navigate to your Themes
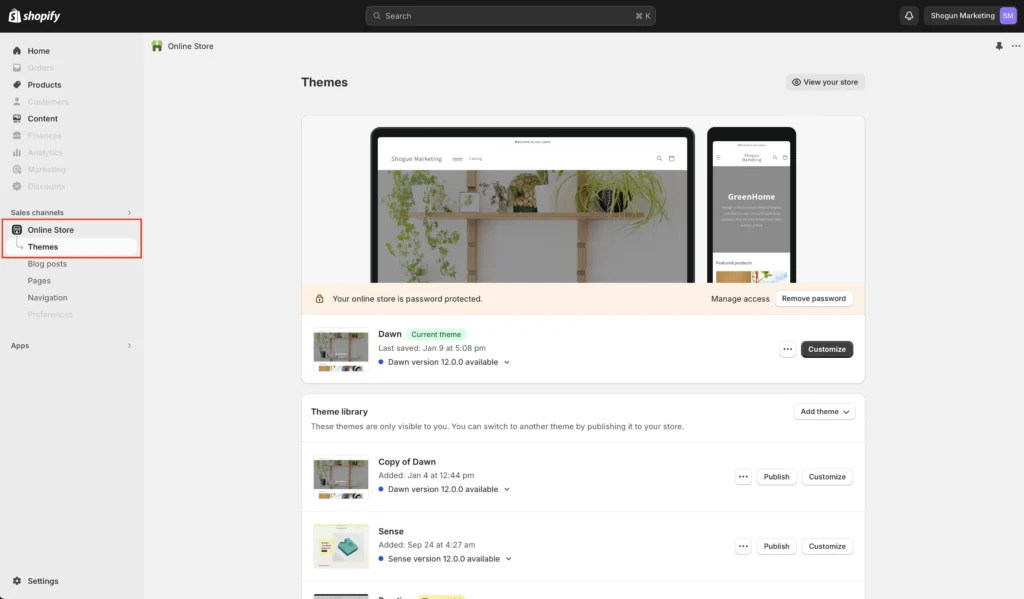
To start, log in to your Shopify admin panel, head to where it says ‘Online Store’ on the left-hand navigation bar, and click on ‘Themes.’
Step 2: Customize Your Theme
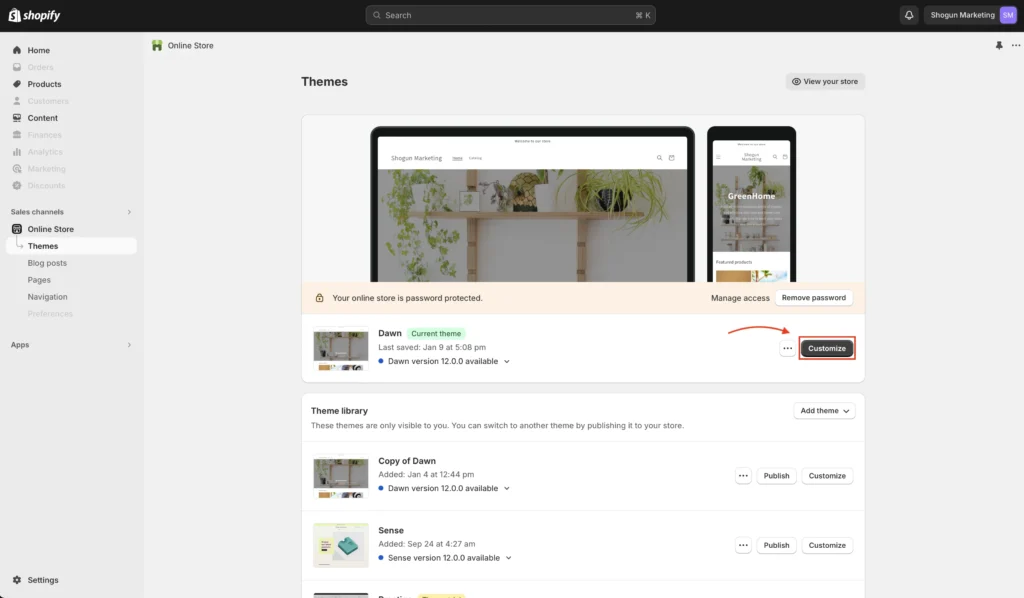
From there, click on ‘Customize’ under your main theme, and you’ll be taken to the section editor.
Step 3: Create a New Template
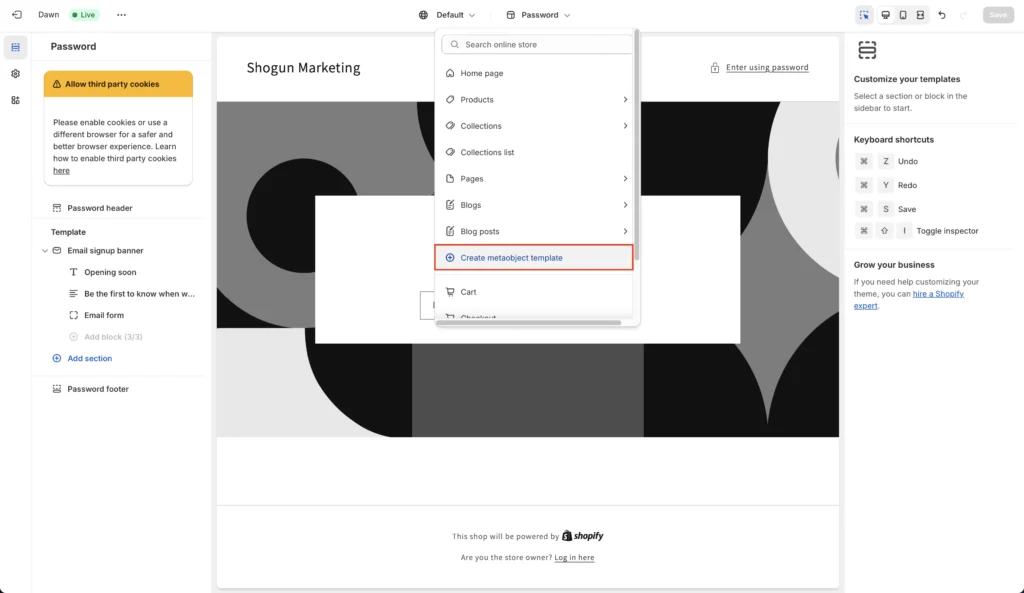
Once you’re in the editor, navigate to the drop-down menu (in our case, where it says “Password”) and click on ‘Create metaobject template.’ This will allow you to create another template and customize it the way you want.
Step 4: Add Section
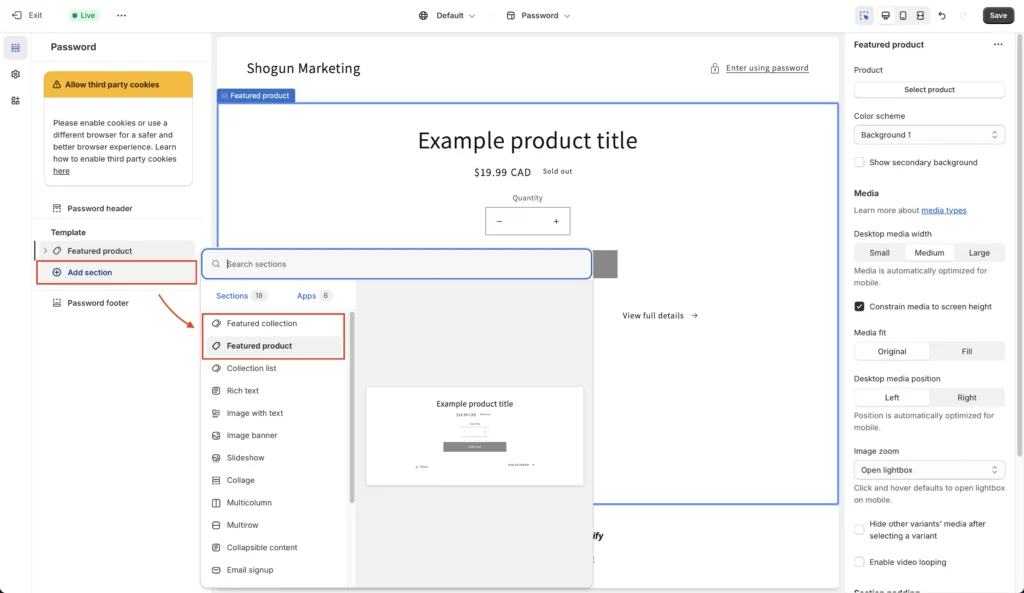
To customize your template, click ‘Add section’ and choose either a ‘Featured collection’ section or a ‘Featured product’ section. For this example, we’ve added a Featured product.
Step 5: Add Your Product
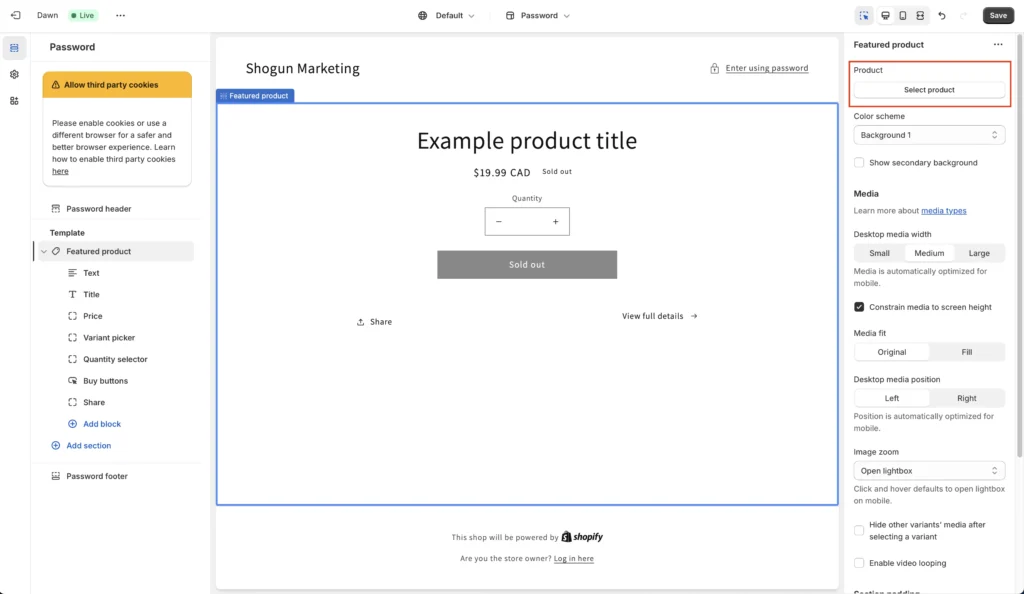
Next, click ‘Select product,’ and you’ll be shown a list of all the products you’ve uploaded or created on Shopify.
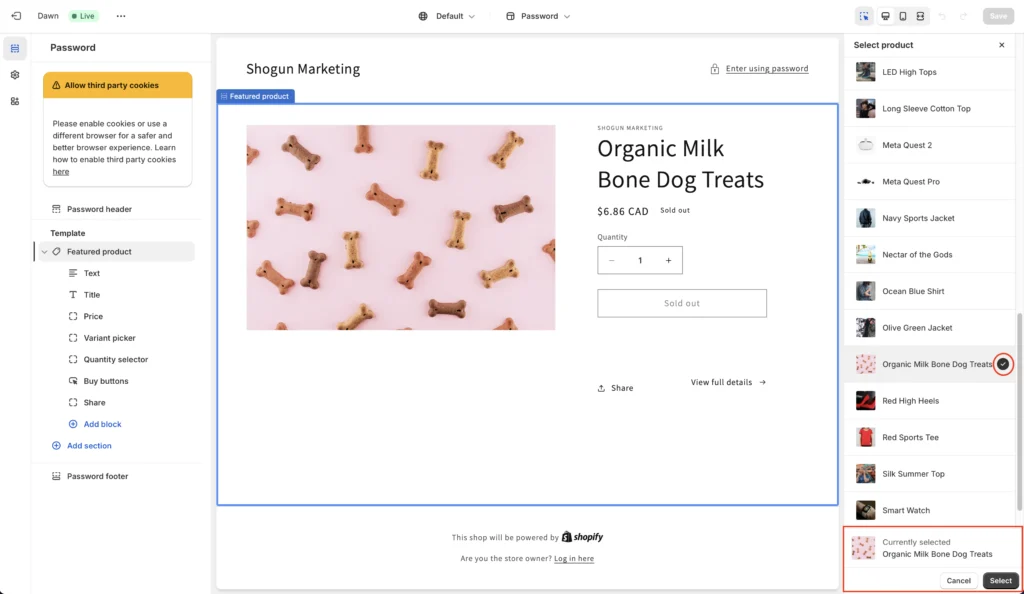
Click on the product you want to add to the template and click ‘Select’.
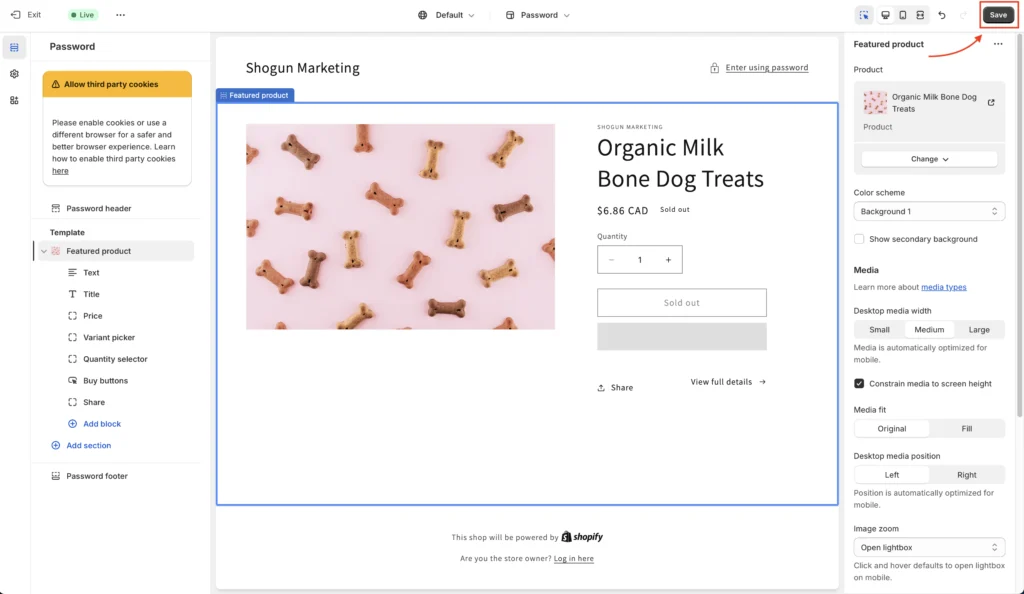
On the right-hand toolbar, you can customize the module to your liking. Once you’re happy with it, press ‘Save’ in the top right-hand corner.
Step 6: Create a New Page
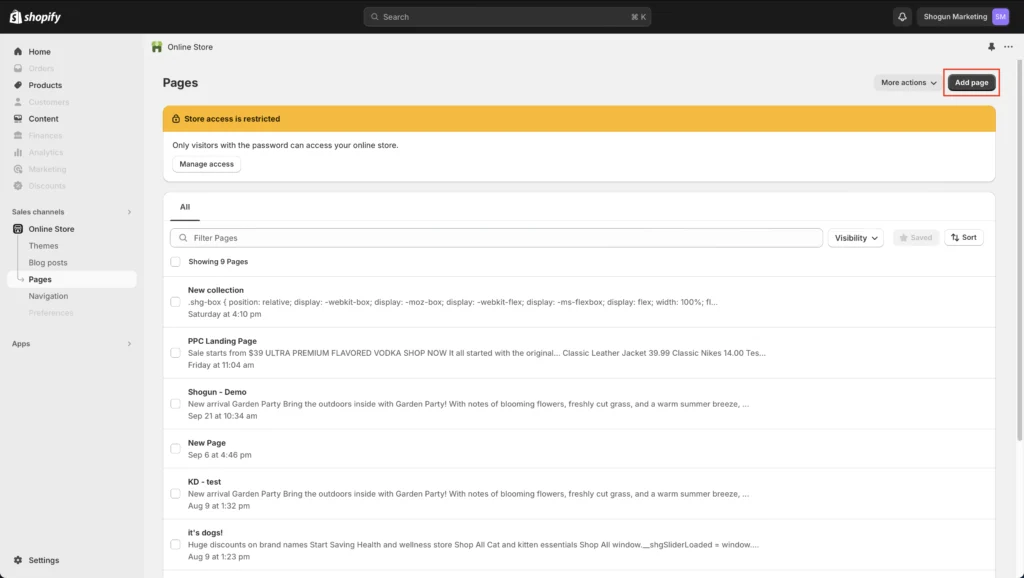
Navigate back to your Online Store page and click ‘Pages’ in the left-hand navigation menu. Click ‘Add page,’ enter a title, and add any other extras in the Content box.
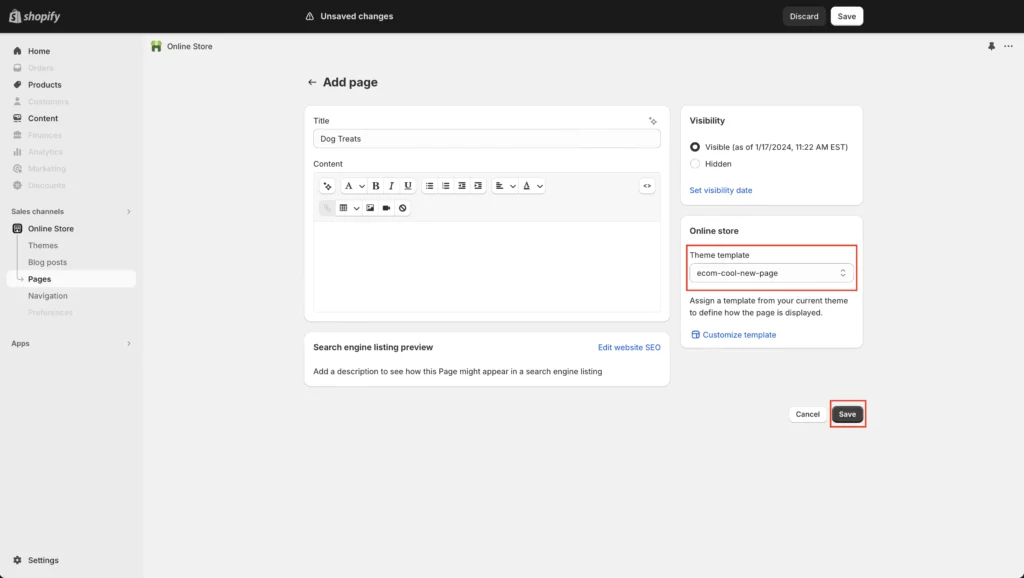
Your theme template should be set as the one you just created using the editor. Then, click ‘Save.’
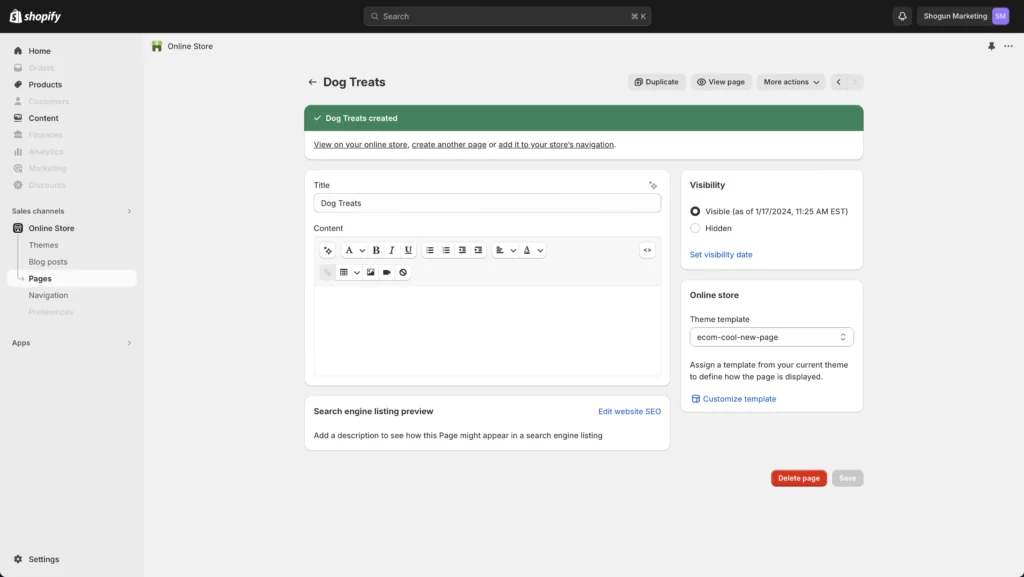
After you’ve created your page, you can now either view it on your online store, create another page, or add it to your store’s navigation.
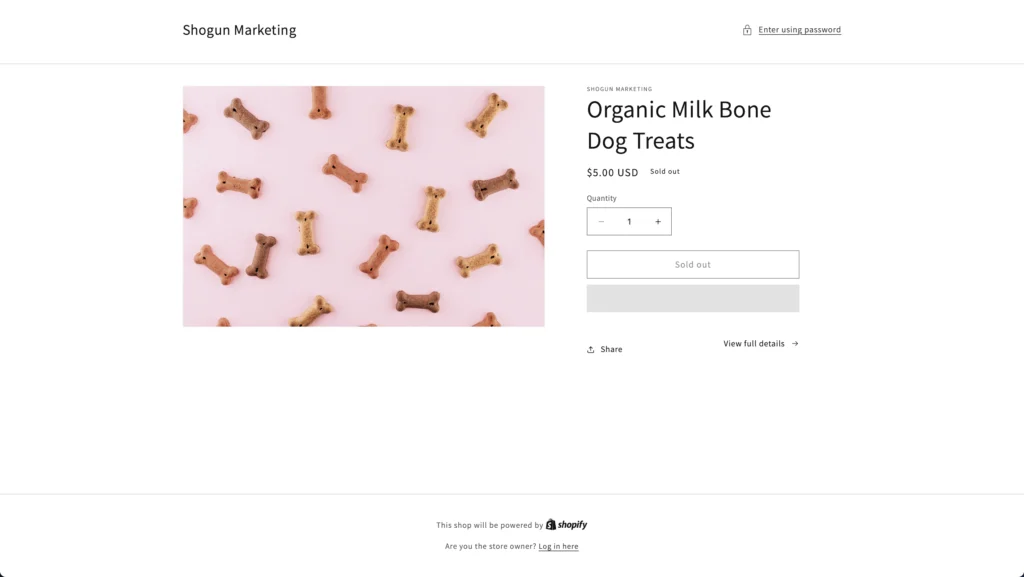
Add products to a page using Shopify Liquid
The second way you can add products to a page is by using Shopify’s native language – Shopify Liquid. This method requires a little more involvement and access to the code editor.
Step 1: Navigate to your Themes
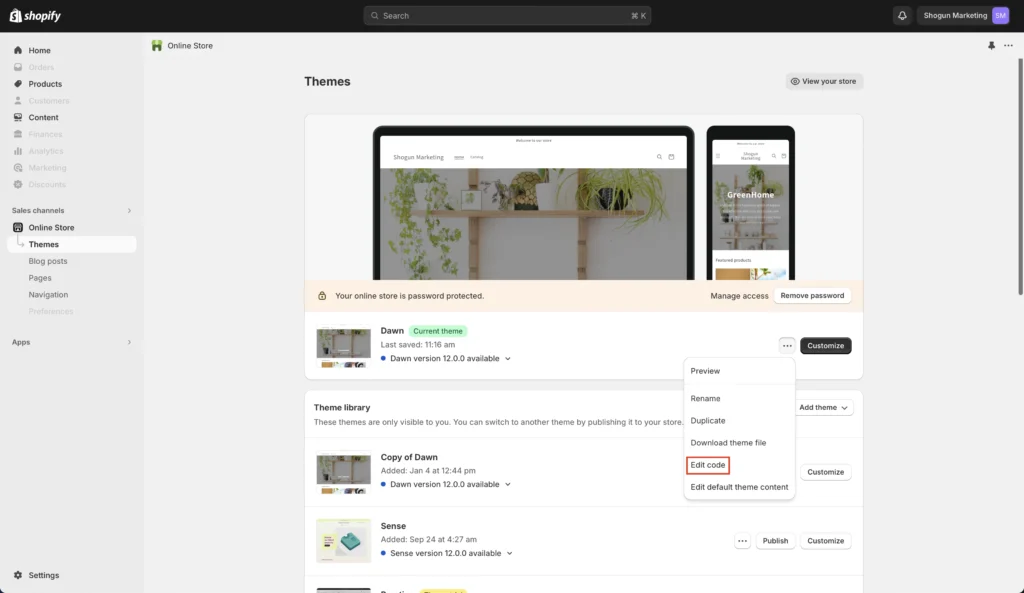
Just like with the Online Store Editor method, you’ll want to start by navigating to your Online Store and clicking on ‘Themes’ in the left-hand navigation. From there, click on the three dots under your current theme and click ‘Edit code.’
Step 2: Create a New Template
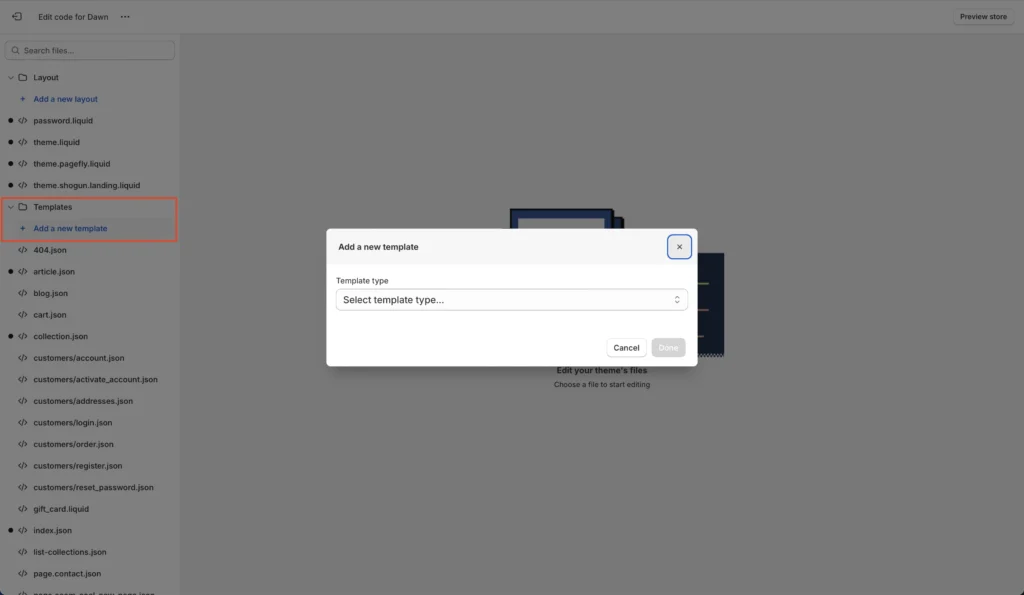
Once you’re in the code editor, click on ‘Add a new template’ within the ‘Templates’ folder. You’ll see a pop-up where you can pick ‘Product’ from the list of template types.
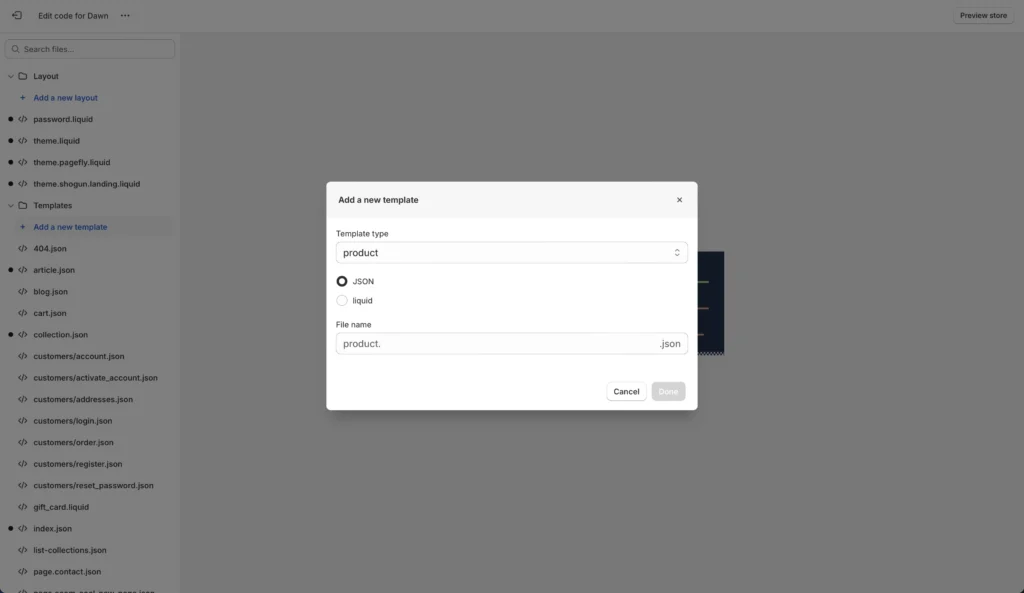
You’ll have the option to choose whether you want to use a “.json” file extension if you’re using Shopify 2.0 themes or “liquid” if you’re using other Shopify themes. Name your new file and click ‘Done.’
Step 3: Change Existing Code
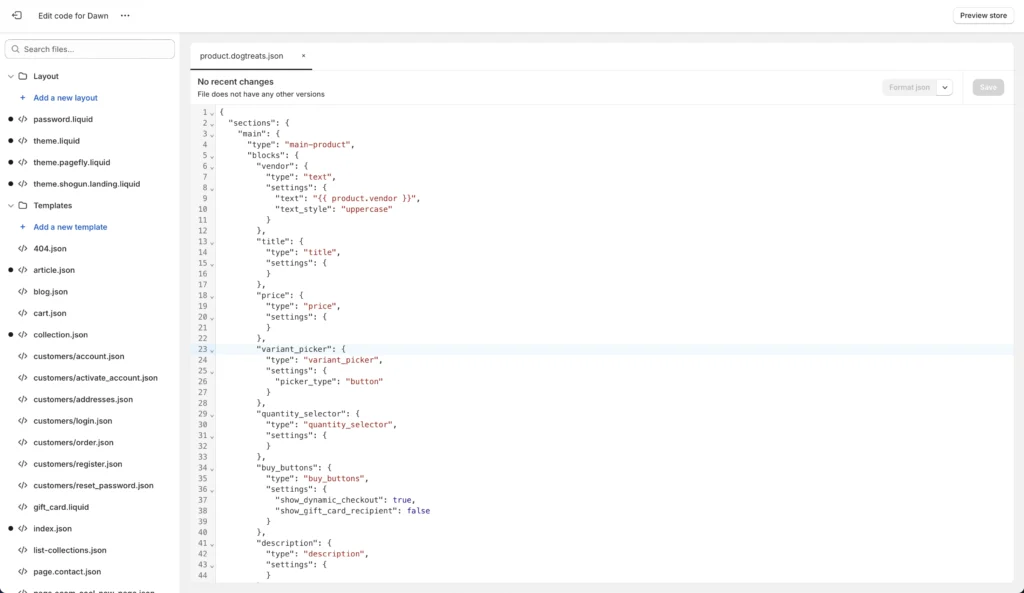
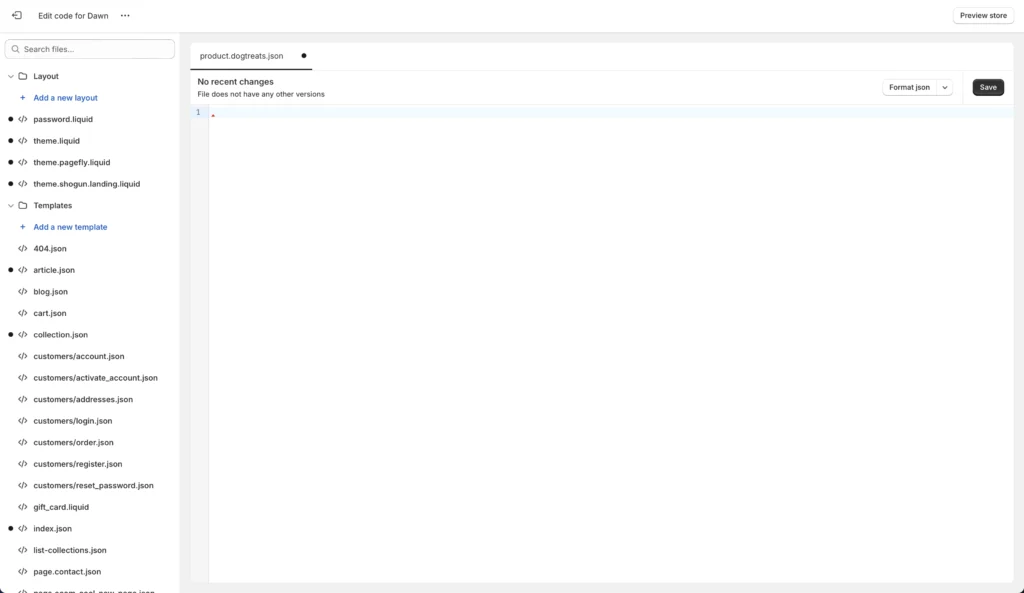
Remove all the code in the new product template and then open ‘product.json’ for Shopify 2.0 themes or product.liquid for other themes from the Templates folder.
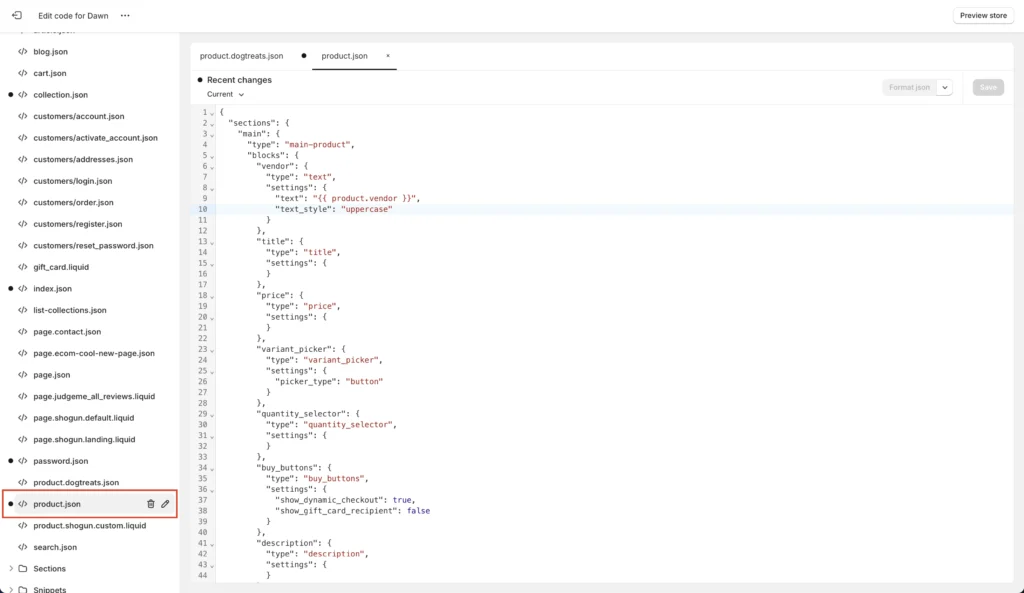
Copy all the code in the product.json file and paste it into your new product template.
Step 4: Add a New Section
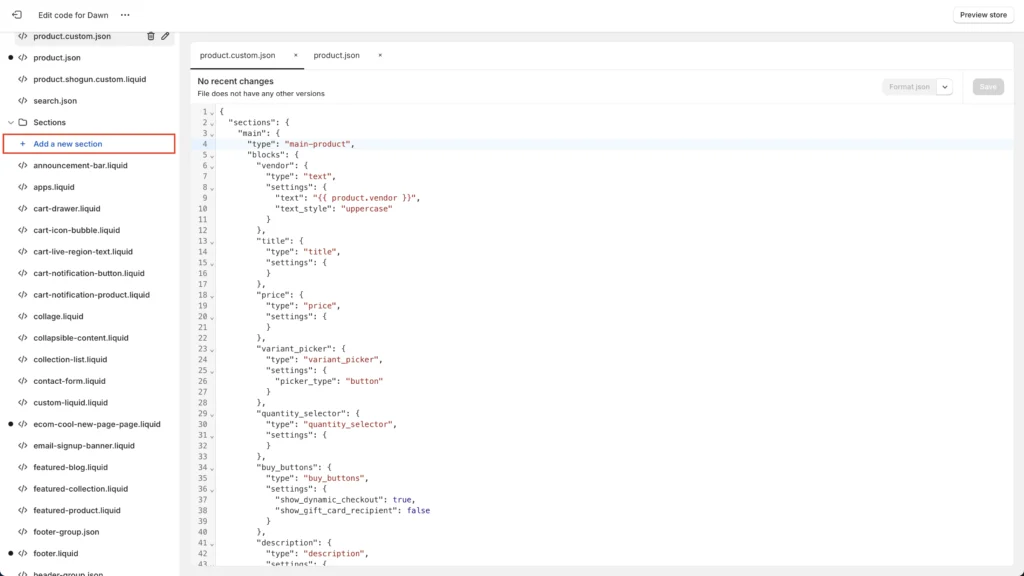
Click on ‘Add a new section.’
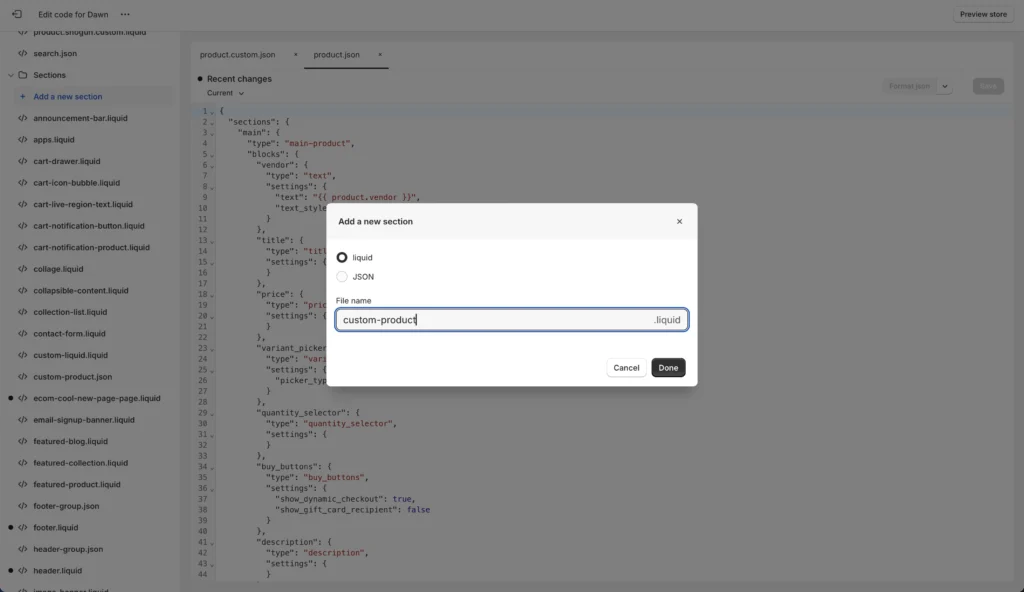
Name this new section file ‘custom-product’ and click ‘Done.’ Make sure the file is in ‘liquid.’
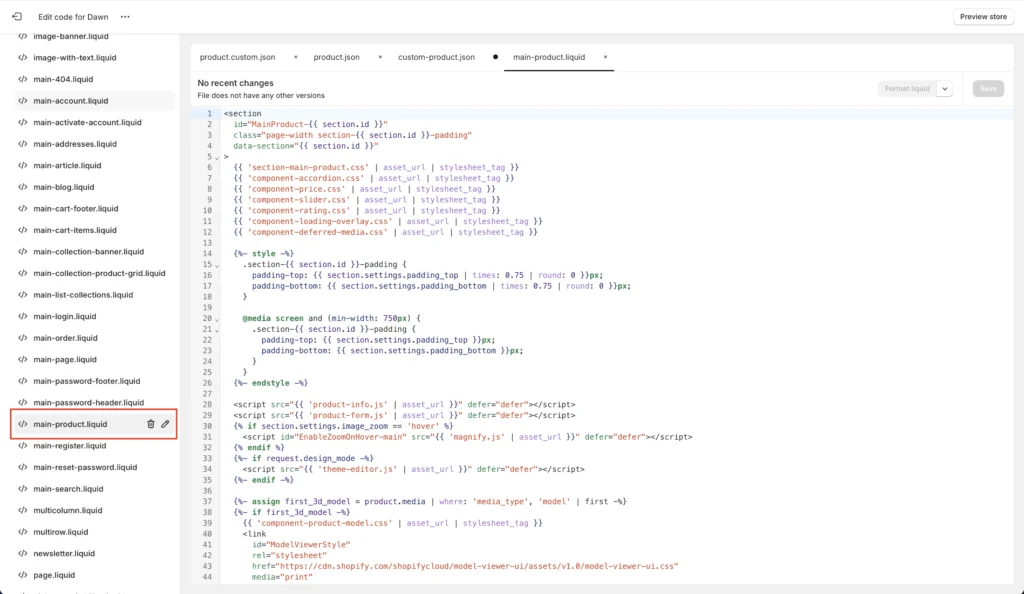
Navigate to ‘main-product.liquid’ and copy all the code from the file.
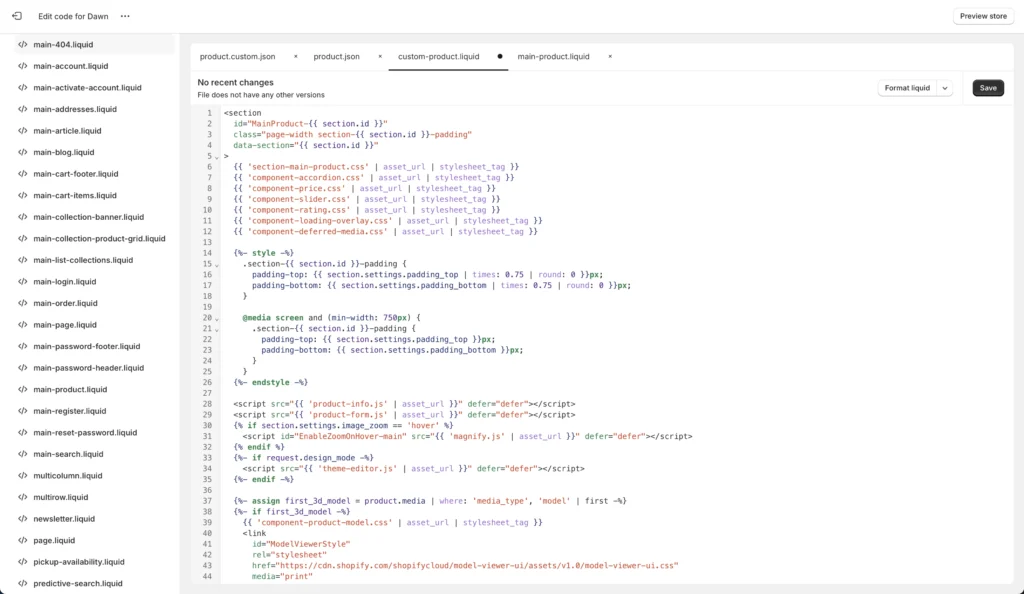
Replace the existing code in ‘custom-product.liquid with the code you copied previously and click ‘Save’ in the top right-hand corner.
With these files in order, you’ll be able to customize them with liquid code. You can find an array of Shopify Tutorials on how to do so.

For example, you might want to add code in order to show the product SKU. In this case, you’d simply add the above snippet of code to the product template you created in Step 2.
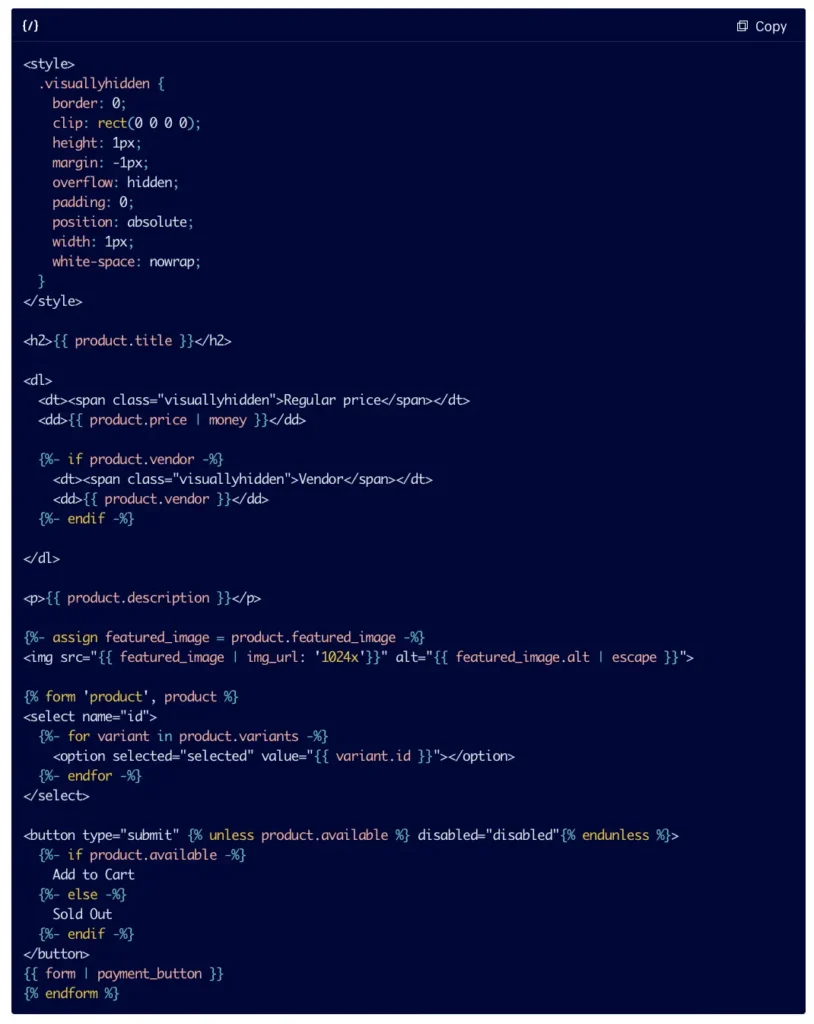
If you want complete code for a single variant product, with a product title, description, price, images, and a dynamic checkout button and add to cart button, you can place the above snippet of code in the same file.
Use Shogun to Add Products to your Shopify pages
Using Shogun to add products to your Shopify pages takes things to the next level. Not only does Shogun come with easy synchronization of your Shopify product database, but it also provides a suite of customizable design features that enable merchandising teams to build standout experiences.
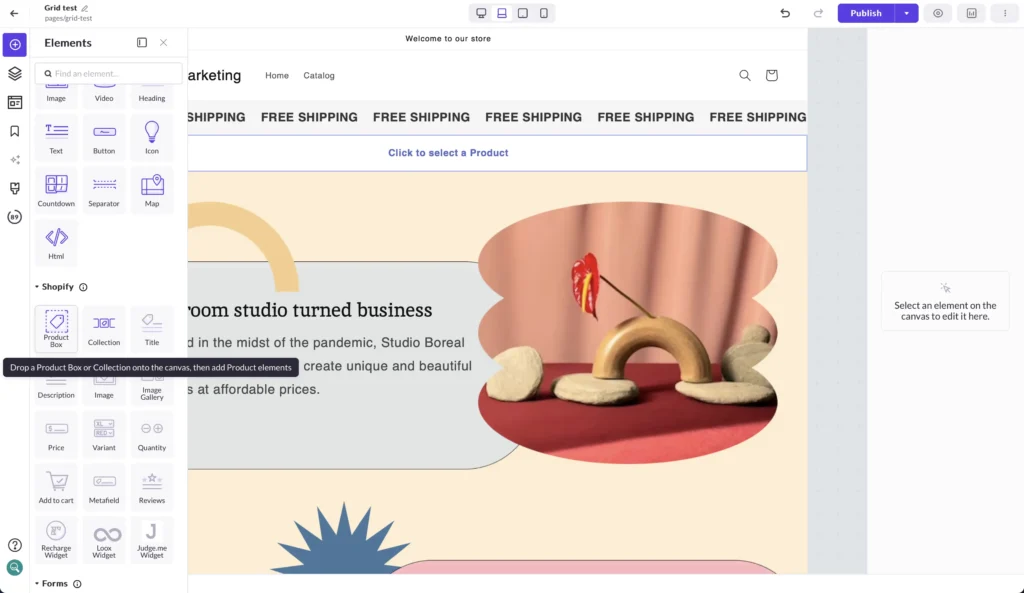
To start, simply click on a page within Shogun. Once on that page, look for ‘Product Box’ under the Shopify section and drag it onto your page, wherever you want it to go.
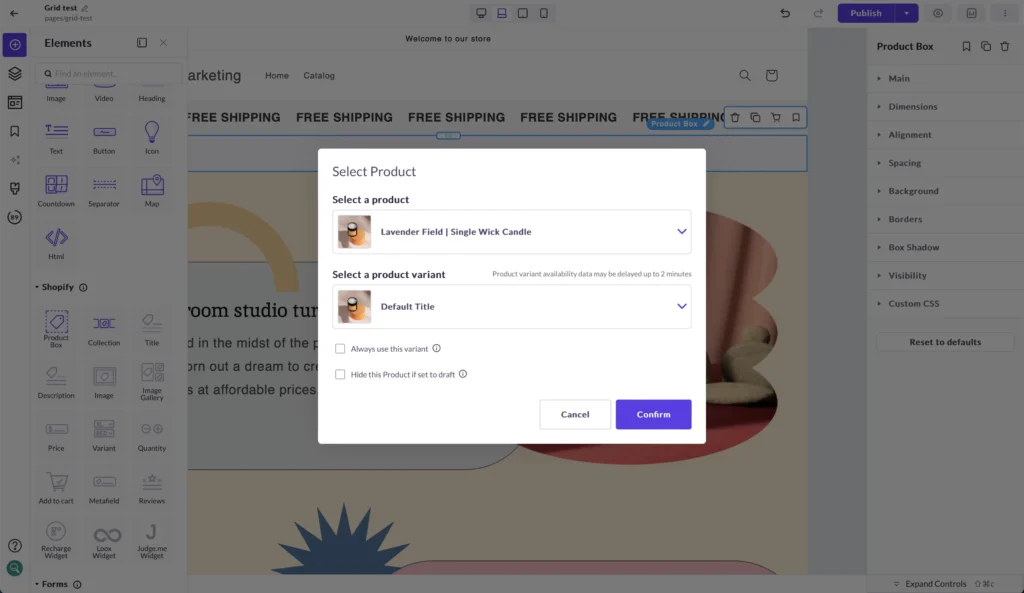
Select from one of your Shopify products and select a product variant if applicable, then hit ‘Confirm.’
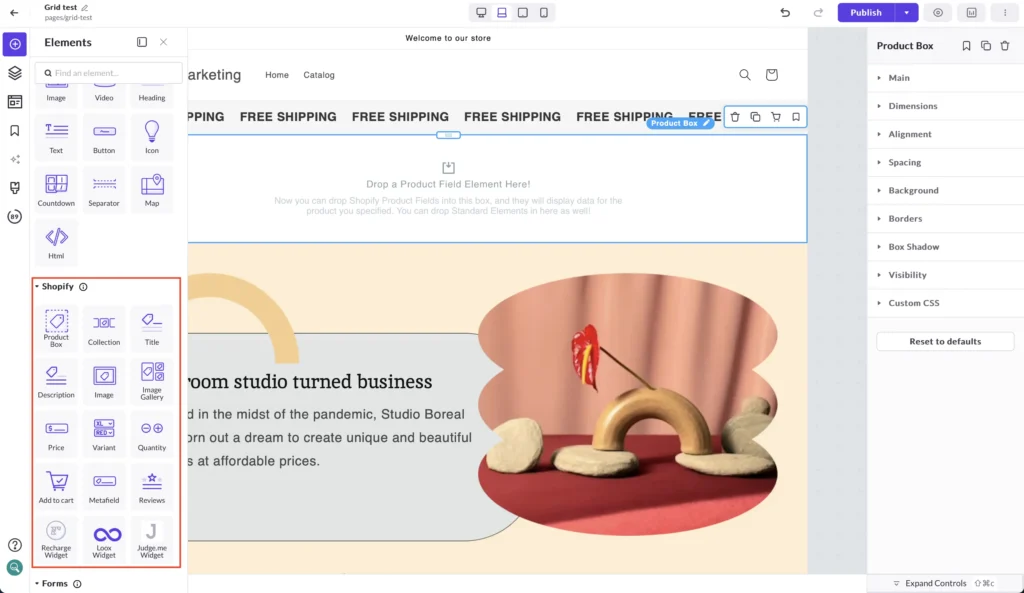
From here, you can play with the range of elements that Shogun has to offer, from image galleries, titles, descriptions, and other formatting and customization tools to make your product or featured collection pop. Simply the elements into the product field and create your product experience!
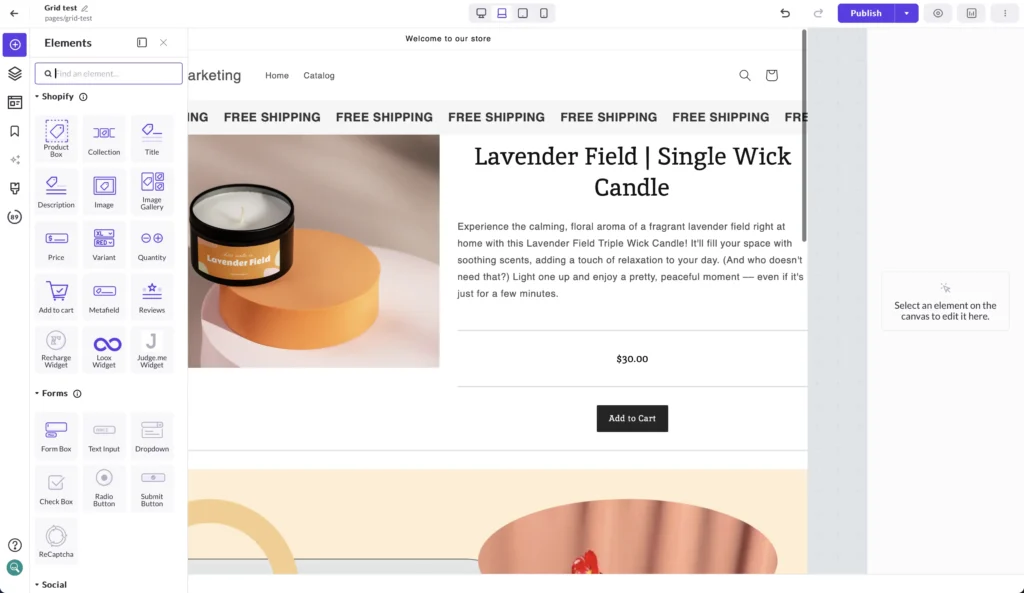
When you choose Shogun, you choose the fastest and most effortless way to transform your product pages.
Blog pages
Trying to figure out how to strategically feature your products on your blog pages? Shogun’s got you covered. Spotlight your best-sellers, promote seasonal favorites, or introduce new product lines right within your articles – turning readers into potential customers as they come across your content.
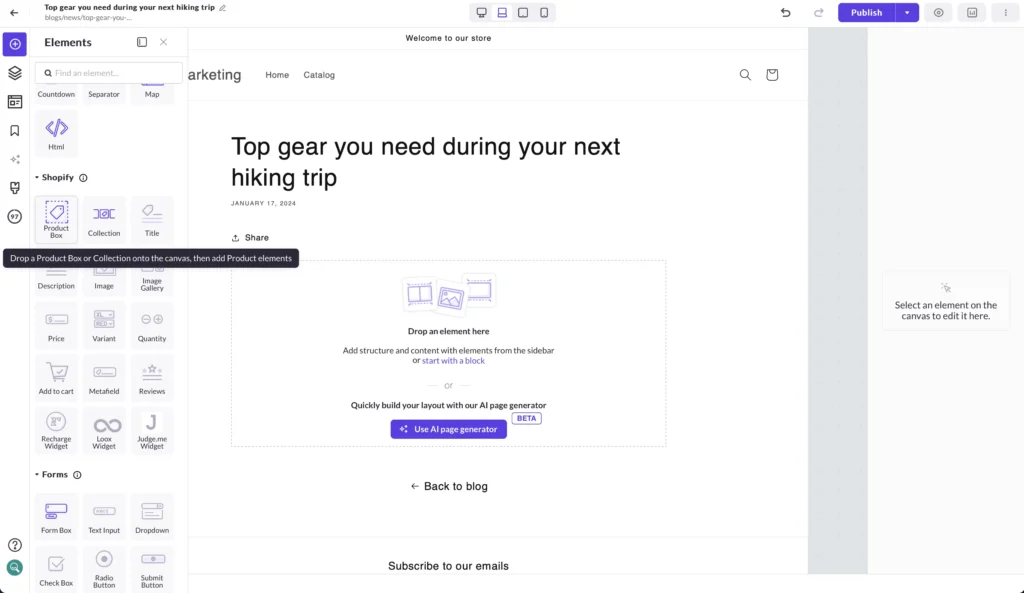
To do this, simply navigate to your chosen blog post within the Shogun interface, drag and drop the ‘Product Box’ into the post, and pick the product you want to feature.
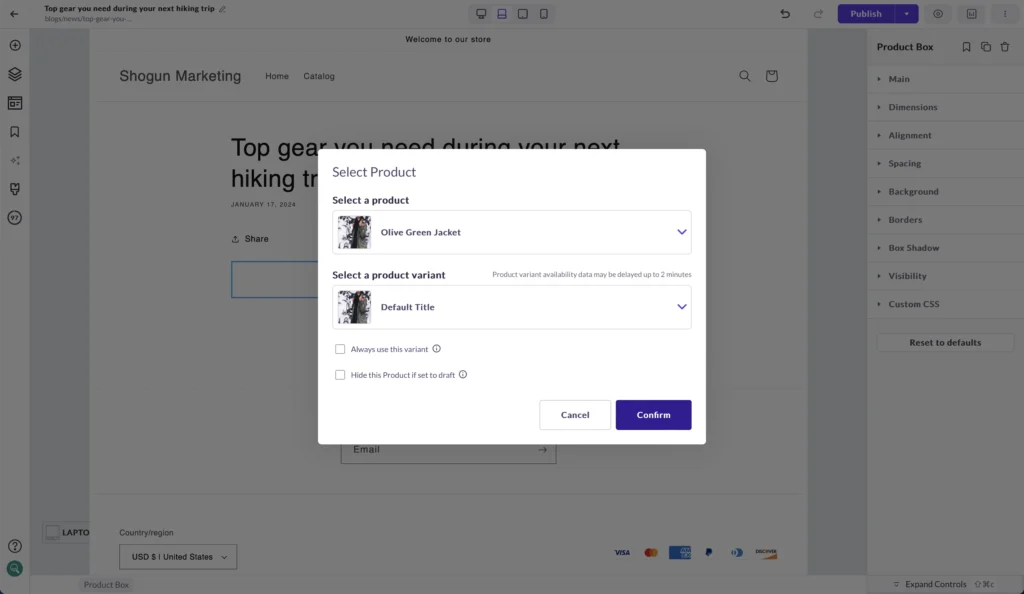
You can then match the product’s design to your blog’s aesthetic and add all the details you want – your readers won’t even notice they’ve shifted from engaging content to browsing a product. If you’re ready to unlock that cross-promotion potential, install Shogun today!
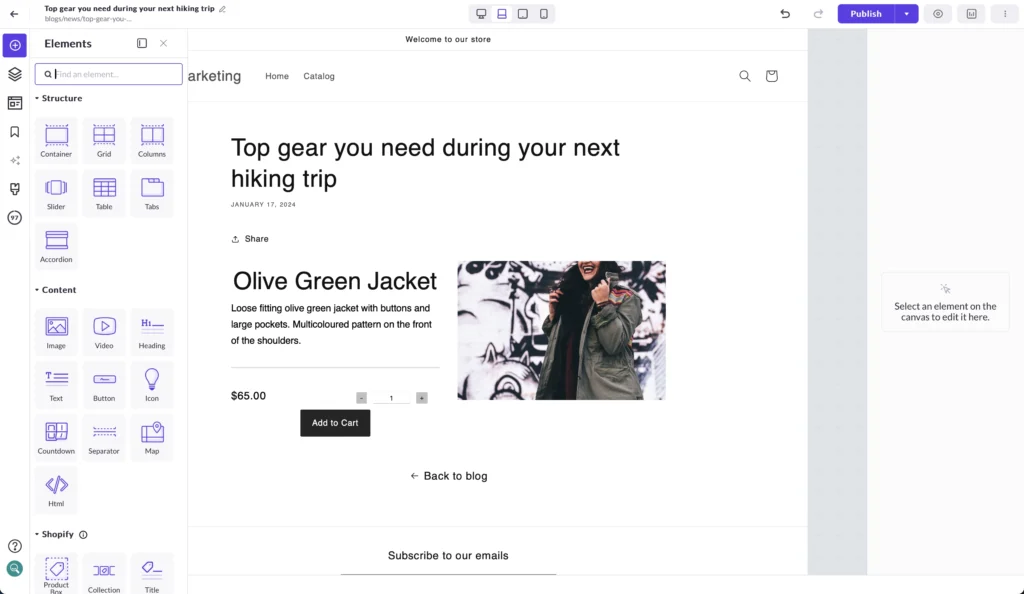
Landing pages
Want to design a landing page that showcases a brand-new product? Shogun allows you to strategically place products on your page, encouraging buyers to add items to their cart.

To get started, navigate to your homepage and drag a product box to the canvas.
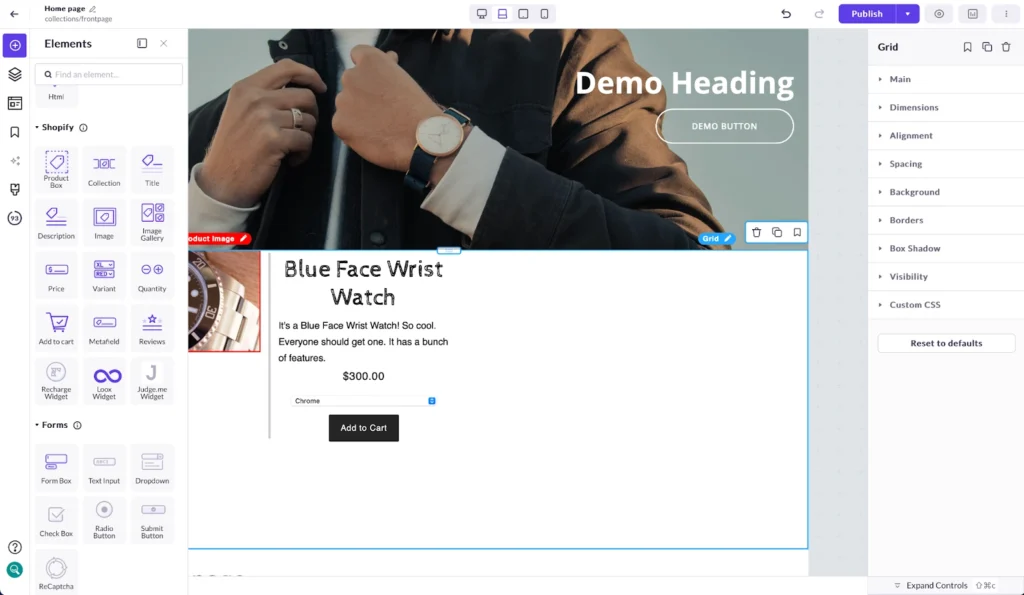
From there, you can drag and drop all sorts of Shopify elements into the product box and continue dropping product boxes to showcase your top products to potential customers.
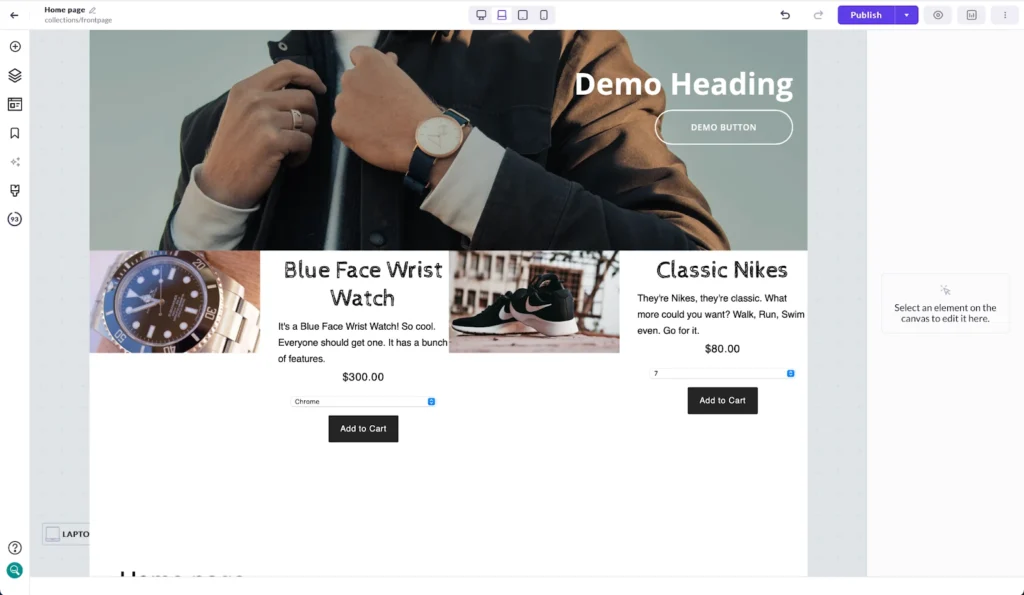
Shogun gives your team access to world-class design and merchandising tools that help your brand reach its revenue goals. Install Shogun and take your product merchandising to the next level.
Add your products to a Shopify page in minutes with ShogunAdd products to blogs, landing pages, the home page and more. Get started now

Phill Moorman
Phill, the VP of Marketing at Shogun, is a seasoned expert in ecommerce. With a keen focus on strategic marketing, Phill drives growth and cultivates brand success in the dynamic online marketplace.

